A Window to the Sky: Creating Stunning Views with Walk-On Rooflights
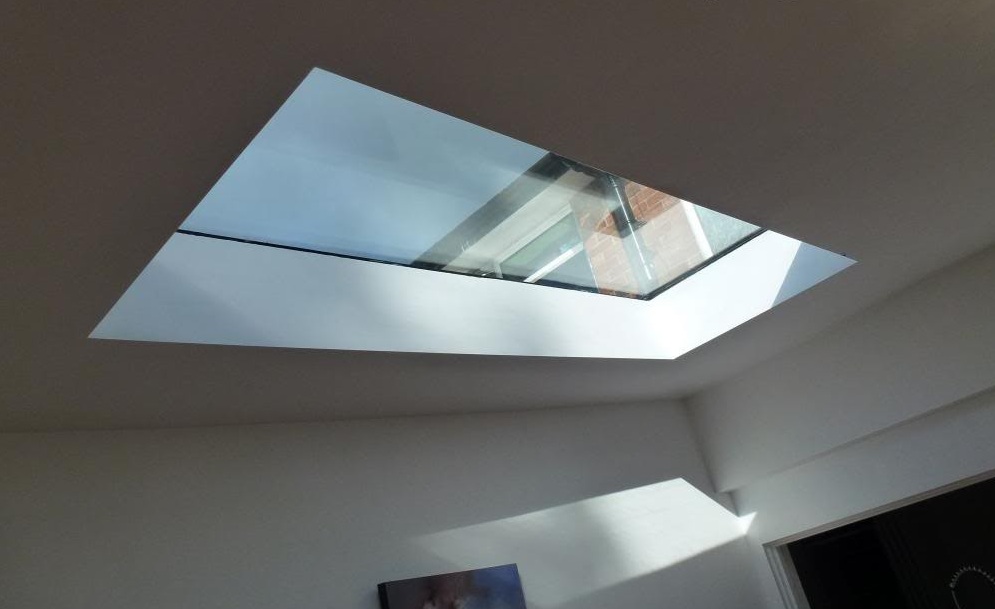
Table of Contents
Today, we’re talking about walk-on rooflights, those magical additions that bring a piece of the sky right into your home. If you’ve ever dreamed of bathing your living room in natural light or gazing at the stars from the comfort of your own space, you’re in for a treat.
Embracing Natural Light: The Beauty of Walk-On Rooflights
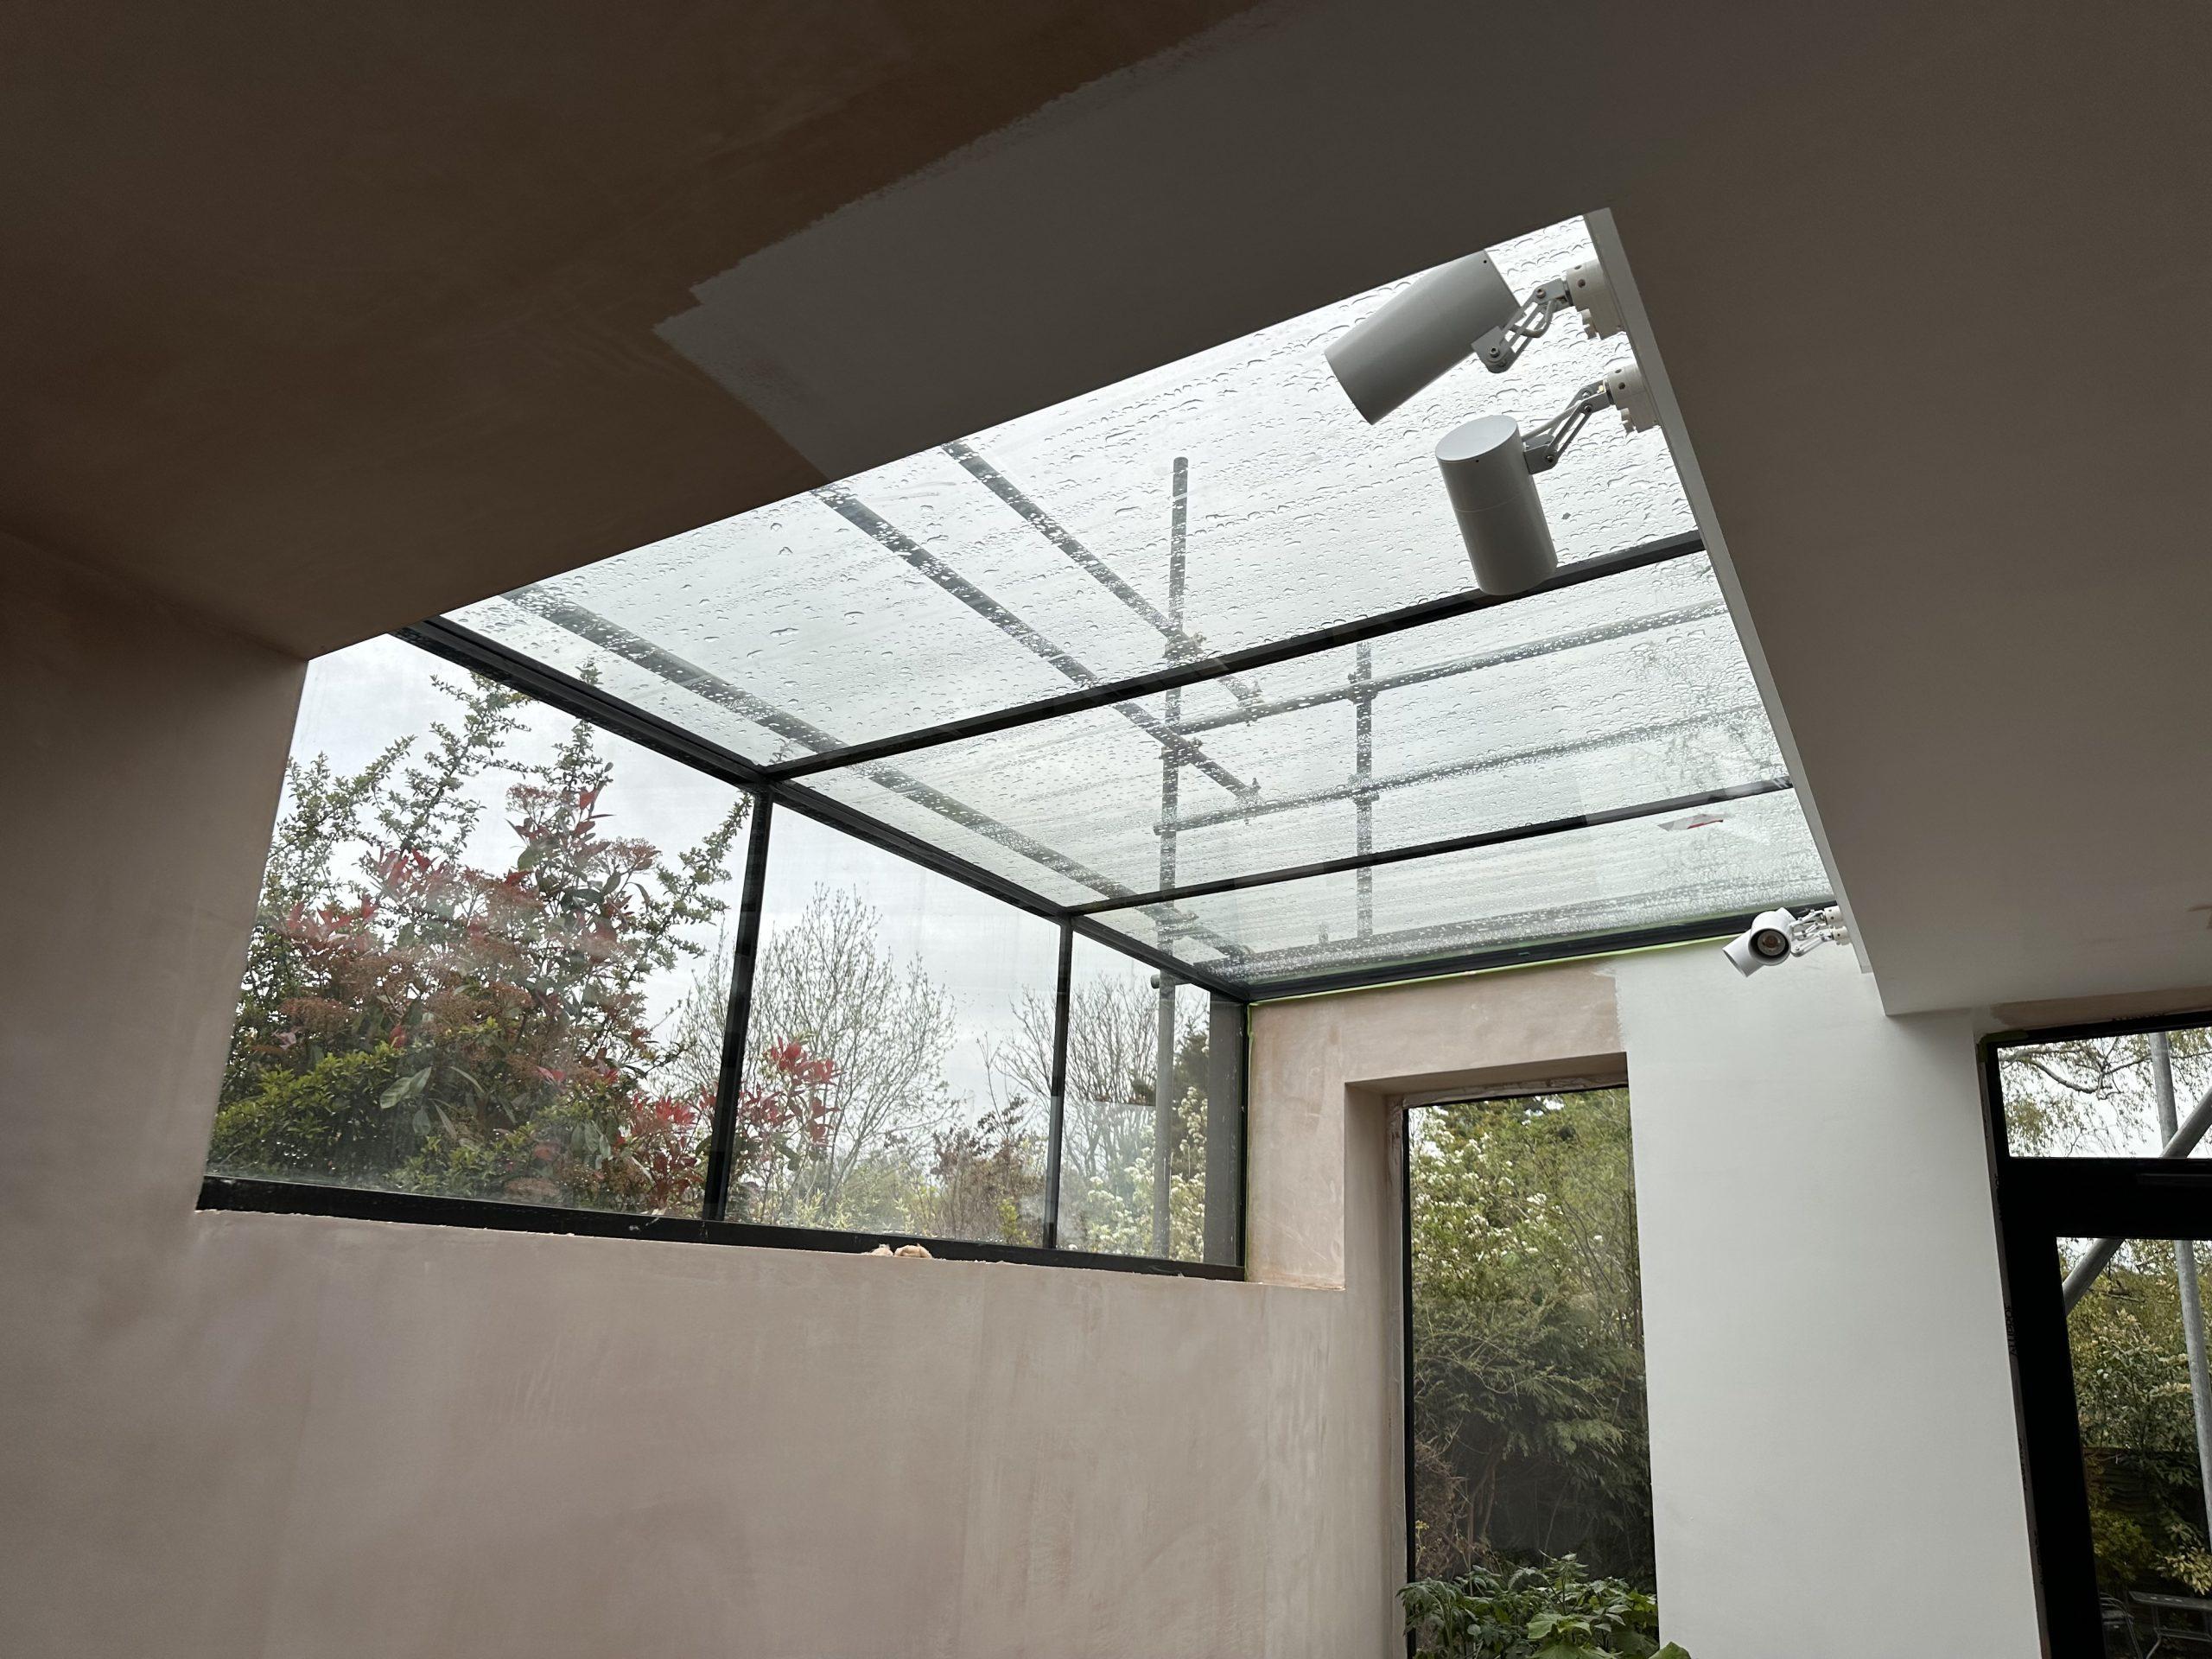
Picture this: you wake up in the morning, stretch out in bed, and open your eyes to a flood of natural light streaming in from above. That’s the magic of walk on rooflights. Unlike traditional windows or skylights, walk-on rooflights are designed to be walked upon, adding both functionality and style to your living space.
Why Choose Walk-On Rooflights?
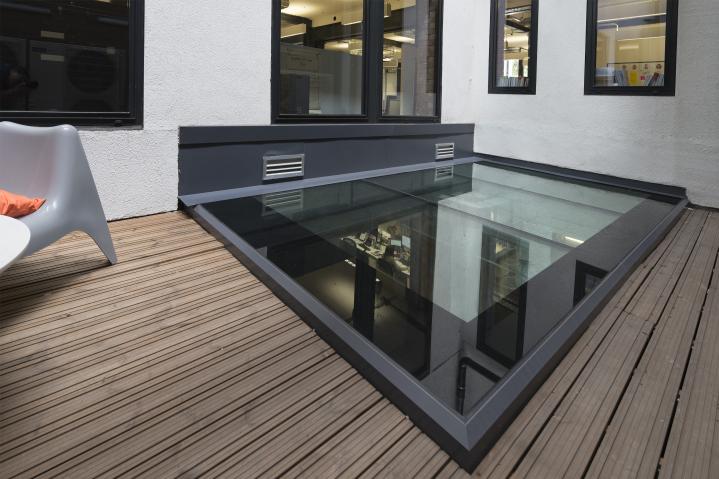
Maximize Space – With walk-on rooflights, you can make the most of your available space by turning your roof into a usable area. Whether you’re creating a rooftop garden, installing a cozy seating nook, or simply enjoying the added square footage, walk-on rooflights open up a world of possibilities.
Enhance Aesthetics – Let’s face it—traditional roof structures can be a bit, well, bland. But with walk-on rooflights, you can add a touch of architectural flair to your home. These sleek, modern fixtures not only flood your space with light but also serve as stunning design features that elevate the overall aesthetic of your property.
Boost Property Value – Looking to increase the resale value of your home? Walk-on rooflights are a surefire way to attract potential buyers and command a higher price. Their ability to enhance natural light and create a seamless connection between indoor and outdoor spaces makes them a highly desirable feature for any property.
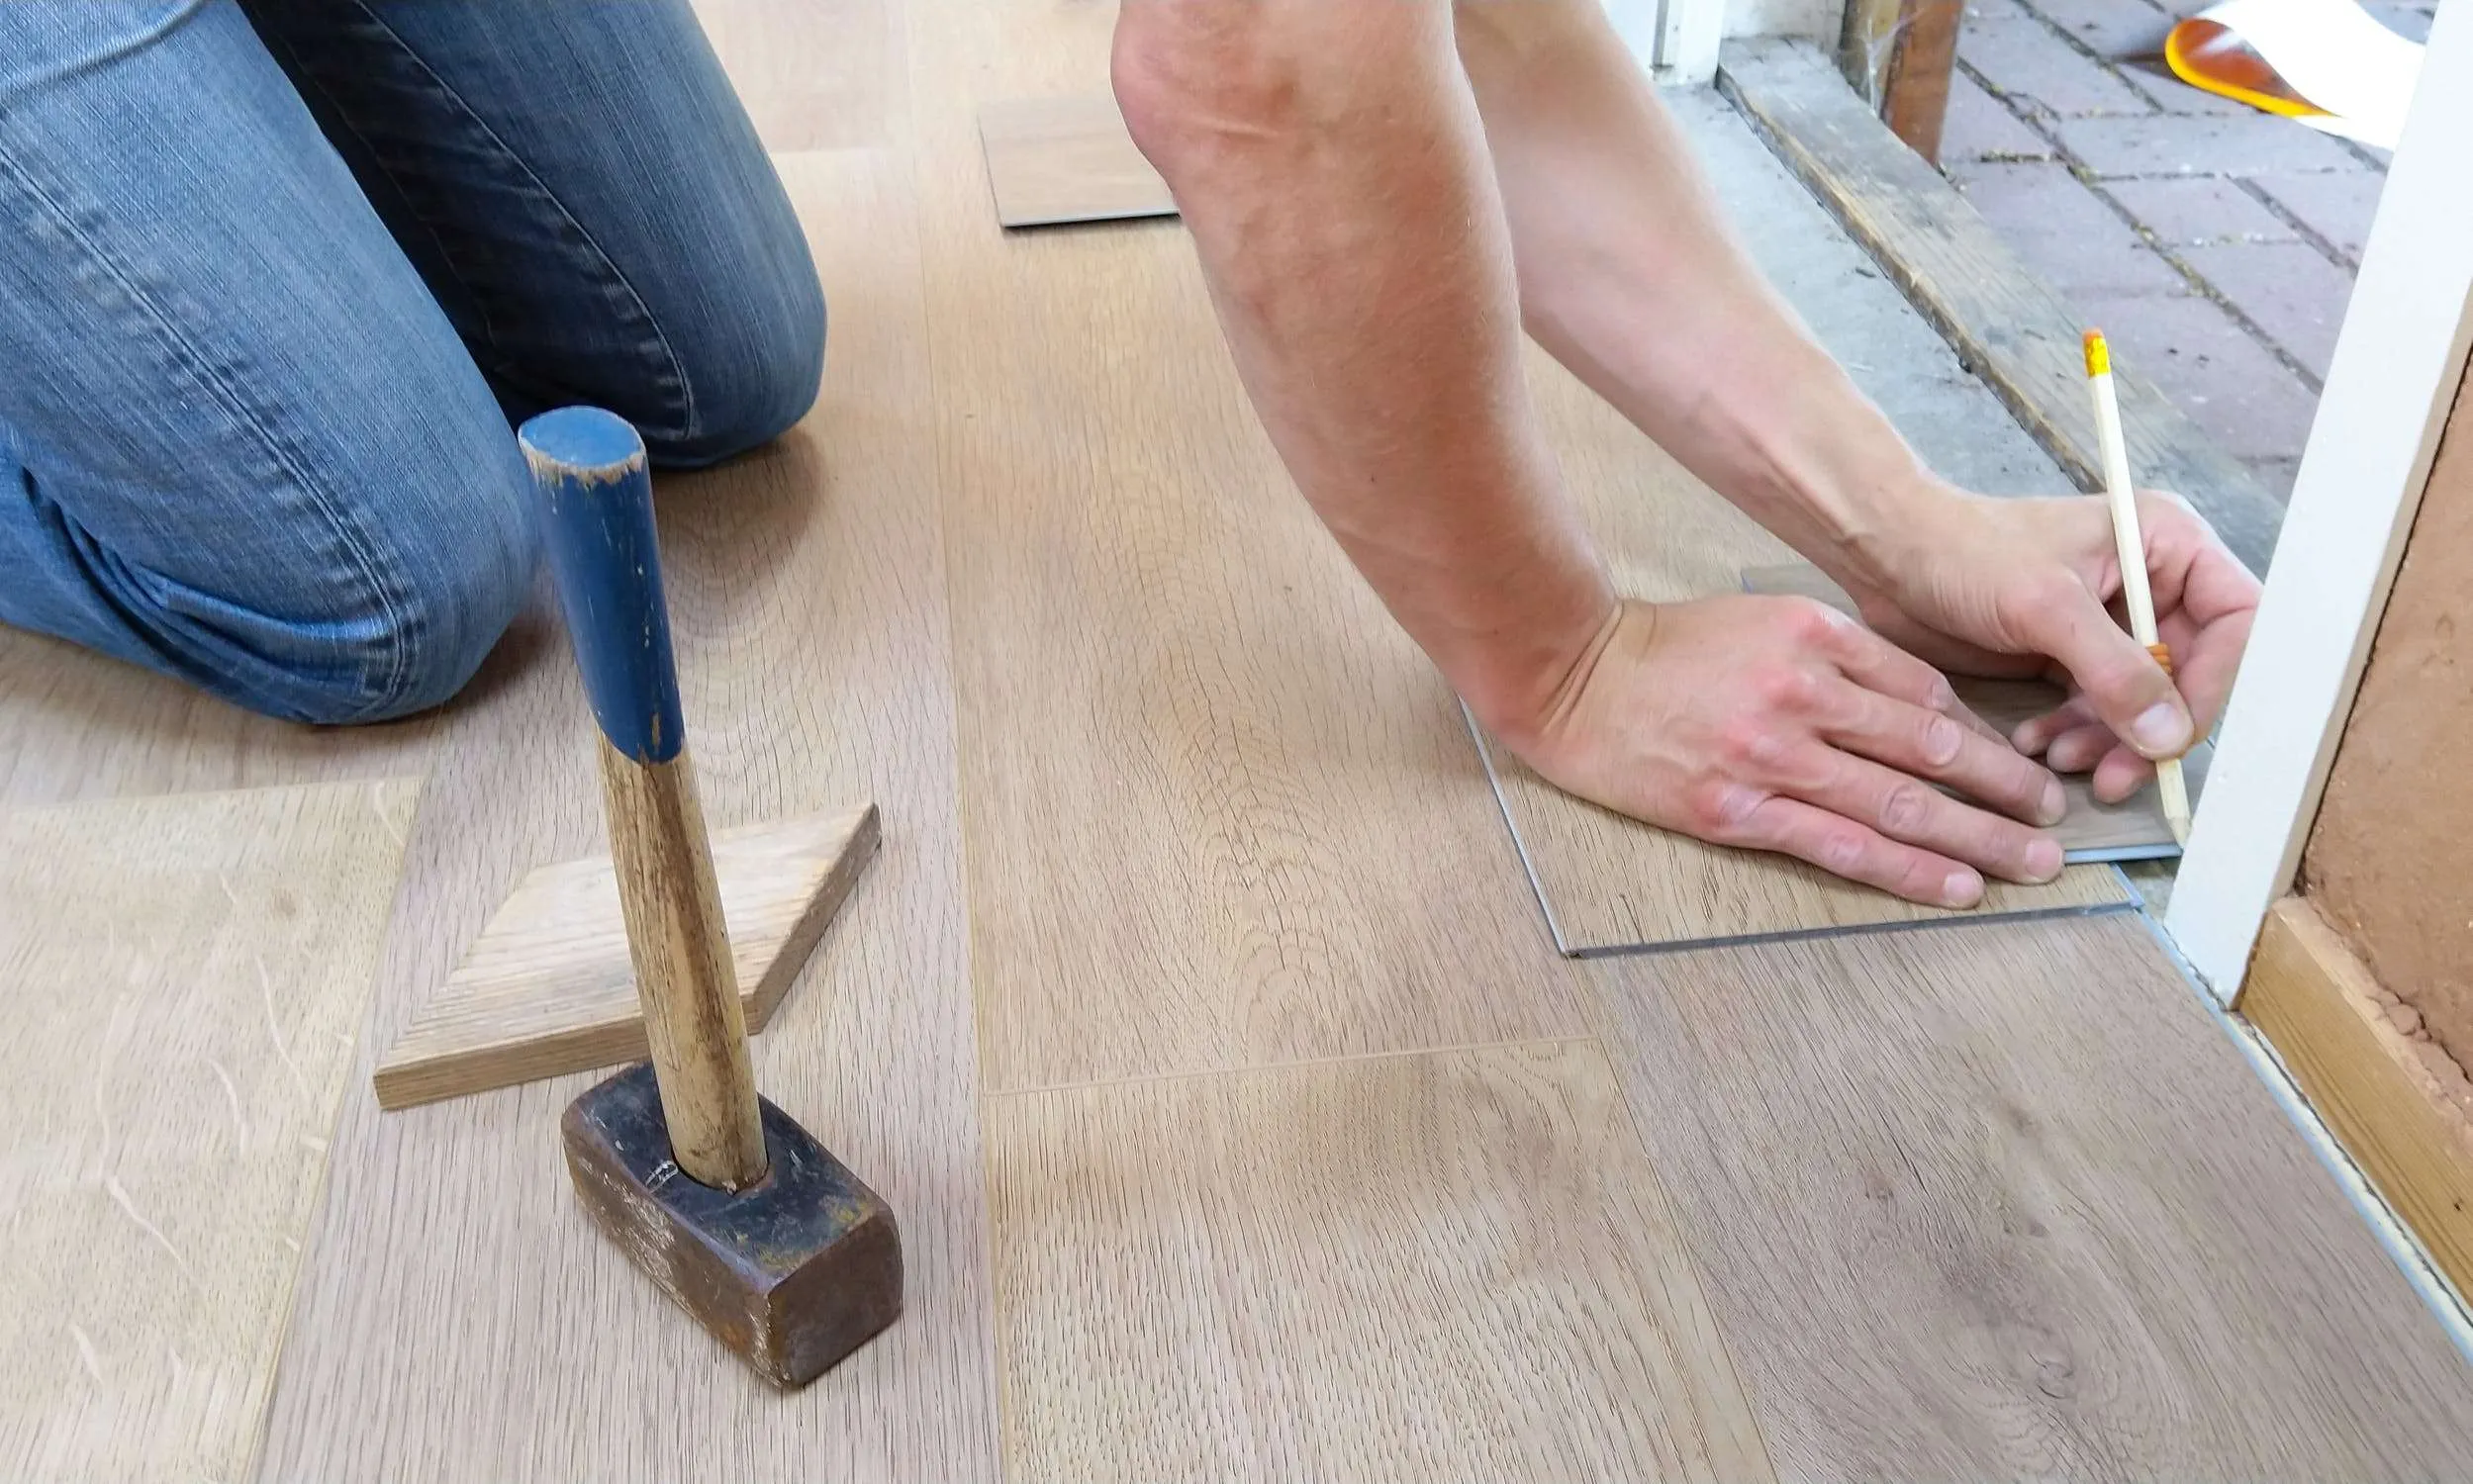
Installation Made Easy: A Step-by-Step Guide
Now that we’ve covered the benefits of walk-on rooflights, you might be wondering how to go about installing them. Fear not! While the idea of cutting into your roof might seem daunting, the process is actually quite straightforward. Here’s a basic overview of what to expect:
- Consultation and Planning – Before diving into the installation process, it’s important to consult with a qualified contractor to assess your roof’s structural integrity and determine the best location for your walk-on rooflight. This initial step will help ensure a smooth and successful installation process.
- Preparation – Once you’ve selected the perfect spot for your walk-on rooflight, the next step is to prepare the area for installation. This may involve removing any existing roofing materials, reinforcing the surrounding structure, and creating a secure base for the rooflight.
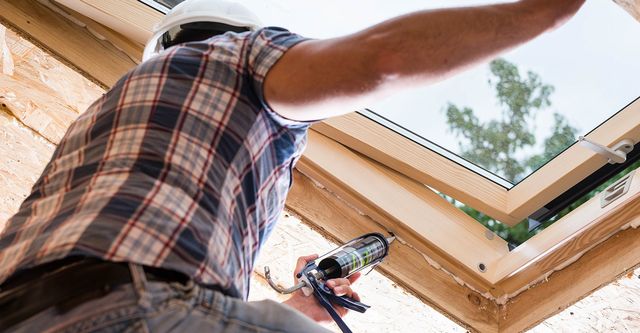
- Installation – With the groundwork laid, it’s time to install your walk-on rooflight. This typically involves cutting an opening in the roof, inserting the rooflight frame, and sealing it in place to prevent leaks and ensure a watertight seal.
- Finishing Touches – Once the rooflight is securely in place, the final step is to add any finishing touches, such as insulation, flashing, and trim. These details not only enhance the aesthetic appeal of your rooflight but also help protect it from the elements and ensure long-lasting performance.
Maintenance Tips for Long-Term Enjoyment
Congratulations! You’ve successfully installed your walk-on rooflight and transformed your living space into a light-filled oasis. But before you kick back and relax, it’s important to keep up with regular maintenance to ensure your rooflight stays in tip-top shape for years to come. Here are a few simple tips to help you get started:
- Clean Regularly – To prevent dirt, debris, and algae from accumulating on your rooflight, make sure to clean it regularly using a mild detergent and water solution. Avoid using abrasive cleaners or tools that could scratch the surface.
- Inspect for Damage – Periodically inspect your rooflight for any signs of damage, such as cracks, leaks, or loose seals. Addressing these issues promptly can help prevent further damage and extend the lifespan of your rooflight.
- Trim Surrounding Vegetation – Overhanging branches and foliage can pose a threat to your rooflight, so be sure to trim any nearby vegetation to prevent damage from falling debris or excessive shade.
- Schedule Professional Inspections – In addition to regular DIY maintenance, it’s a good idea to schedule professional inspections at least once a year to ensure that your rooflight is functioning properly and to address any potential issues before they escalate.
Conclusion: Bring the Outdoors In with Walk-On Rooflights
Whether you’re looking to brighten up your living space, maximize your home’s aesthetic appeal, or simply enjoy the beauty of the outdoors from the comfort of your own home, walk-on rooflights offer a simple yet effective solution.