Easy Steps to Propagate Erysimum “bowles Mauve” Using Cuttings
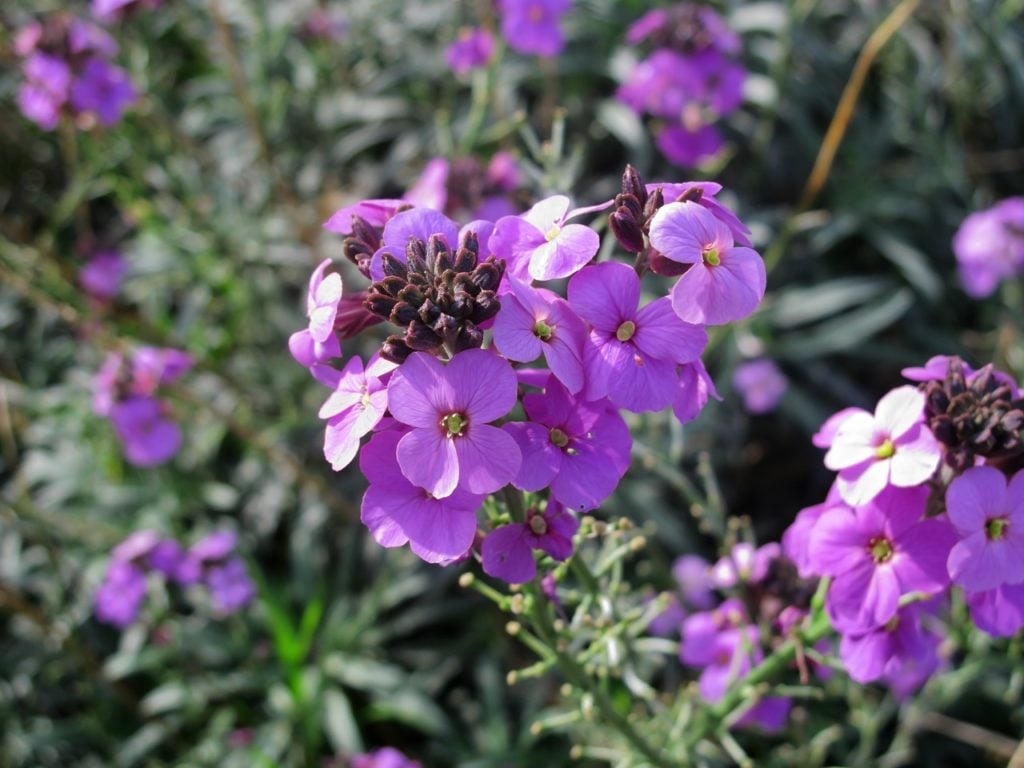
Table of Contents
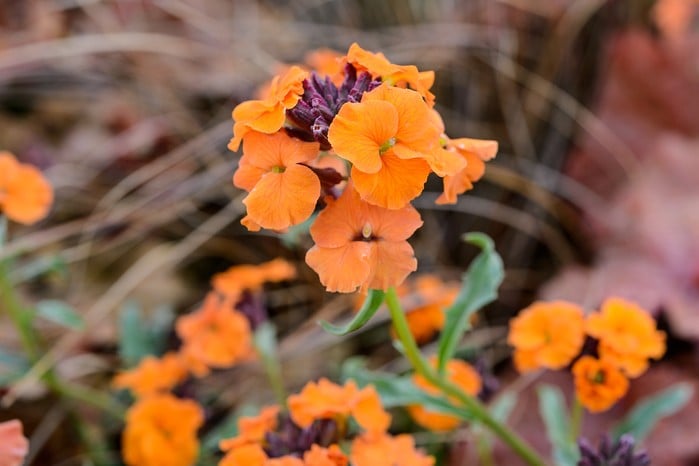
The Erysimum genus plants, most commonly called Wallflowers, are beautiful four-petalled flowers that come in different colours including yellow, orange, red, blue, and purple. They are hardy blooms that grow very well in warm environments and are very adaptable. The name for these plants, “Wallflowers,” comes from the fact that they blossom through silty cracks in cement walls and bricks.
These plants are of all kinds- perennial, annual, biennial, and herbaceous, that come in different varieties. Their blooming time is spring, summer, and fall. The good news is they are very easy to grow. You can grow them not only with seeds but you can propagate bowles mauve cuttings too.
In this article, we discuss How to propagate erysimum from cuttings and take care of them, too.
Different Erysimum Varieties
You can find many kinds of Erysimum flowers that you can cultivate very easily. Here are some varieties that are easy to work with.
- E. cheiri ‘Sunset Apricot’: This is a biennial plant that is yellow in colour. It is fragrant and beautiful to add to your garden.
- E. cheiri ‘Sunset Primrose’: These are evergreen perennials with flowers that first bloom lemon yellow and later turn into primrose as they start to mature.
- Winter Passion and Winter Orchid: They are special winter series flowers that are compact and have large, fragment spikes that smell beautiful.
- ‘Red Jep’: This is a hybrid fragrant red-purple wallflower
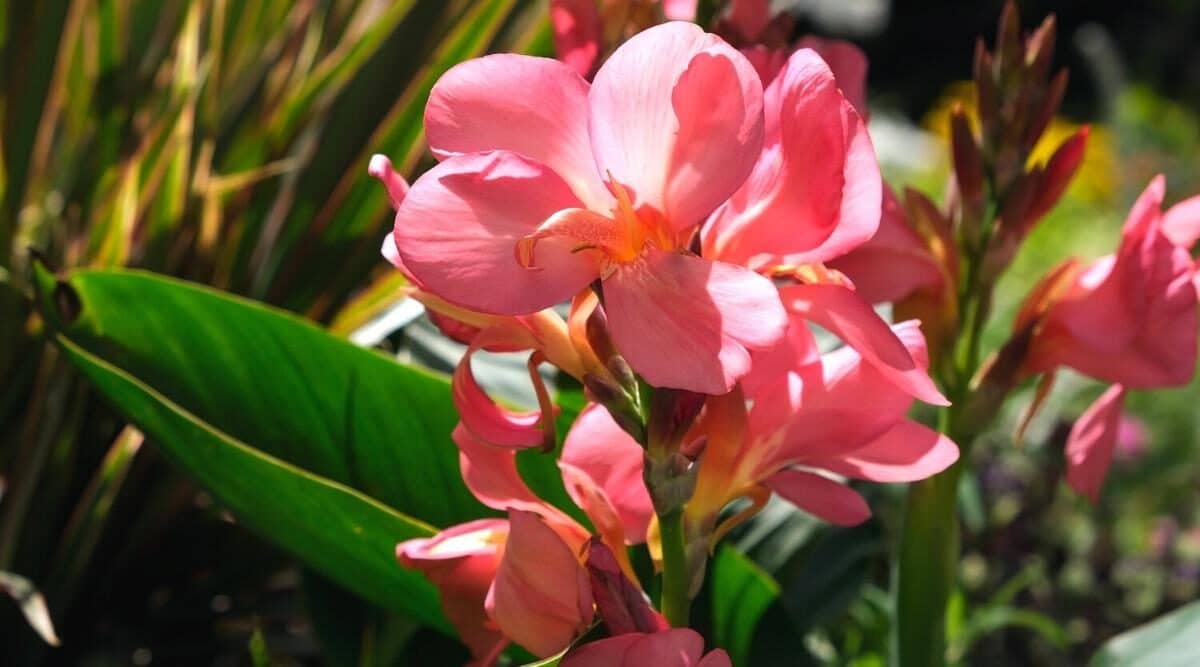
- E. linoleum ‘Bowles’s Muave’ with rich, mauve blooms
- Walberton’s Fragrant Sunshine is a trademarked hybrid with compact, bushy orange blooms.
You can choose any of these varieties and propagate these in different ways.
Growing the Erysimum
Wallflowers are very easy to propagate. In many varieties, they can self-seed. You can also propagate Bowles mauve cuttings. Here are different ways how to propagate Wallflowers.
Propagating By Seed
Since Wallflowers are Binneal plants, you can sow them this year, and that will give you a good bloom the next year.
When you are sowing any seed, it is important to think the whole process through. For small seed plants like Erysimum, it is important to start in a seed bed. The steps to make sure that your seeds germinate are easy.
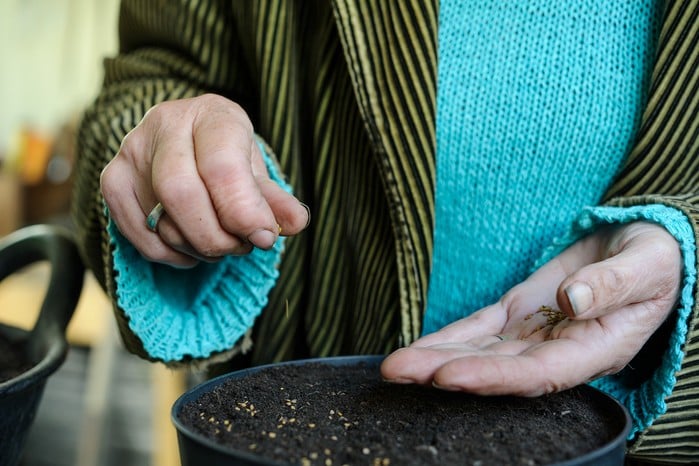
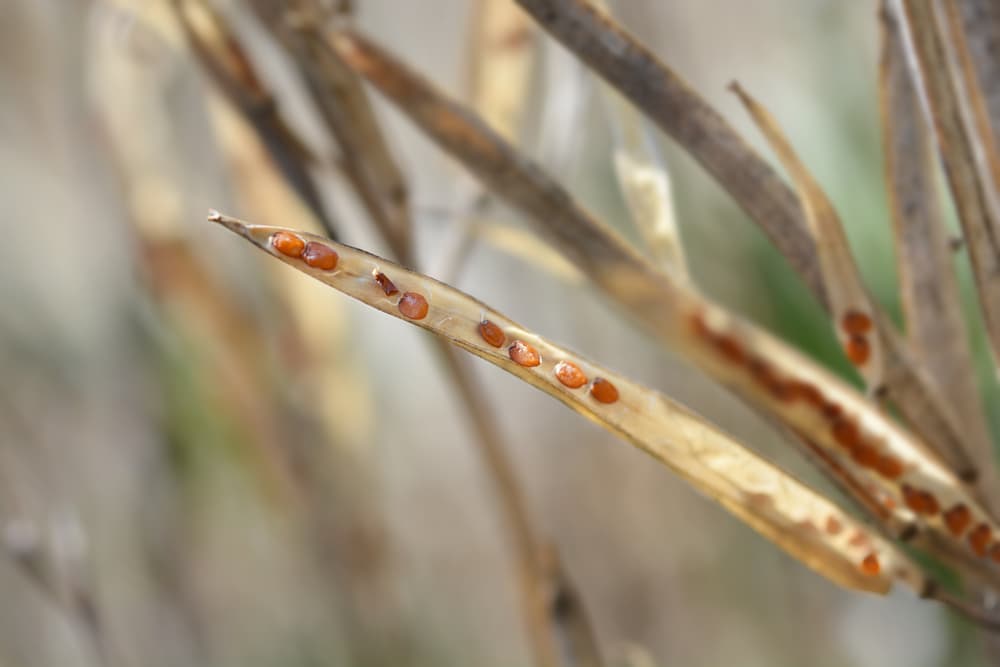
- Before starting, you will need seeds. You can either buy them or make them yourselves. Just save the dried seedheads from previous years and rub them. This will give you many fruitful seeds. Once you have the seeds, you can start propagating them like this.
- Take a seed tray and fill it with well-fertilized soil. Once your seed tray is filled, spread some small seeds in the tray. Be generous but do not overdo it. Remember, you do not have to poke or dig holes for this; just spread the seeds around the seed tray.
- Next, cover the seed tray with a thin layer of compost and soil. Keep the layer thick enough for the seeds to get covered but do not make it very thick.
- Once you are done, you can spray some water on it with a spray bottle. If not, you can also put the seed tray in a tray of water so it can soak up moisture. Do not wet the whole tray.
- Place them in a protected place outside. A Cold frame is ideal, and they do not need to be put in a greenhouse. You can let them be in a protected place outside, and you will be good to go.
- These seeds will germinate in about 4-6 weeks, and once they have germinated, you can plant them in bigger pots.
How to Propagate Erysimum from Cuttings?

It is easy to propagate Erysimum with bowles mauve cuttings. They grow the best in well-drained soil with full sun. Make sure you take the cuttings in the spring season that is, ideally, May or June. Here is the process of how you should do it.
How To Take and Grow Cuttings?
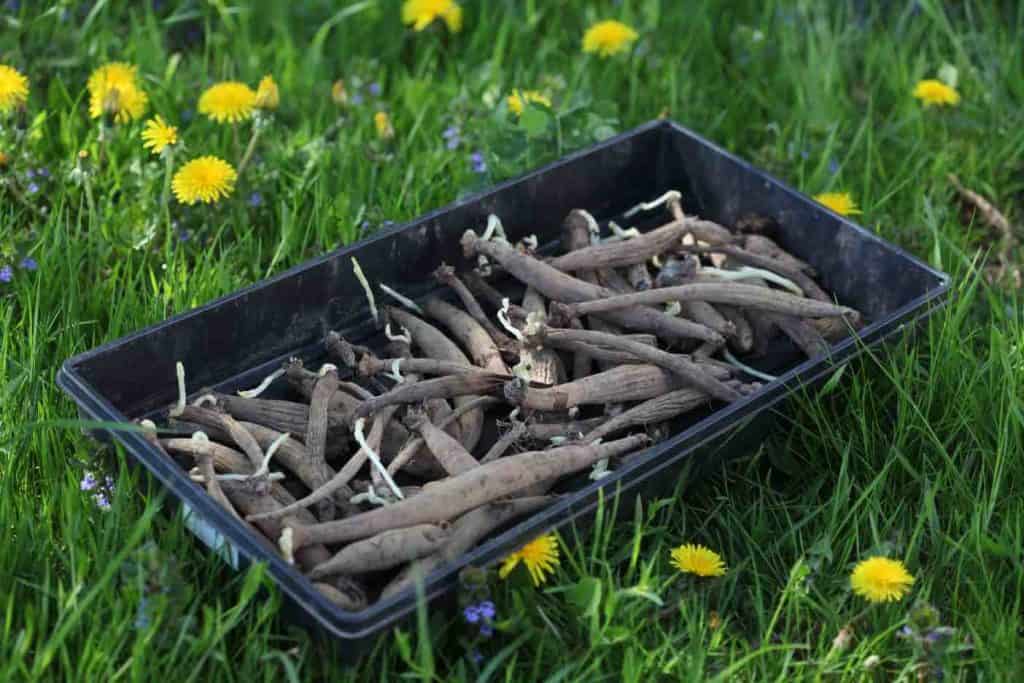
- You can either take cuttings from the tip of shoots or lateral shoots. Take around 10 cm of the stem for your cutting. Of course, it depends on your subject, but 10 cm is a great length to work with. Use a sharp knife to trim the cutting. Cut just below the nodes and use that stem.
- After removing all the lower leaves, push this cutting into a growing medium. If you are taking a number of cuttings, prepare them by keeping them in a plastic bag for a little while. Let them cool off, and then you will be able to plant them. Leaving these cuttings would give them the opportunity to heal and grow roots.
- Transfer them to a seed tray and keep your cutting in a warm and sheltered space. Do not leave them out in direct sunlight. You can also cover these stems in polythene bags to make sure any moisture is not lost. It will take about two weeks- two months to start rooting.
- Once the plant has started growing the roots, it is time to transfer them into bigger containers. You can also transfer them to the garden and let these plants grow. With appropriate care, you will get great bloom soon.
Other Things to Keep in Mind
- Make sure you have put the cuttings in a good growing medium that stays moist and fastens root development. Put a lot of compost on this and let it release slow nutrients. To facilitate your root development.
- Hygiene is also very important. Make sure you use clean pots or tray cells to keep these stems. You can also use biodegradable pots that will help you plant out without removing the pot.
- Keep checking the polythene bags every now and then, and it will help you make sure that the plant is not getting too wet. A very wet root might rot, and it will not give you good bloom.
- Feed the growing plants liquid seaweed fertilizers every now and then, and this will increase the growth.
How to Care for Wallflower?

Wallflowers are attractive plants and a great addition to any garden, and the good part about them is they are low maintenance. When planted in sunny positioning with well-drained soil, these plants give you a bloom that will leave you impressed. Here are a few care tips to get the best bloom.
- Light: Erysimum or Wallflowers should be grown in bright and sunny locations. They can tolerate part shade, but they thrive when put in the sun.
- Soil: Well-drained, dry to medium soil is the ideal soil for wallflowers. These flowers do not do well on wet feet. So, avoid planting these flowers in gardens that do know have good drainage. If you are planting in a container, make sure it has enough drainage holes.
- Water: Erysimum flowers are drought-tolerant plants and hence do not require a lot of water. Make sure you water these plants as needed and continue to cut back when they have matured.
- Temperature and Humidity: Erysimum grows the best in warm temperatures. However, if you are growing these flowers in colder regions, make sure you care for them well. Keep them in secured spaces and protect them.
- Fertilizer: These flowers don’t require a lot of fertilizer. So, instead of putting a lot of fertilizer, you can mix compost into the soil when you plant it.
How to Get the Best Blooms? (Caring Tips)
Depending on when you have propagated your plant, you will have to take care of it. You might not get the bloom during the first year, but if you have bought the plant from the nursery, you might get the bloom in the first year. Regardless, there are a few things that you will have to keep in mind to take care of these plant varieties.
- Overwintering: While wallflowers generally don’t need a lot of protection, you might have to protect them from frost. It might start to drop leaves when it gets really cold. You can, however, bring the wallflowers inside in times of frosty winters.
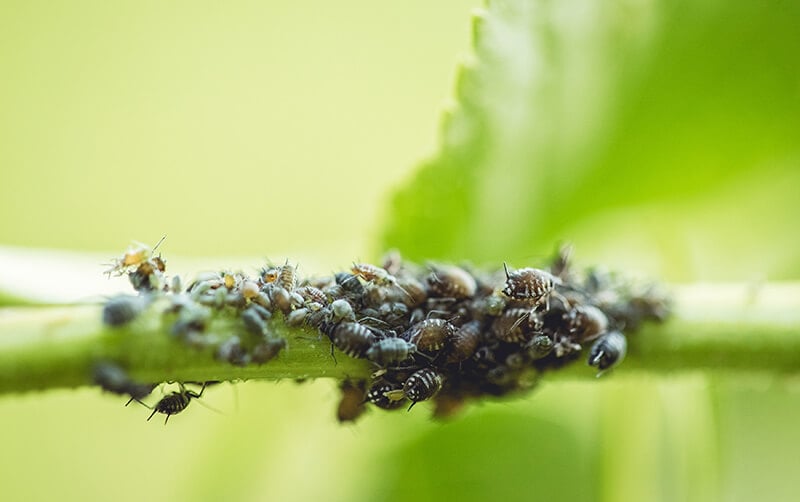
- Common Pests & Plant Diseases: Wallflowers are susceptible to many common garden pests like flea beetles, cabbage worms, and aphids. To prevent this, ensure you are not planting these flowers in the garden bed that might have species of these pathogens and pests.
- Pruning: Another thing that you have to do to ensure your plant’s great health is to prune them. Deadheading the dried plants encourage blooming, and pinching them back once the plant has finished blooming leads to better plant health. To prune an Erysimum plant, follow these steps. Early on, if you are in warmer climes, prune the stems back to at least half. This helps them stay bushy and better looking. In cooler climates, prune them in fall and only a couple of inches above the soil. This will reward you with dense new growth.
Conclusion
The Erysimum plants are available in several varieties that all look very attractive. It is very easy to grow these plants with bowles mauve cuttings, and seeds. You get great bloom with both of these, and the process is very easy too.
These plants are beautiful, need very low maintenance, and add great value to your garden. The Erysimum plants don’t need you to invest in many things and still reap good fruits.
You can plant them in drained soils and in sunny locations. With minimal effort, you will make your garden extremely beautiful indeed. Make sure you make good use of this easy, low-maintenance plant.
Frequently Asked Questions
Can You Take Cuttings from Bowles Mauve?
Yes, you can take cuttings from Rysimim Bowles Mauve. You can find a small shoot on the side and peel it off to make the heel cutting. Then, you just have to put it in a pot containing gritty compost and spray some water on it.
How Do You Strike Wallflower Cuttings?
To do this, remove the leaves from the bottom one-third of the cuttings. Now, put the base in rooting power and place it in sandy compost later on. Cover with a plastic bag.
How Long Does Erysimum Last?
This attractive, grey-green-leafed plant is a short-lived perennial that will last as long as 2-3 years.
What Makes Cutting Grow Faster?
Warm growing medium temperatures accelerate cell division in the Erysimum stem. It also accelerates subsequent root growth and encourages better rooting. The best way to warm the growing medium is through bottom heat.
Which Erysimum Is the Most Fragrant?
There are many hybrid Erysimum, but the Rysimum Cheiri is still one of the most fragrant and beautiful wallflowers.
![How and When to Prune an Apple Tree [UK]](https://www.thearches.co.uk/wp-content/uploads/How-And-When-To-Prune-An-Apple-Tree.jpg)