Grow your Own Shallots with these Simple Steps!
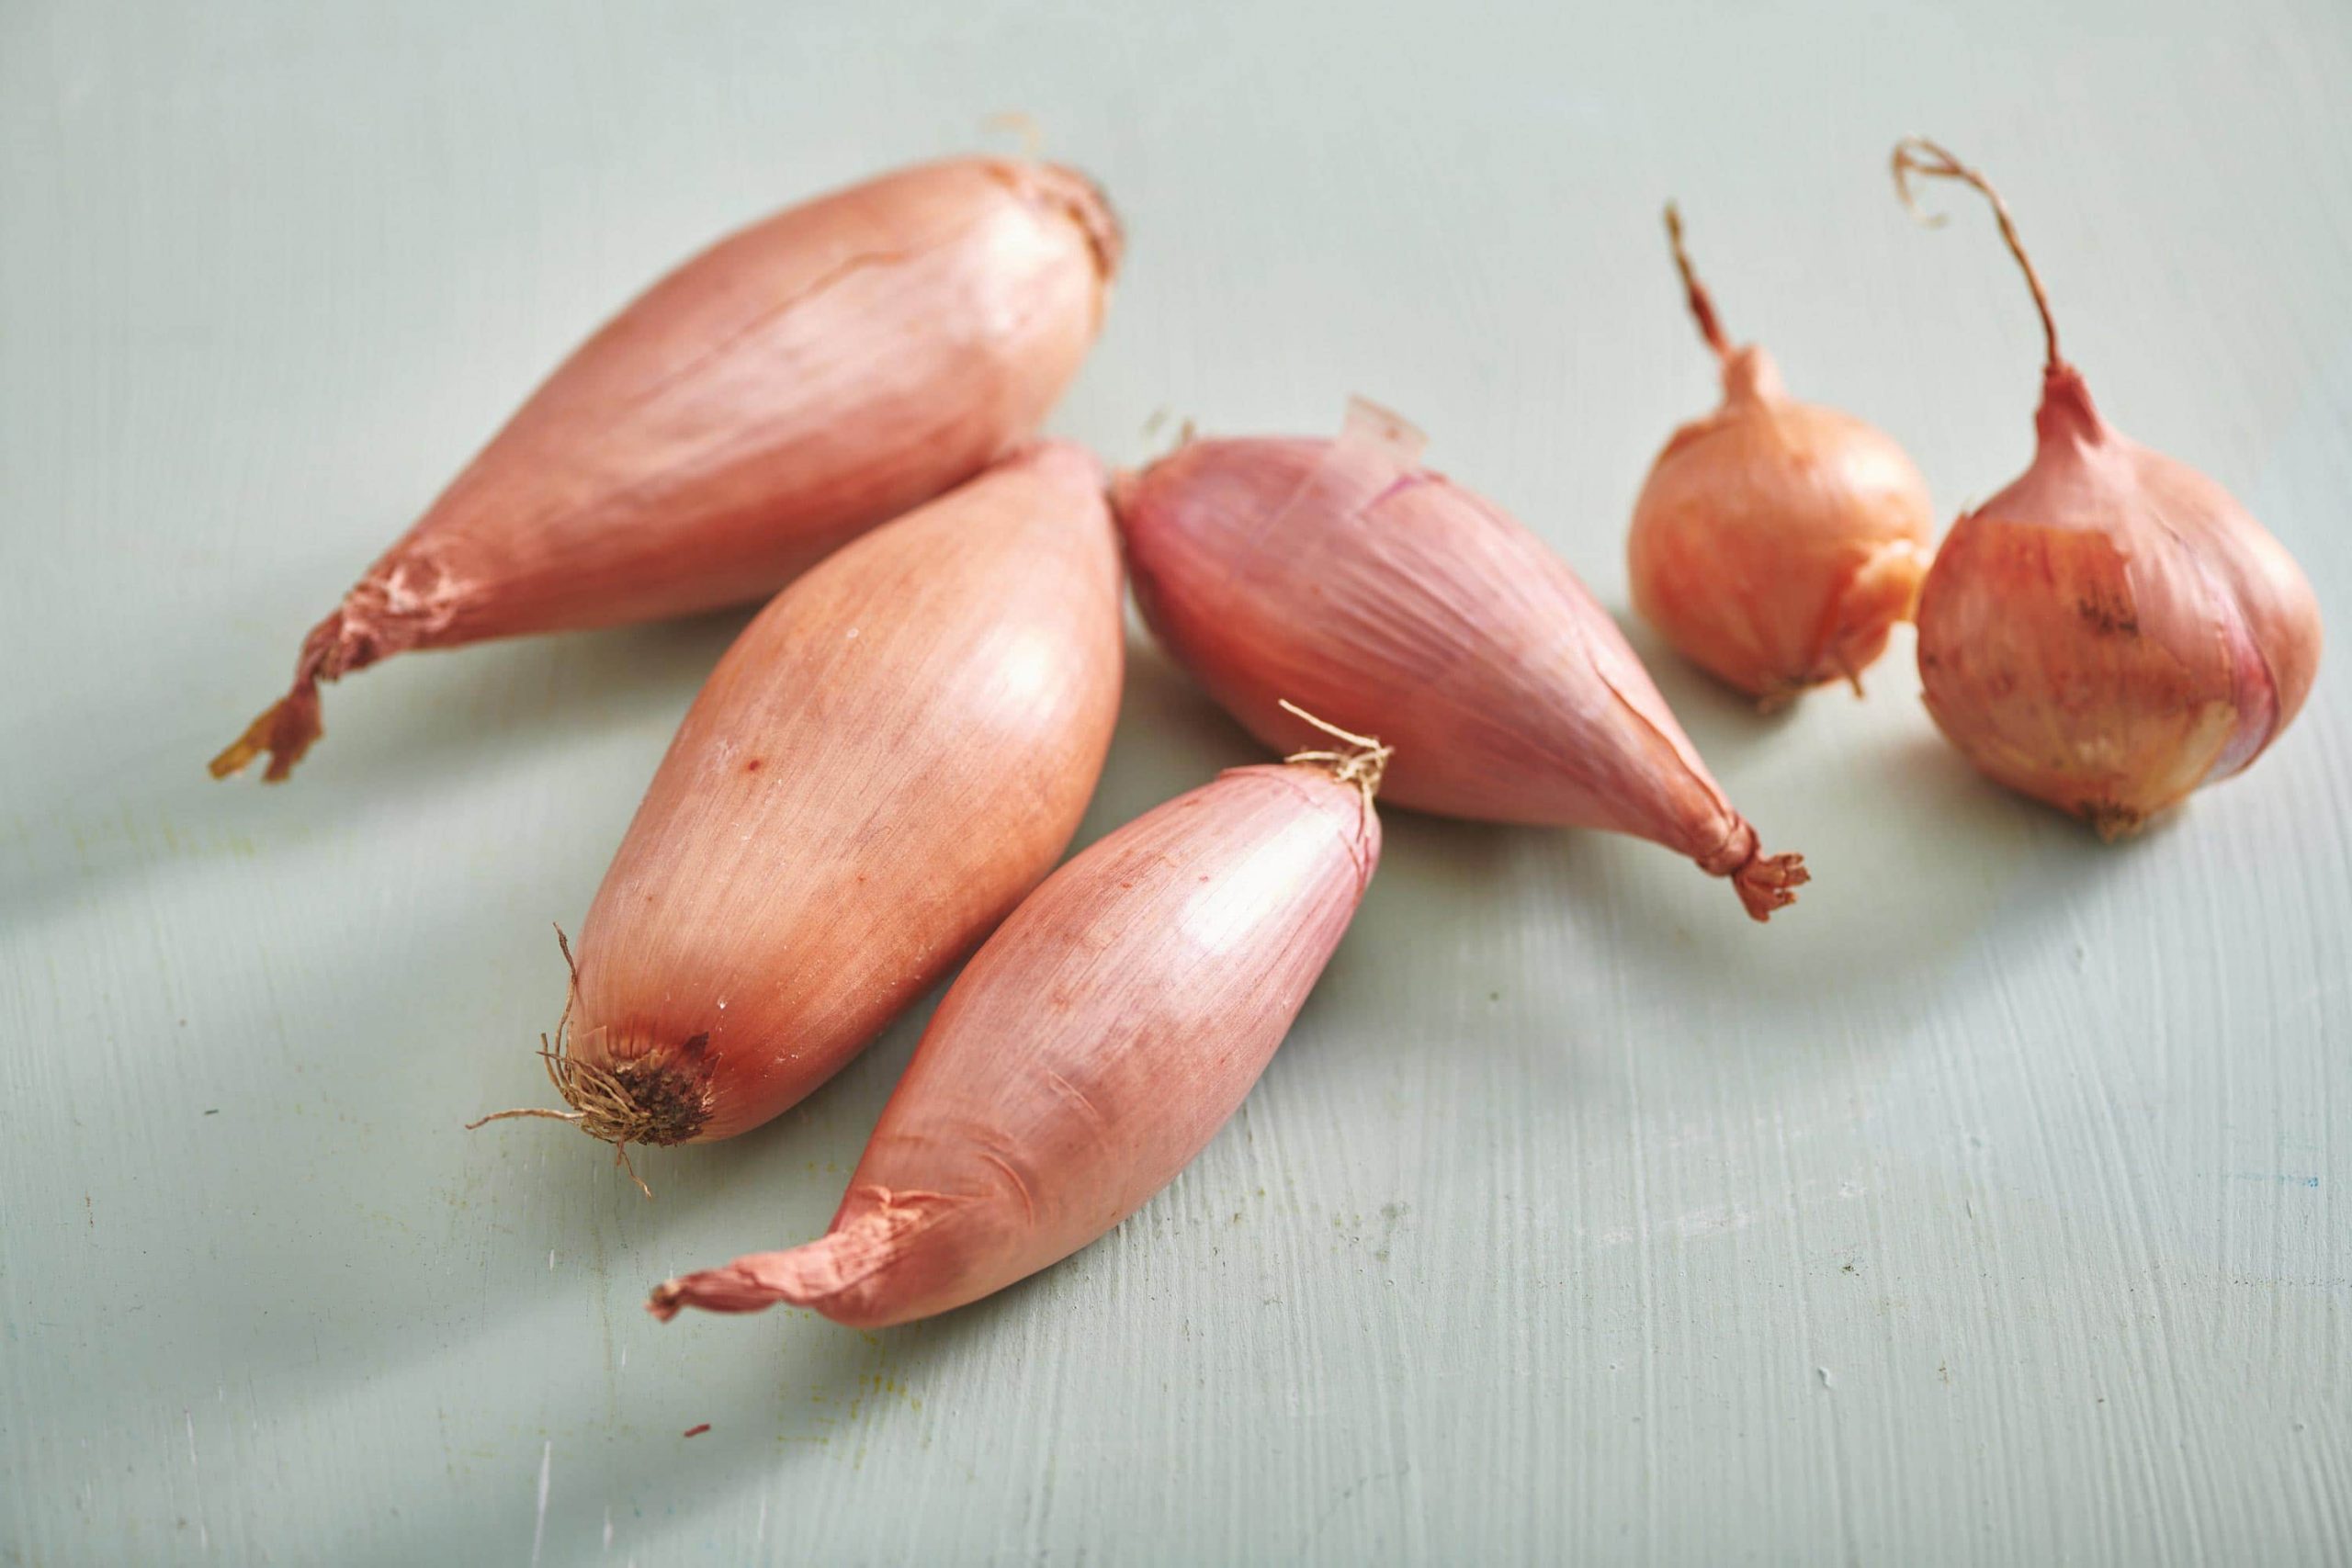
Table of Contents
Shallots are a type of onion that belong to the allium family. Other members of this family are garlic and leeks. Shallots are slightly sweet to taste, with mild flavours. They are harvested in the fall and are mostly used in French cuisine to add flavour to sauces, dressings, and marinades.
Well! If you are interested in growing shallots, then this is the right place to stop. In this article, we have covered different phases involved in growing shallots. These are – selecting, planting, caring, harvesting, and storing.
Regarding harvesting, we have mentioned three methods in this article. A simple guide on how to grow and harvest shallots awaits you. With a little patience and care, you can enjoy the delicious taste of homegrown shallots in your cooking.
1. Selecting Shallots for Planting
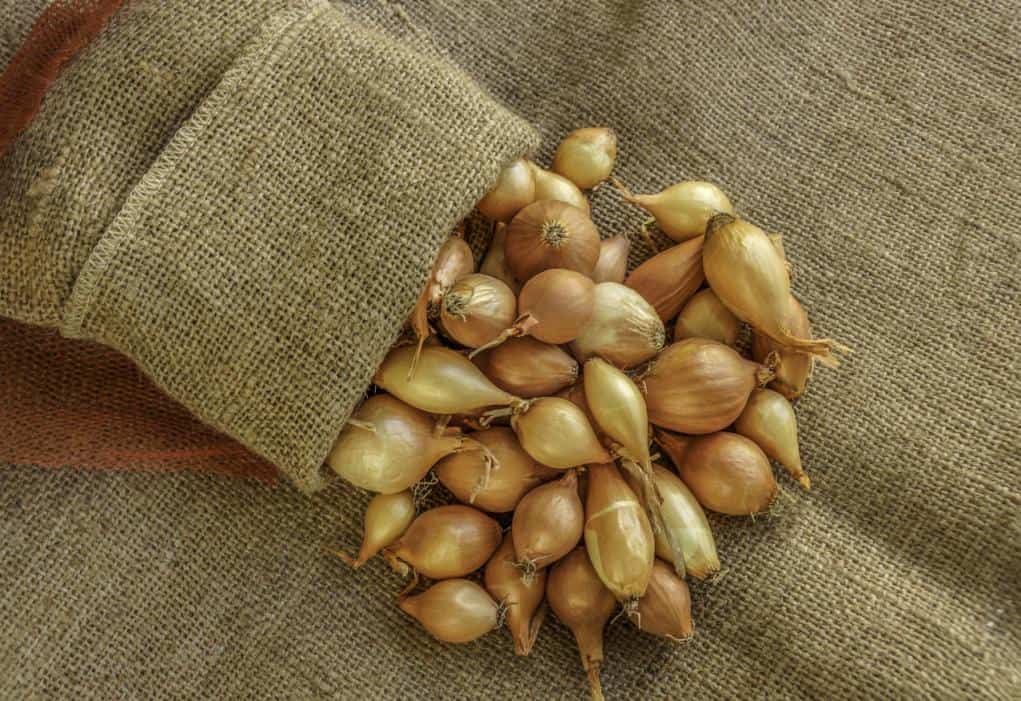
Selecting high-quality shallot bulbs is important for successful planting and growing. Here are some steps to follow when selecting shallots for planting:
Choose the Right Variety
Shallots come in many different varieties, each with its own unique flavour and characteristics. Consider the flavour and texture you are looking for when selecting a variety. Some of the premium quality shallots are Gray Griselle, Golden Gourmet, Red Gourmet, and Red Sun.
Select Healthy Bulbs
You must look for bulbs that are plump, firm, and free of blemishes or soft spots. You must avoid those shallot bulbs that are sprouting and have green shoots, as they may have started to rot. Select bulbs that are medium to large in size, as these will produce the largest and healthiest shallots.
Buy from a Reputable Source
You must buy your shallots from a reputable garden centre, nursery, or online supplier to ensure you are getting high-quality bulbs that are disease-free. You must look for organic shallots look for bulbs that are certified organic. These bulbs have been grown without the use of synthetic pesticides or fertilizers.
2. Planting Shallots
Planting shallots can be beneficial for several reasons. Firstly, they are a flavorful and versatile ingredient that can be used in a wide range of dishes. Secondly, shallots are relatively easy to grow and can be a rewarding addition to any garden. And finally, shallots are packed with nutritional benefits. Here are some steps to grow shallots in your garden or kitchen garden.
Choosing the Right Location
When choosing a location to plant shallots, it’s important to consider the specific needs of the plant. Shallots require well-drained soil that is rich in organic matter, and they prefer cool temperatures and full or partial sun. The planting site should also be sheltered from strong winds and provide enough space for the shallot bulbs to grow and develop. By choosing a suitable location and providing the proper care, you can grow healthy and flavorful shallots in your garden.
Soil Preparation
Shallots prefer well-drained soil that is rich in organic matter. The soil where you plant shallots should be loosened 6 to 8 inches deep and free from weeds and rocks. Shallots grow best in soil with a pH between 6.0 to 7.0. Avoid planting them in heavy clay or waterlogged soil, which can lead to poor drainage and root rot.
Time to Plant
The individual shallot bulbs should be 4 to 6 inches apart in rows that are spaced 12 to 18 inches. Plant them with the pointed end facing up, about 1 inch deep into the soil. Water the newly planted shallots thoroughly and cover the soil with a layer of mulch to help retain moisture. Keep the soil moist throughout the growing season, fertilizing the shallots every 4-6 weeks with a balanced fertilizer or compost.
3. Caring for Shallots
Caring for shallots is relatively simple and involves providing them with the right growing conditions and minimal maintenance. Here are some tips for caring for shallots that you have planted.
Watering
Shallots prefer consistent moisture, so be sure to water them regularly and deeply, especially during dry periods, but stop once the bulbs have swollen. Avoid overwatering, as this can lead the shallots to rot and disease.
Fertilizing
Autumn-planted shallots require nitrogen-rich fertiliser, such as sulfate of ammonia, during late winter. It helps in growth as well as suppression of premature flowering. The alternative to nitrogen-rich fertilizer can be dry poultry manure.
Mulching
Applying a layer of mulch around your shallot plants can help to retain moisture in the soil and suppress weed growth. Weed can damage the bulb or foilage of shallots, and this affects their overall growth.
Pest and Disease Control
Shallots can be susceptible to certain pests and diseases, such as onion maggots and downy mildew. You must immediately respond to any signs of damage and treat the issue to prevent further damage.
4. Harvesting Shallots
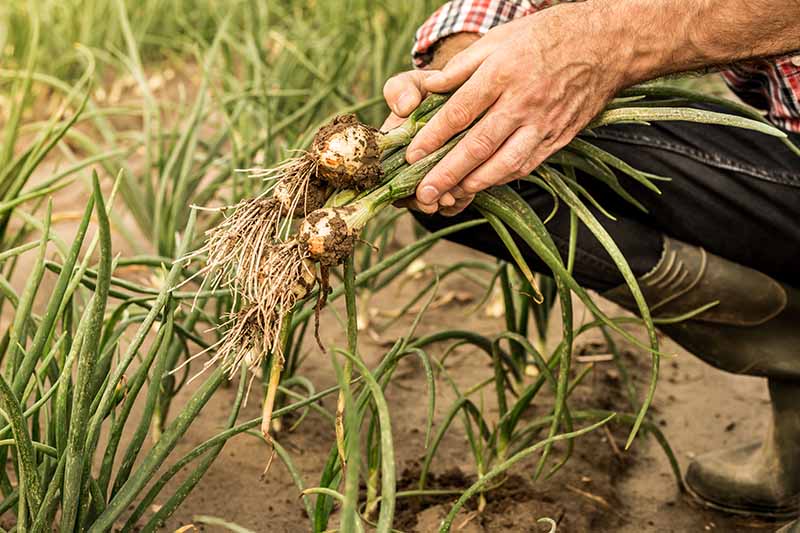
Harvesting shallots typically occur in the late summer or early fall, depending on when they were planted. Some useful steps to follow while harvesting shallots are listed below.
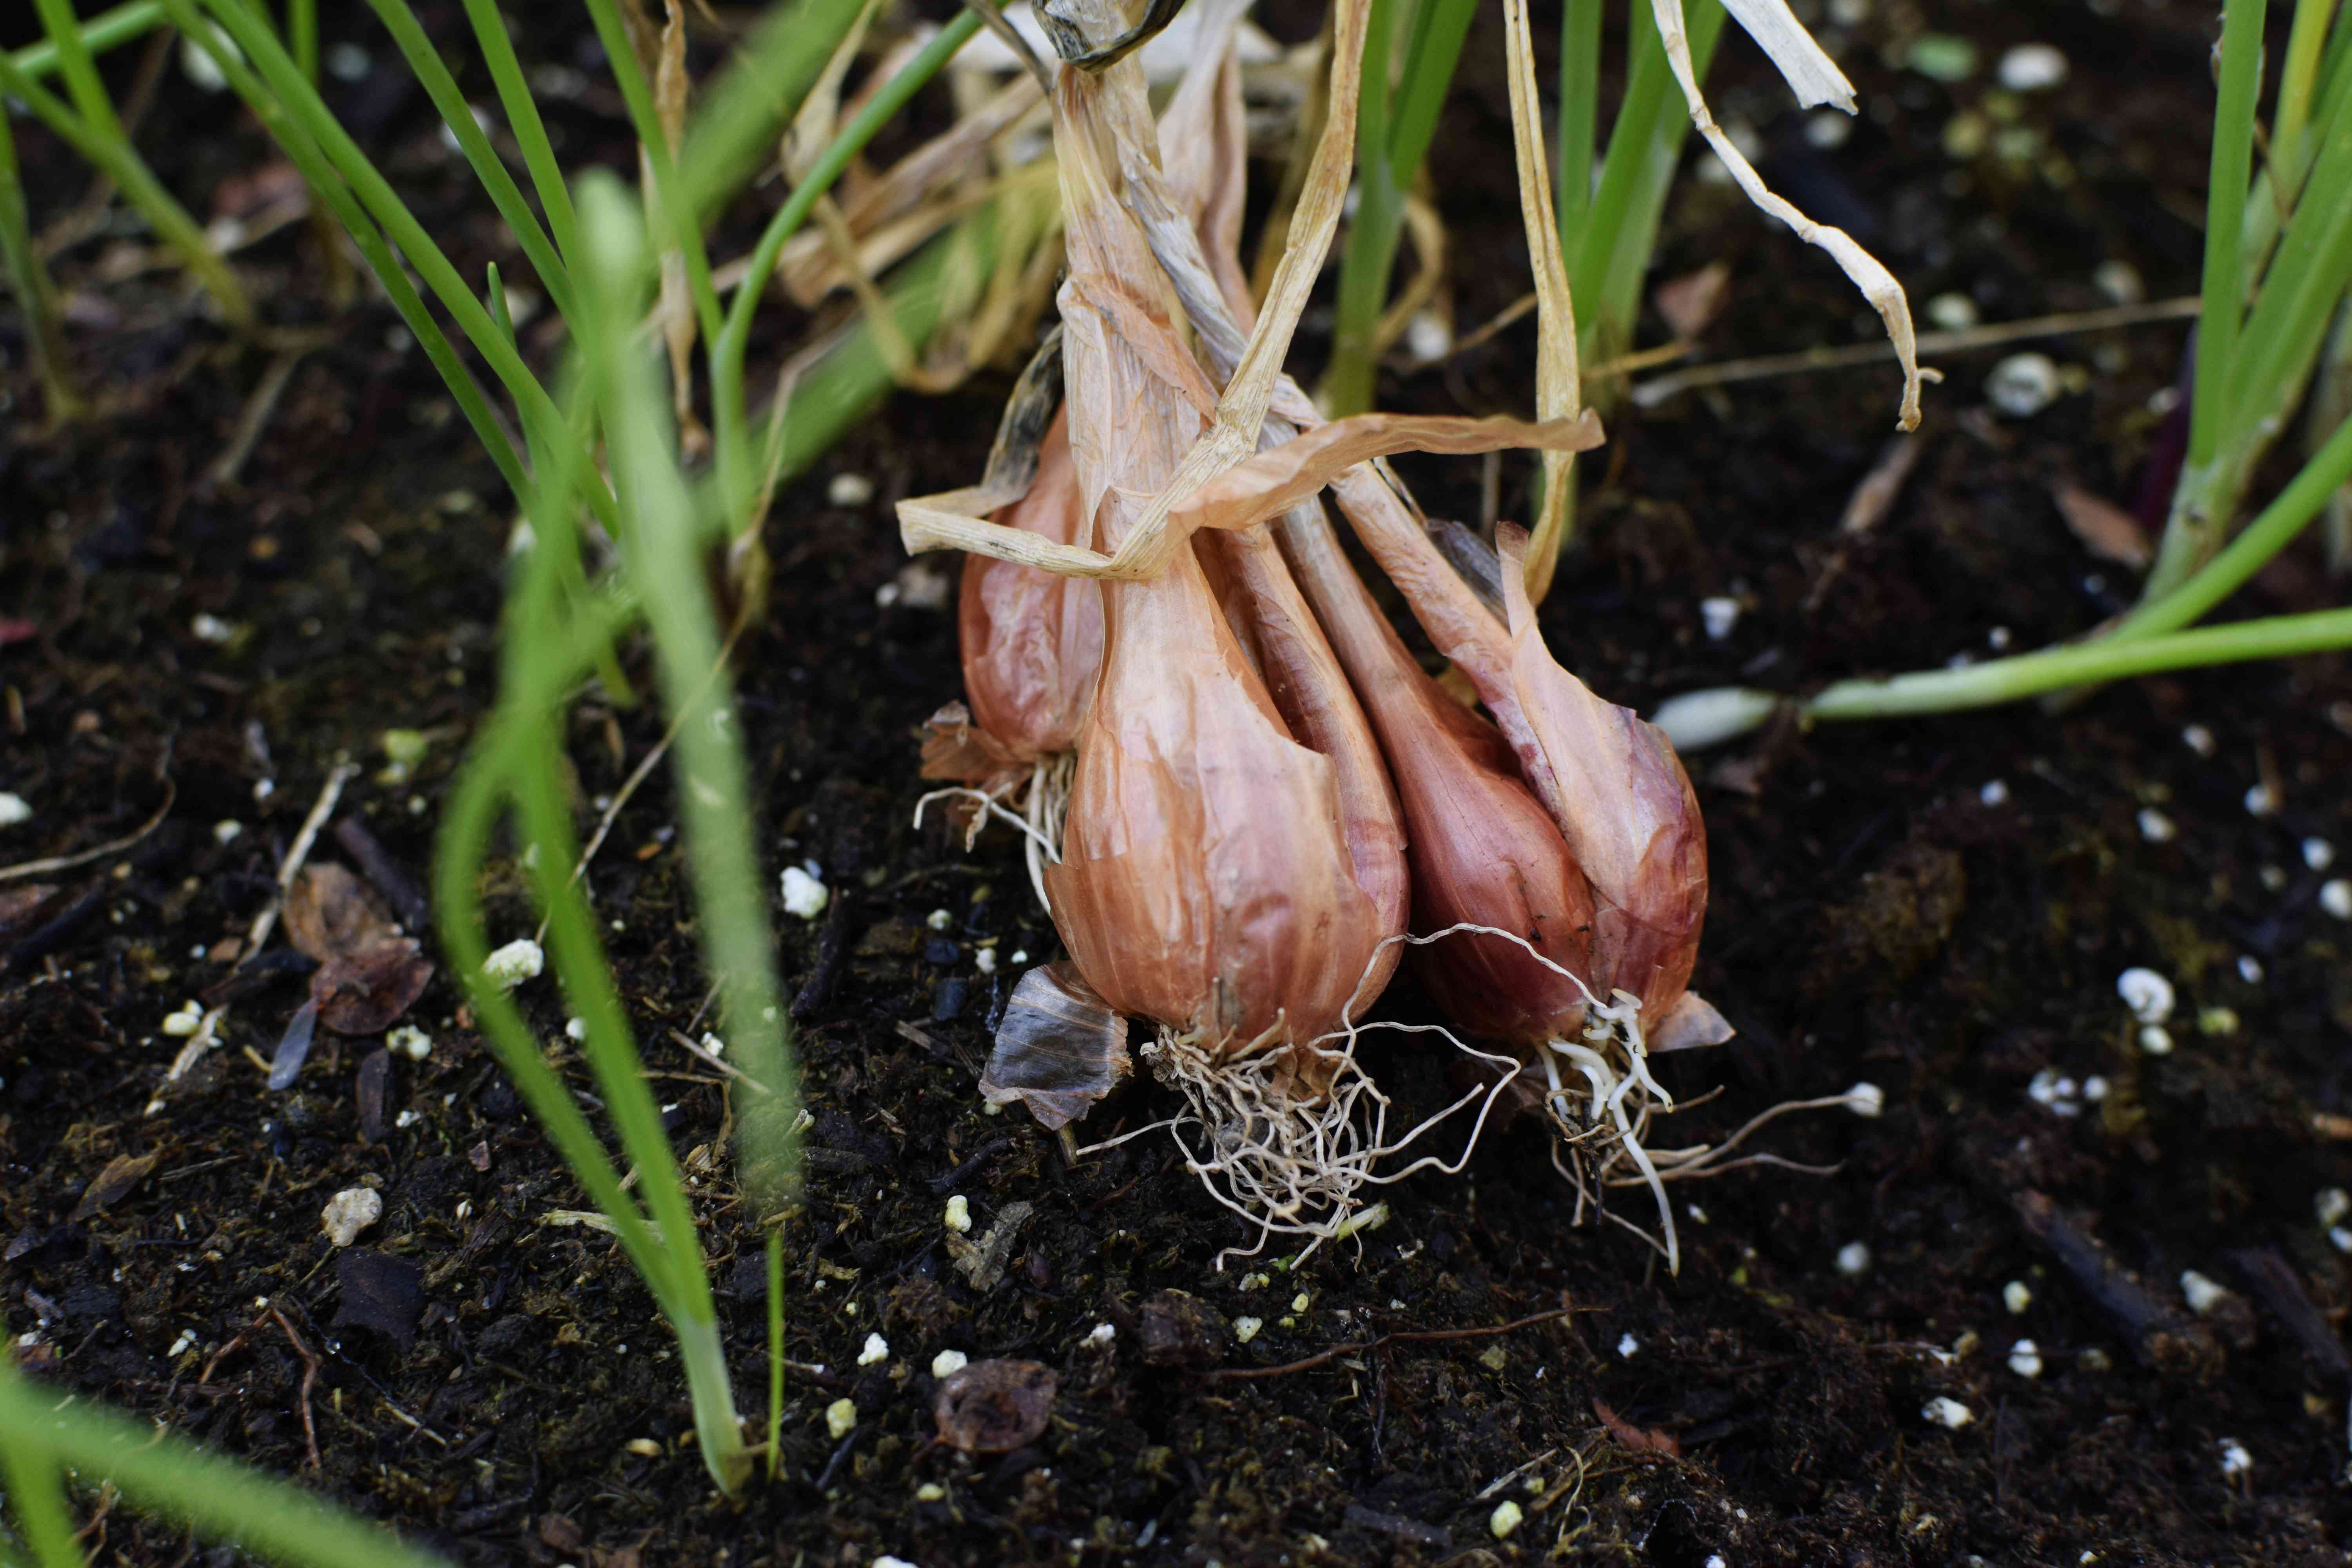
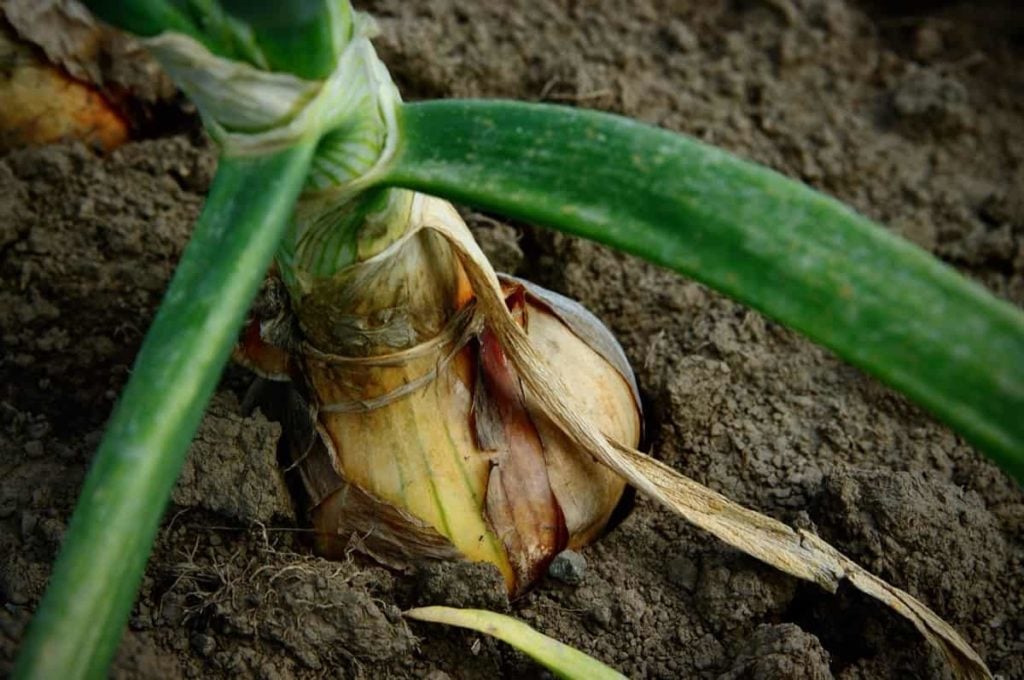
Signs of Maturity
There are several signs that indicate when shallots are mature enough to harvest. Shallots are ready to harvest when the leaves begin to turn yellow and wilt, indicating that the plant is starting to die back. Another indication of maturity in shallots is when the foliage starts to dry out and fall over. It is also important to note that shallots can be harvested earlier for a milder flavour or later for a stronger flavour, depending on personal preference.
Harvesting Methods
After seeing the signs of maturity, shallots are ready for harvest. There are personal preferences when choosing a harvest method. There are three common ways to harvest shallots:
- Hand Harvesting: This method involves gently pulling the shallot bulbs out of the soil by hand, being careful not to damage them. This is a good option for small planting areas or if you want to be very gentle with the bulbs.
- Garden Fork: Using a garden fork is a good option for a larger planting area. First, gently loosen the soil around the shallots with the fork, careful not to damage the bulbs. Then, carefully lift the bulbs out of the soil.
- Undercutting: This method involves using a spade to undercut the bulbs and loosen them from the soil. First, dig a trench around the perimeter of the planting area, being careful not to cut into the bulbs. Then, use the spade to loosen the soil underneath the bulbs and lift them out of the soil.
Curing Shallots

Curing is the final and most important step of harvesting shallots. This process ensures that shallots have a longer shelf life. To cure shallots, start by cleaning off dirt from bulbs, then spread them out in a single layer on a tray or other flat surface in a warm, dry, and well-ventilated area, such as a garage or a covered porch. And finally, allow the shallots to dry for several weeks, turning them occasionally to ensure that all sides are exposed to air.
4. Storing Shallots
Storing shallots properly is important to maintain their quality and flavour. After curing, shallots should be stored in a cool, dry, and properly ventilated place like a pantry. It is important to avoid storing shallots in areas that are too warm or humid, as this can cause them to spoil. Ideally, shallots should be stored in a single layer in a basket or mesh bag that allows air to circulate around them. Avoid storing shallots near other vegetables or fruits that give off ethylene gas, as this can cause them to sprout or spoil more quickly. With proper storage, shallots can last for several months and can be used in a variety of dishes to add flavour and depth.
From Garden to Plate
Growing shallots is a great way to add a delicious and versatile ingredient to your home garden. They are easy to grow and require little maintenance, making them a great choice for beginner and experienced gardeners. Not only do they add a unique flavour to a variety of dishes, but they also have several health benefits, such as being high in antioxidants and anti-inflammatory compounds.
Shallots can be grown in a variety of climates and soil types and can even be grown in containers for those with limited outdoor space. They can be planted in either the spring or fall, depending on your location and preference. Once planted, shallots require regular watering and occasional fertilization to promote healthy growth.
Growing your own shallots can also be a cost-effective alternative to buying them at the grocery store. So why not give it a try? Plant some shallots in your garden or in containers and enjoy the tasty rewards.
Frequently Asked Questions (FAQs)
How Long Does It Take to Grow Shallots?
It usually takes about 90 days for shallots to mature from planting to harvesting. Once they are harvested, you can use them in a wide range of culinary preparations, adding flavours to dishes such as stews, soups, dressings, and sauces.
Are Shallots Red or White?
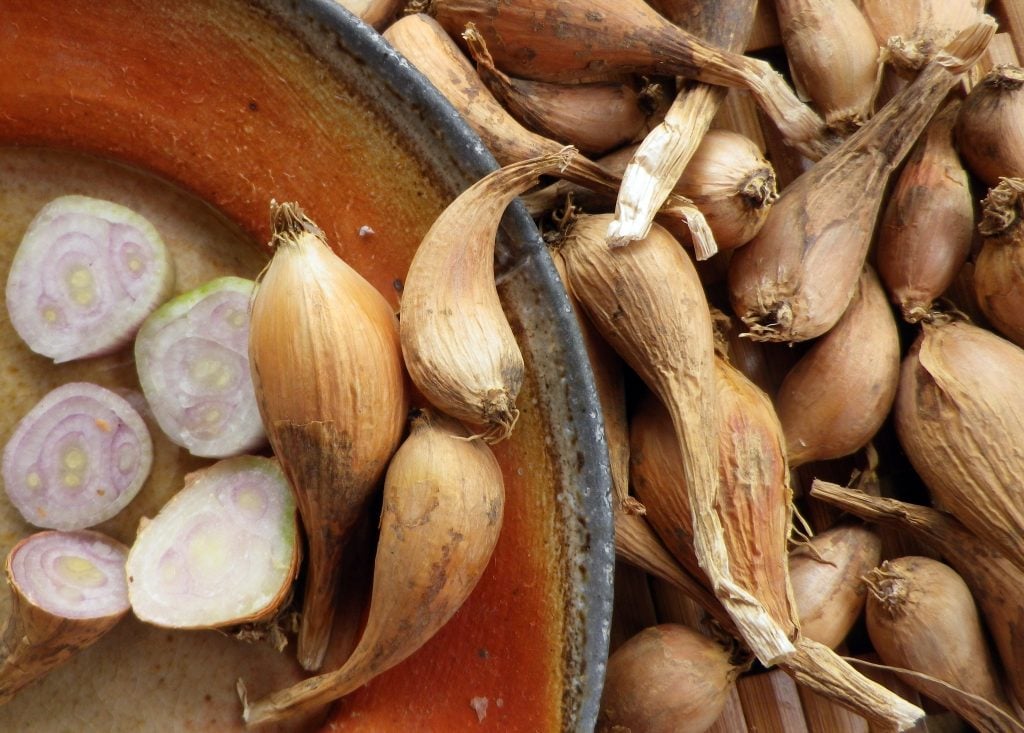
Shallots are characterized by their papery brown skin and their bulb-like shape with a cluster of cloves, which contains white or pale purple flesh. This delicate and mild-flavoured flesh makes them popular in most kitchens, adding a subtle sweetness to dishes such as sauces, dressings, and soups.
What Do Shallots Look Like?
Shallots are small, elongated, and oblong-shaped bulbs that resemble onions. They have a papery brown skin that covers a cluster of individual cloves, each with white or pale purple flesh. Shallots can often be considered small-sized onions; however, both have different flavours.
What is the Best Fertilizer for Shallots?
Shallots benefit from a balanced fertiliser with a moderate amount of nitrogen, phosphorus, and potassium. A balanced fertiliser can be applied to the soil before planting and then once again halfway through the growing season. Organic fertilisers such as compost or well-rotted manure can also be used.
What is the Difference Between Onion and Shallot?
Shallots have a sweeter, milder, and more delicate flavour than onions. On the other hand, onions have a more pungent and assertive flavour. Shallots also have a slightly different appearance, with a more elongated and oblong shape, covered in a papery brown skin and a cluster of individual cloves.
Do Shallots Like Lots of Water?
Shallots prefer well-draining soil and do not like to be overwatered. While they require consistent moisture, excessive watering can lead to problems such as root rot, bulb splitting, and disease. It is recommended to water shallots deeply once a week, especially during the growing season.

![When and How to Grow Broad Beans [UK]](https://www.thearches.co.uk/wp-content/uploads/How-To-Grow-Broad-Beans-scaled.jpg)

![Step-By-Step Guide on How to Grow Asparagus [UK]](https://www.thearches.co.uk/wp-content/uploads/How-To-Grow-Asparagus-Plants.jpg)