Guide to Growing and Caring for Hollyhock Plants
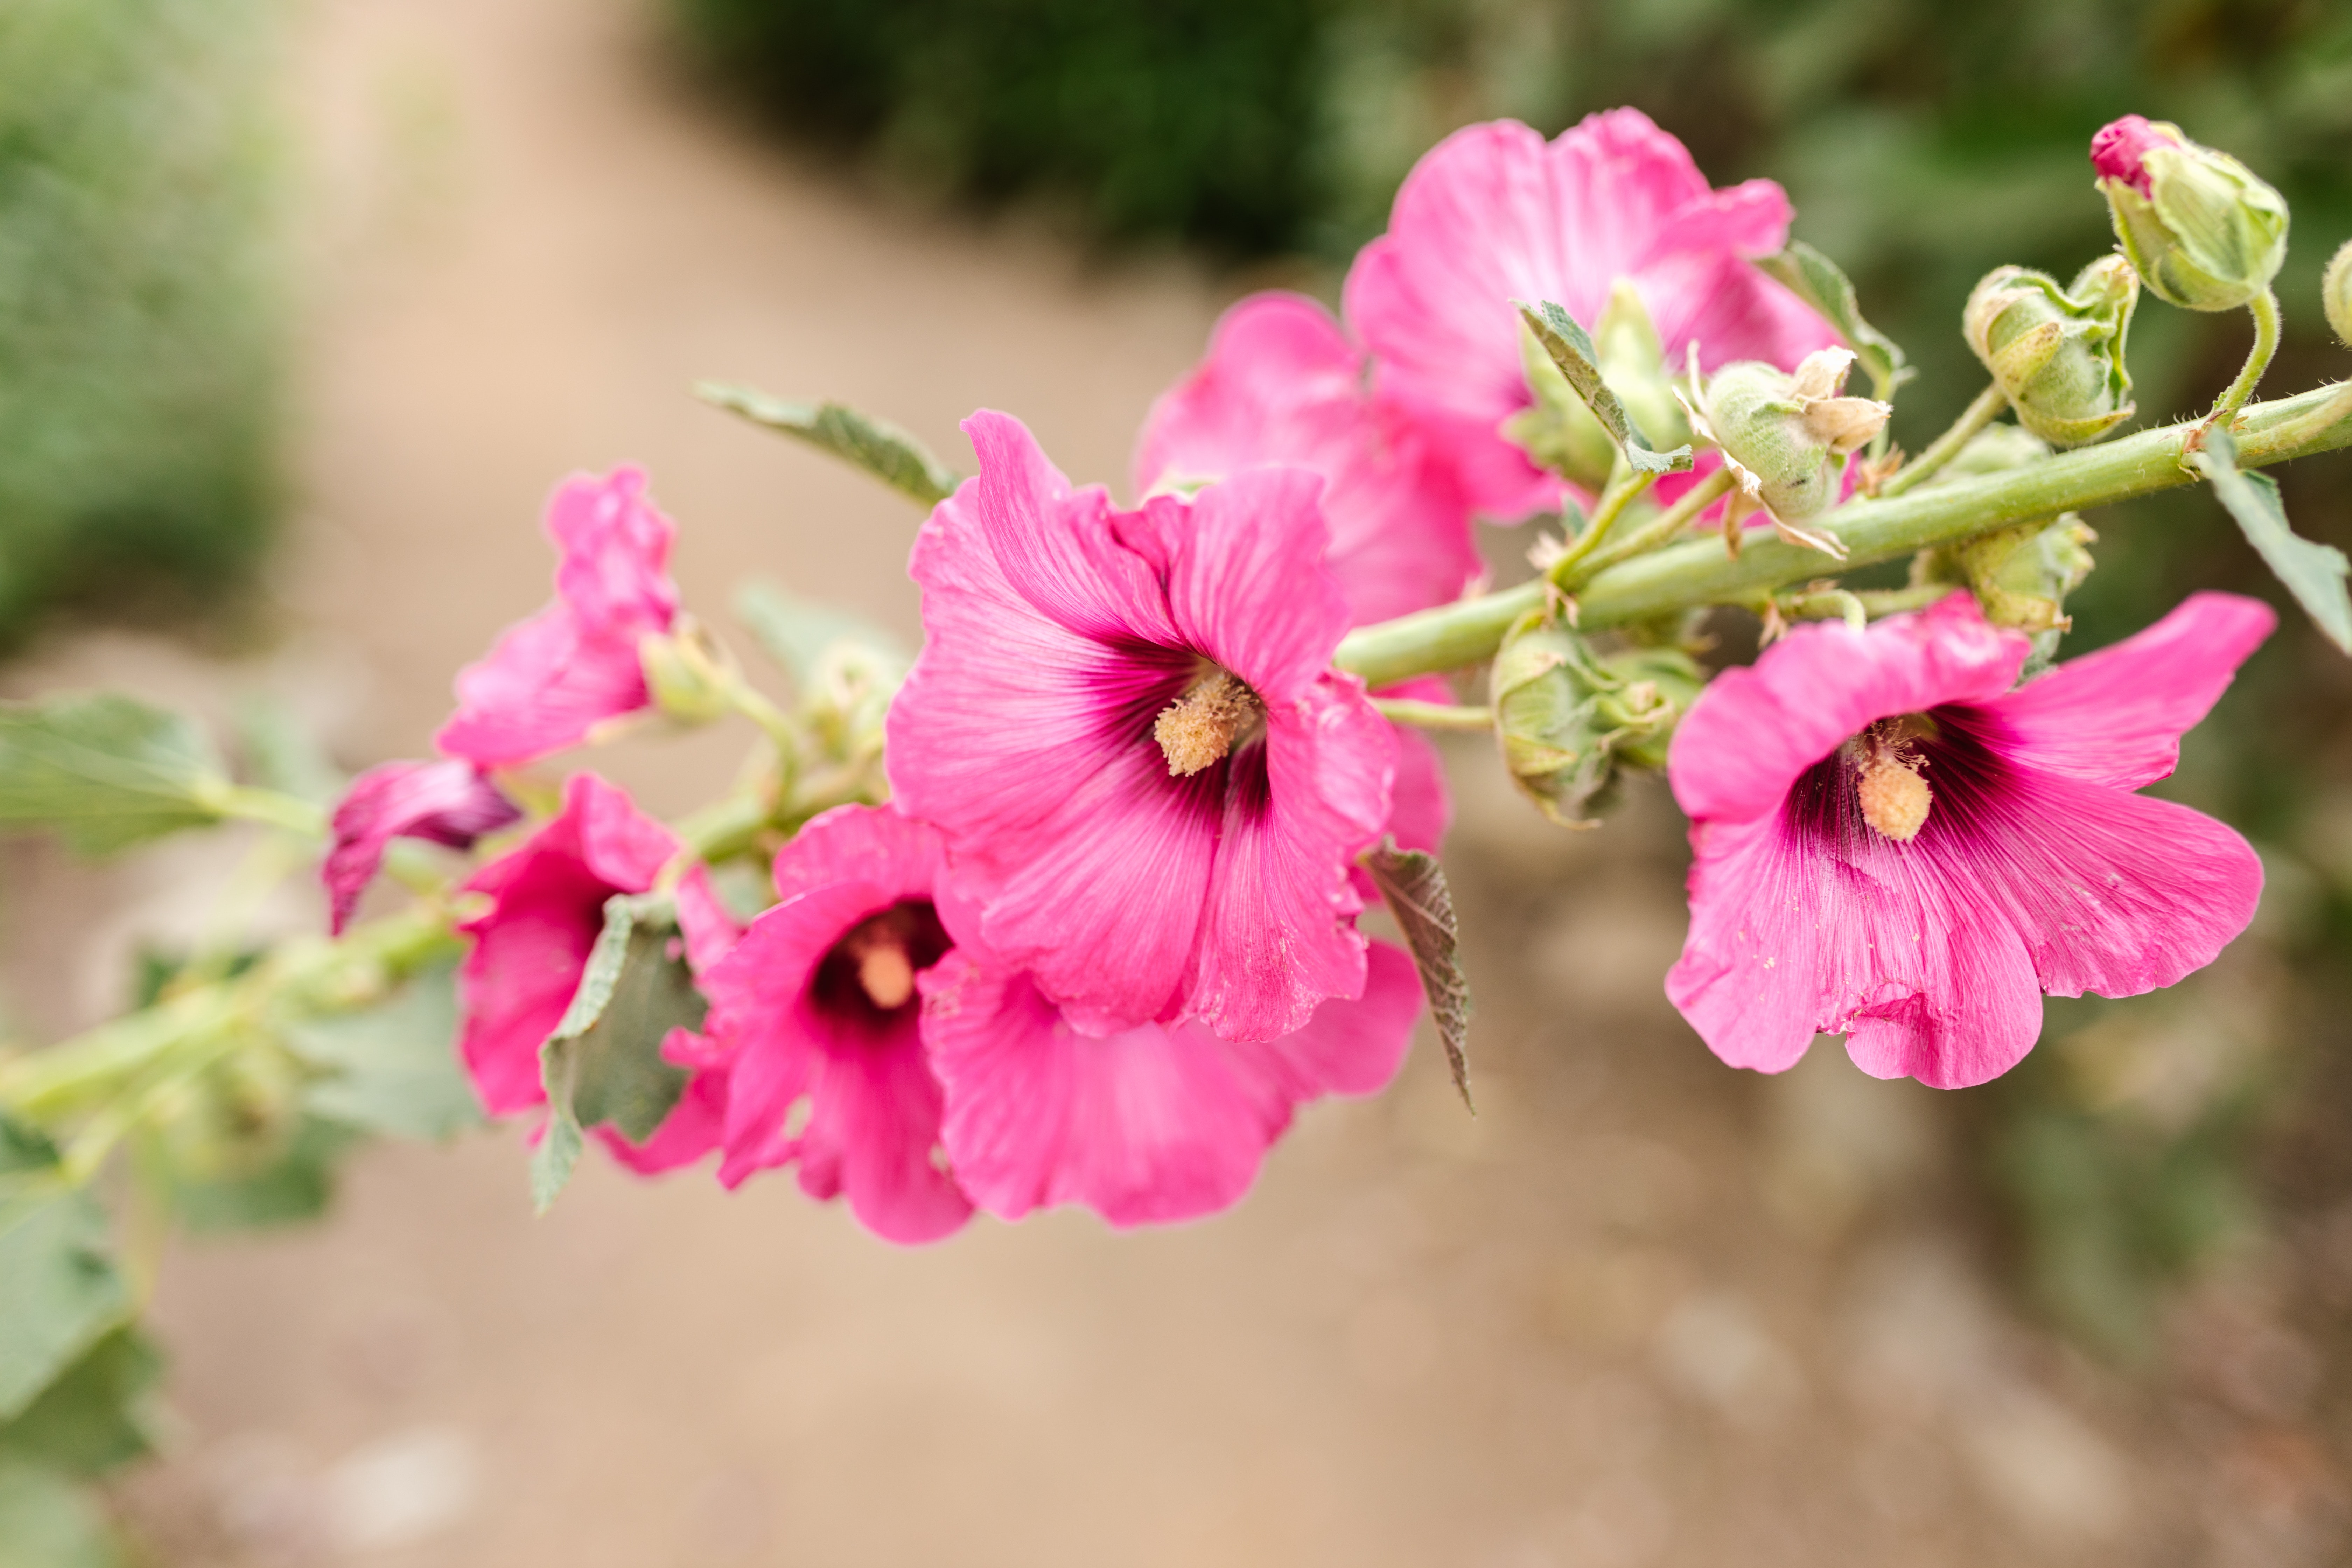
Table of Contents
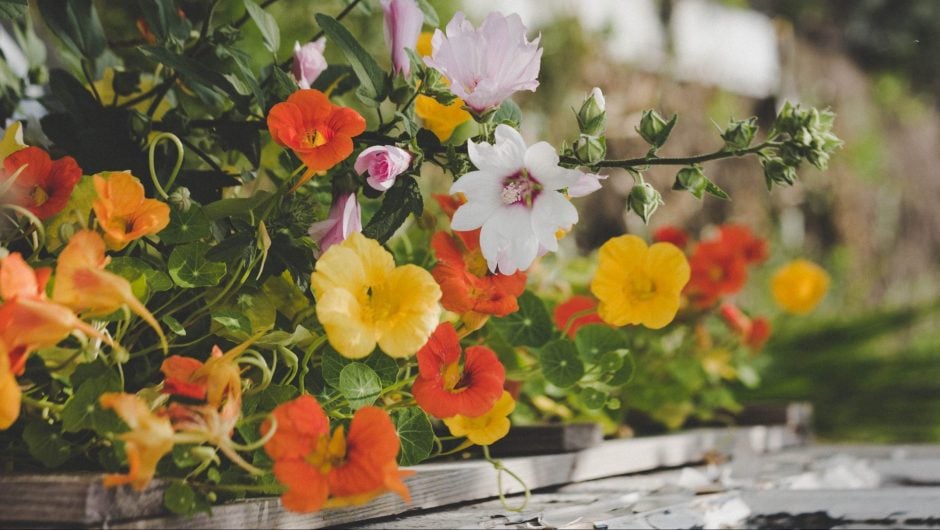
Hollyhock is one of those quintessential cottage garden plants in the UK. They look wonderful against walls, fences, and of course, cottage gardens. They are easy to grow and will look wonderful in any planting scheme. The Royal Horticultural Society has listed Hollyhocks on their Plants for Pollinators list as they are a great provider of nectar and pollen for bees when they are flowering during the summer months. These wonderful plants are sun lovers, so plant them in garden beds and borders for better growth.
You can enjoy Hollyhock flowers from early summer to autumn. The tall towers of jewel-coloured flowers will jazz up any garden. In this article, you will learn when to plant, how to plant them, where to plant them, how much to water them, what common problems you will have to deal with, which plants make the perfect companion to Hollyhocks, and other important topics.
The Hollyhock Plant
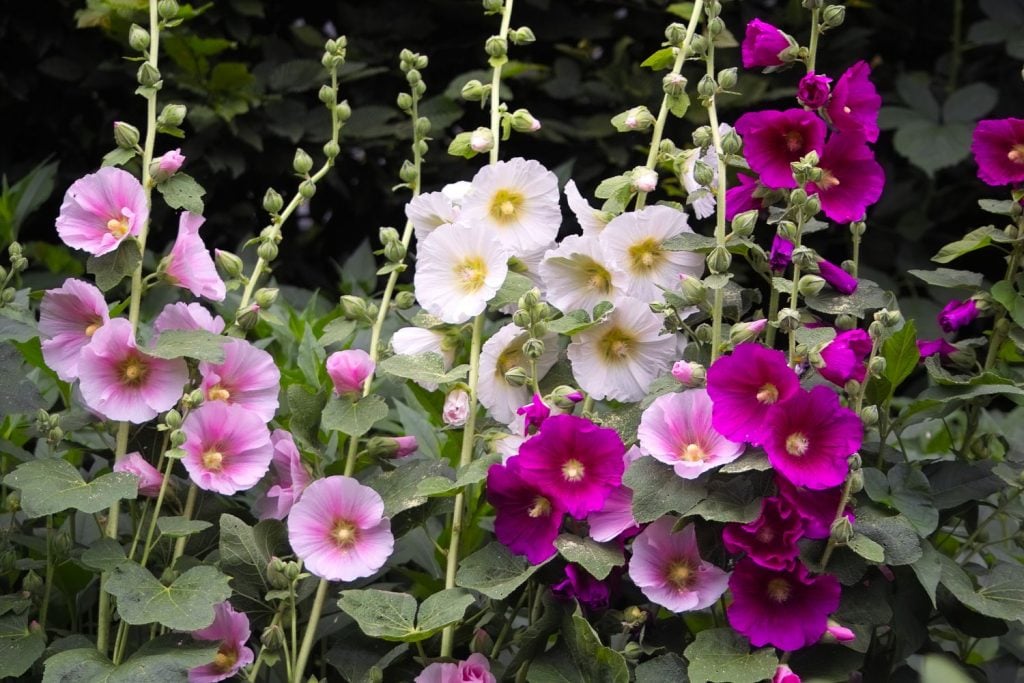
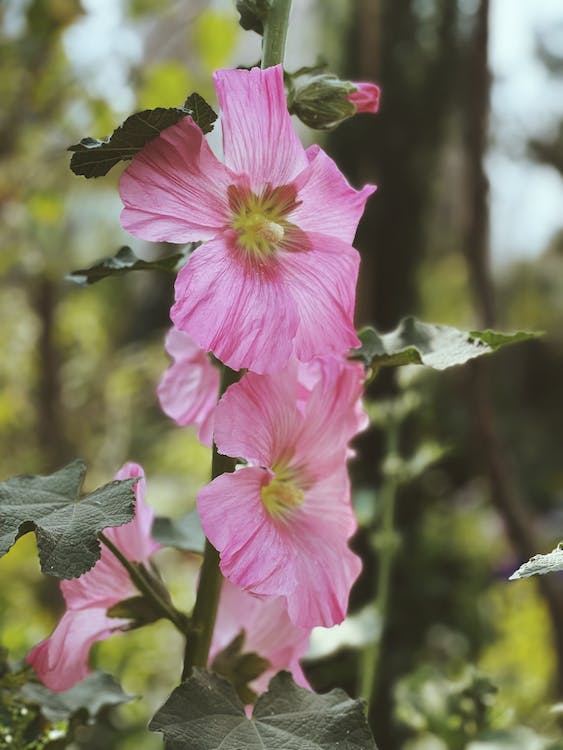
Commonly known as Hollyhocks, Alcea is a plant genus of over 80 species; these flowering plants are part of the Malvaceae or Mallow family. They are native to Asia and Europe, and it is said that they were introduced to the UK region in the 15th century. The Hollyhocks have large flowers and tall stems in a wide range of colours, from pink, yellow, and purple to almost black. There are several Hollyhock varieties in the UK, so you just need to pick the colour that goes with your gardening plan. Hollyhocks are available as single or double-flower varieties.
A Brief Overview of Hollyhock
- Scientific Name – Alcea rosea
- Common Name – Hollyhocks
- Plant Type – Biennial
- Hardiness – H5
- Height – 1.5 – 2.5 m
- Spread – 0.5 – 1 m
- Sunlight – Full sun
How to Grow Hollyhock
Planting Hollyhock plants in your garden is the best idea for your garden. Some of the best varieties in the UK include A. ‘Blacknight’, A. ‘Sunshine’, A. ‘Halo The Bride’, A. ‘Halo Apricot’, and A. ‘Chaters Double Rose’. You can add the petals to salads, or you can crystallise them for cake decorations. Hollyhock is truly a versatile plant. You can buy Hollyhock in the form of seeds, small plug plants, or young plants. You just need to remember that they are hardy and will flower in the second year after you have sowed them.
1. Ideal Location
Hollyhock plants like the sun, so they need to be planted in a south or west-facing spot. They can tolerate most soils if it is well-drained and relatively fertile but not clay soil. Even after germination, give the plants as much sunlight as possible, and take them out carefully approximately 4 weeks later.
2. From Seeds
You can buy Hollyhock seeds or get them from previous Hollyhock plants. If you are doing the second method, then you need to leave the flower stems on the plant until after the flowering has finished. You wait until the seed heads become brown, remove the pods, and keep them in a dry and moisture-free container until it is time for sowing.
3. Right Time
The best time to sow Hollyhock seeds in a greenhouse or on a windowsill is April or May; to sow directly in the ground, do it in June, after the soil has warmed up. For sowing indoors, fill up a tray with fine seed sowing compost and water. Add the seeds 5 cm apart, press down gently, and cover them lightly with soil.
4. Soil Profile
The soil must be moist, and the temperature should be between 16 to 21°C. The seed germination takes around 10 – 14 days. You can even try soaking the seeds overnight in water before planting, as this will soften the outer coat and could help increase germination chances. They can be transferred into individual small pots, add peat-free multi-purpose compost and Hollyhock. They can be planted out in their final spot in June or July, where they will grow but only flower until the following year.
Caring Tips for Hollyhocks
1. How to Plant Out
You need to prepare the ground by removing any weeds and adding some organic matter or compost into the ground. Then place the Hollyhock in the ground at the same level as in the pot, firm it up and add water. If you are planting in groups, then space the Hollyhock 60 cm apart since they need space to thrive. In an open garden, it is better to tie the stems to a stake or bamboo cane since this stops them from being blown over.
2. Feeding and Watering Hollyhock
In the beginning, regularly water the Hollyhock, but once they are established plants, they do not need much water except in hot and dry spells. If the soil is relatively fertile, it will not need to be fed during its growing season. If the soil is poor, then well-rotted organic matter can be added before planting or liquid feed fertiliser in the growing season. After the flowers die back, the stems can be left so that the seed pods will naturally self-seed around; the seed can be saved and stored for sowing in the future or even cut down.
3. Pruning and Deadheading
Hollyhocks do not need pruning. You just need to remove any rust-affected leaves in the summer. This is why Hollyhocks are easy to grow and take care of. To deadhead the Hollyhock, cut off the flower spikes once the Hollyhock flowers have faded. To save the seed, you need to wait until the seeds become brown; collect the seeds and cut down the stalks in the end.
Gardening Equipment Needed for Hollyhocks
Gardening tools are helpful when tending to your plants, flowers, and garden.
Hollyhock Seeds
Hollyhock seeds are the perfect start for your gardening journey.
- 100 X WHITE HOLLYHOCK SEEDS
- PREMIER SEEDS DIRECT – Hollyhock – CHATERS Double Mixed – 260 Seeds
- 50 x Hollyhock Vibrant RED Seeds
- 50 X Cerise Hollyhock Seeds
Young Hollyhock Plants
If you do not have to start with seeds, then you can buy young Hollyhock plants.
- Digitalis Foxglove Dalmation Mixed Garden Plant Hardy Biennial Flowering Garden Plants Easy to Grow
- Hollyhock Chaters Double Garden Plant Hardy Perennial Flowering Garden Plants
- Hollyhock Garden Ready Plants UK ‘Chater’s Doubles’ Heirloom Double Blooms Hardy Perennial
- South Eastern Horticultural Hollyhock Alcea Spring Celebrities Series Mix Plug Plants Pack x6
Liquid Feed Fertilisers
Liquid-feed fertiliser will help in growing your Hollyhock plants.
- Miracle-Gro Pour & Feed Ready to Use Liquid Plant Food, 3 Litre
- Liquid plant food concentrate Bio-active
- Maxicrop POPGS4TL Original Seaweed Extract Organic Plant Growth Stimulant
- Envii SeaFeed Xtra – Organic Liquid Seaweed Fertiliser for Vegetables, Lawns & Houseplants
Gardening Tools
You can not have a beautiful garden without any gardening tools.
- MOXTOYU Garden Tool Set with Holders, 13PCS Stainless Steel Garden Tool Set
- Jardineer Garden Tools Set – Durable Gardening Tools Set 8Pcs
- GREEN HAVEN Stainless Steel 11 Piece Heavy Duty Garden Tool Set with Tote Bag
- Grenebo Gardening Tools, 9-Piece Heavy Duty Gardening Hand Tools
Common Problems and Pests to Look Out For
The popular issues for Hollyhocks are slugs, caterpillars, flea beetles, spider mites, Japanese beetles, anthracnose, leaf spot, powdery mildew, and rust.
When the plants are young, you can try putting barriers like wool pellets or copper rings; predators, including birds, hedgehogs, and frogs, will help keep slugs away. If you see round holes in Hollyhocks foliage, then the flea beetle is the blame. Pick the beetles off or encourage the same predators to protect your Hollyhocks. An unappealing fungal disease, rust can affect your Hollyhocks. It is spread by airborne spores and is typically more horrible in a wet summer. You will see red, orange, or yellow bumps on the leaf underside. You need to remove any affected leaves quickly. Growing hollyhocks as biennials and planting new ones will decrease the chances of rust since age is a factor. Hollyhocks can not be planted too densely for good air circulation. Some Hollyhock varieties have been said to have improved rust resistance and should be checked out.
Summing Up
All in all, Hollyhock is the one plant that just grabs attention; your garden will have impressive flower displays. Hollyhocks are known as exceptional pollinator plants, so bumblebees, bees, hummingbirds, and butterflies will be buzzing all around your flowers. If you have a cottage garden or stunning garden wall, then Hollyhocks are your best choice.
These tall flowers will bloom from June to August, and you will be mesmerised by the colour range from yellow to white to pink to maroon. Hollyhock’s cut flowers make the perfect addition to your flower arrangements. Hollyhock plants just need a sunny spot, well-draining soil, and some watering. Grow them from seed to plug plants, whichever way is easiest for you. Take good care of them, and you will be rewarded with picturesque flowers.
So what are you waiting for? Buy your garden ornamental plants today. In the comments below, describe your thoughts and experiences with planting Hollyhock plants in your garden.