How to Building a DIY Cold Frame for Your Plants [UK]
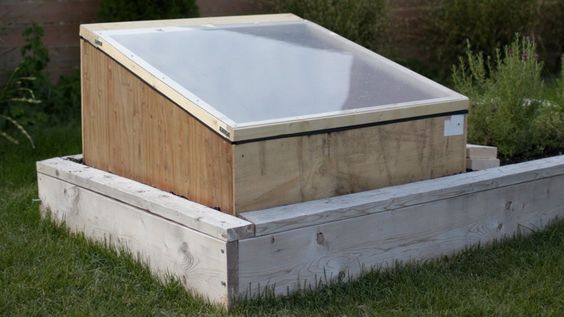
Table of Contents
A DIY cold frame prolongs the summer growing season into the cooler months, allowing you to enjoy fresh vegetables for a longer period of time. By making these easy and flexible DIY cold frames, you’ll be able to germinate seeds, harden them off, and prepare them for planting in your garden during the spring. This improves their efficiency while also speeding up their development in the garden.
Whether you are an expert gardener or a novice, building your own cold frame may be a satisfying and cost-effective choice. While ready-made cold frames or kits are available on the market, we’ll focus on the exciting possibilities of creating one yourself out of recycled materials like plastic bottles, old windows, or even reclaimed materials like bricks or doors.
Let’s walk you through the process of building your own cold frame and show you how to use it to protect and nourish your plants this season.
What is a Cold Frame?
Cold frames are basic structures, typically constructed of wood, to protect plants during the colder months.They are made out of glass, slanted cover that enables sunlight to enter while storing heat energy, producing a perfect environment for plants to flourish in during the winter months. These buildings function as solar greenhouses, providing gardeners with a variety of benefits.
Cold frames come with the unique benefit of not requiring external energy sources. Instead, they capture the sun’s rays, which pass through the clear plastic, glass, or fibreglass sash and absorb heat. While wood is often used for cold frame walls, materials such as concrete, stone, or straw hay can also be used.
The size of a cold frame is variable and is determined by factors such as available space, intended use, and sas material size. A 3 to 4-foot width enables simple access and management. The prime benefit is you can save money and enjoy the benefits of this multipurpose garden construction by making your own cold frame rather than purchasing an expensive one.
How to Create Your Own Cold Frame
Cold frames are a more compact but still useful alternative to greenhouses, which may not be an option for more households. Every climate will profit from adopting cold frames. Even in areas with seasonal limitations, you can gain fresh veggies year-round. Making your own cold frames is a simple yet gratifying DIY projectthat may provide your plants with the best growth conditions possible.
In essence, a cold frame is a box frame with a transparent lid, usually referred to as “light” on top. Wooden frames are typical. However, other materials, such as bricks or blocks, can also be used. As opposed to buying premade solutions, building your own cold frame provides the option of customization.
When it comes to crafting your own DIY cold frame, you’ll need a few key materials and tools to get started.
Materials and Tools
1. The Lid
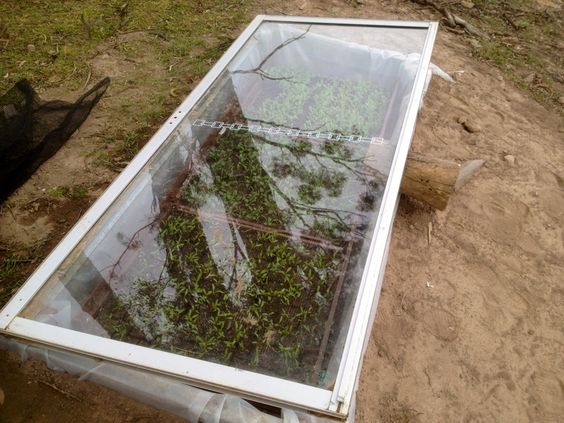
The lid is the main part, and it may be made from a variety of materials based on what is available and what you desire. Using an old salvaged window is a great idea. As an alternative, a transparent door, such as a shower door, can be used. In the absence of these alternatives, you can use a sheet of glass or twin polycarbonate. These materials have the advantages of insulation and transparency.
You’ll also need strong hinges to fasten the lid to the frame firmly. Select hinges that can support the weight and motion of the lid to guarantee a smooth opening and closing. Adding handles to the lid might improve usability and convenience.
2. The Frame
When it comes to constructing the bix that supports the lid of your DIY cold frame, you’ll need specific materials and tools like:
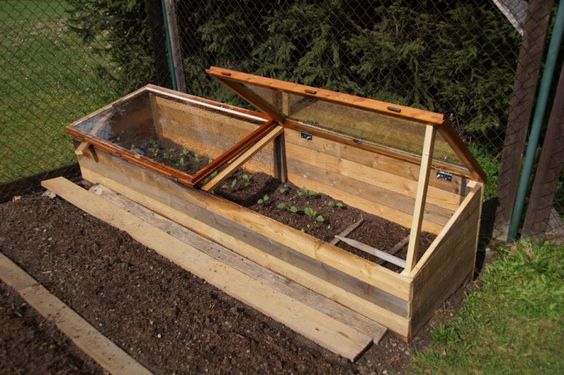
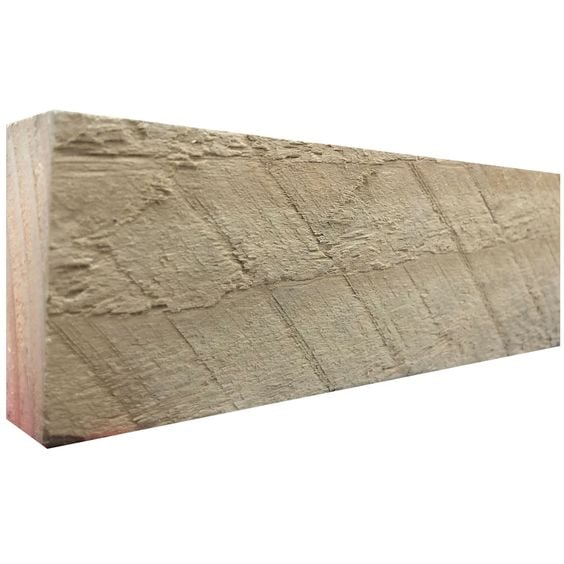
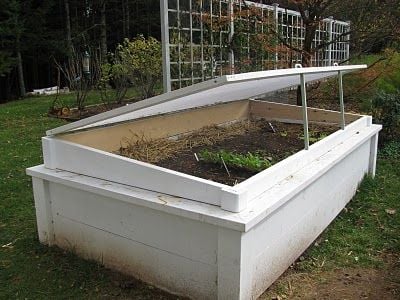
1. Pressure Timber: Pressure-treated timber should be cut into lengths that match the size of your lid. Make sure the back of the cold frame is one board higher than the front. This slope maximises the amount of sunshine that reaches the indoor plants while enabling effective rainfall discharge.
2. Front and Back Boards: The box’s horizontal sides are formed by using three boards for the front and four boards for the backside.
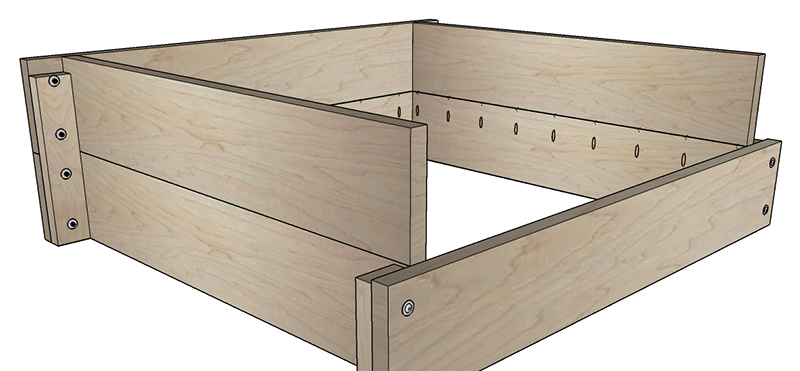
3. Side Boards: The vertical sides of the box are made with seven shorter planks. To create two identical triangular boards—one for each side—cut the seventh length in half diagonally to meet the necessary slope.
4. Vertical Corner Posts: Create 4 corner posts that are vertical and the same height as the front and rear boards. The frame structure will be supported and stabilised by these posts.
5. Battens: Two boards of different lengths are required. On bright days, you may push up the lid of the cold frame using these battens, allowing air to circulate.
3. Tools
In terms of tools, here are some essentials that you will need:
Screwdriver: You’ll need a screwdriver to fasten the handles and hinges to the lid and frame.
Drill: A drill will be useful for producing pilot holes and any necessary frame changes.
Saw: A saw is required to cut and shape the wood to the right measurements, depending on the type of frame material you’ve chosen.
Measuring Tape: A measuring tape is necessary because precise measurements are necessary for a well-fitted cold frame.
Screws: Screws are required to hold the cold frame’s handles, hinges, and other parts in place.
NOTE: Keep security measures and acquire exact dimensions to build a strong and practical structure that supports the lid efficiently.
Step-By-Step Construction of a DIY Cold Frame
A sequence of actions is required to create a practical and efficient cold frame on your own. By following these detailed instructions, you can build a useful and practical structure that will provide your plants with the best possible growing circumstances.
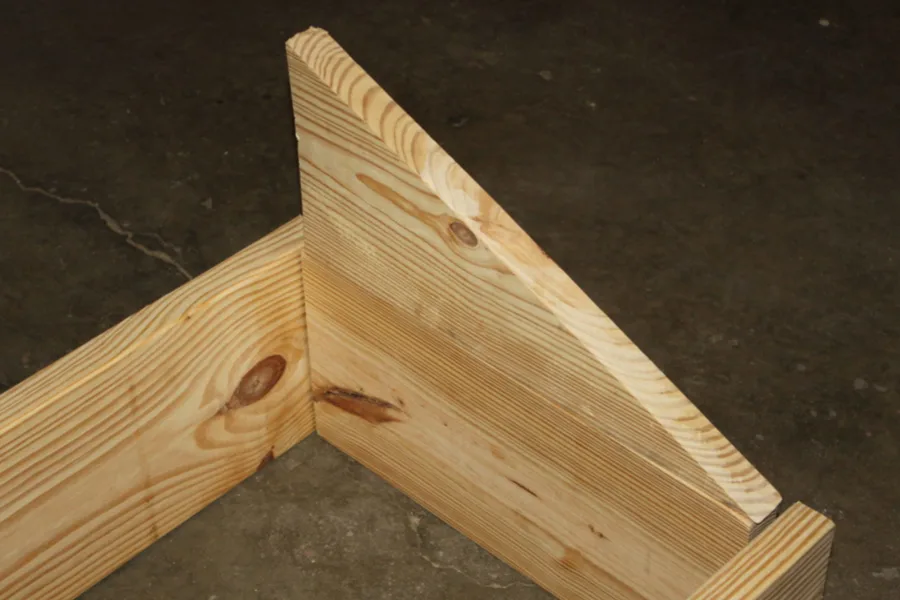
- Attach the side boards: Start by screwing the side boards into the corresponding corner posts to assemble the side boards. Apply two screws to each board’s ends. Before attaching the boards, drill pilot holes to speed up the procedure. The narrow end of the top board of the triangle should be screwed into the board below vertically.
- Secure the front and back boards: Screw the front and rear boards to their corner posts using the same procedure. To give the frame rigidity, make sure the screws are well fastened.
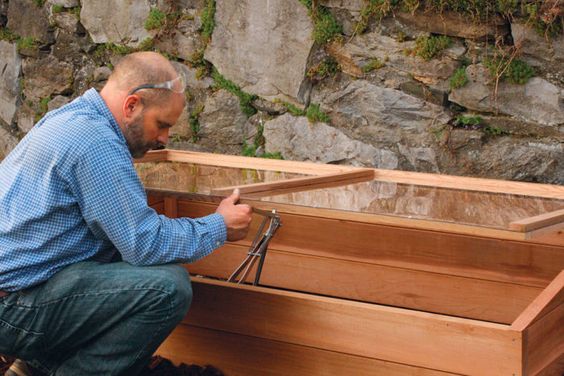
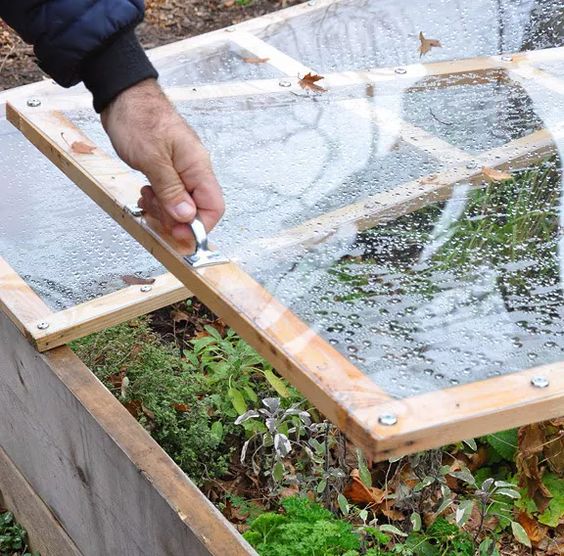
- Prepare for the lid: When the frame is finished, gently install the lid to it, making sure the back is flat. The lid is attached to the frame via hinges. There may be a need for additional hinges throughout the length of longer lids.
- Install lid supports: A short lid support should be placed in front of the frame, and a longer lid support should be placed on the side. Attach them firmly using screws. You may control the airflow by adjusting the height at which you prop open the lid using these supports.
- Attach handles: Screwing handles to the lid will make it more convenient. The cold frame will be simpler to open and close as a result.
- Final touch: Make sure that all the screws are securely fastened to guarantee the stability of the frame and lid. Verify that the lid can be opened and closed securely with ease.
Some Tips to Build a Perfect Cold Frame
You can build a well-designed and useful cold frame that meets your gardening needs by considering these very useful tips:
Select the appropriate material: When building the frame, choose wood since it is easily accessible and can be cut to size using hand tools. Use hardwood leftovers if you can because they often last longer than softwood.
Avoid using old and treated wood: If you are planning on setting the cold frame directly on the ground, avoid using old wood that has been treated with tar or other unfriendly chemicals. You may always use non-toxic paint to decorate the wood if you’re worried about how it will look.
Select the right covering: To cover the box, use glass (like an old storm window) or a frame wrapped in transparent plastic. Thicker materials give better insulation. Reusing existing shower doors or glass is a traditional choice for this project. To provide ventilation on hotter days, think about including hinges or a sliding cover.
Use raised beds: To make a temporary cold frame, install a sheet of glass on top of high-sided raised beds. For specific locations or plants that need more protection, this technique may be useful.
Create temporary frames: For a quicker fix, lean old storm windows tent-style over the plants in the garden row to form temporary frames, or “cloches.” Localized security is provided by this technique.
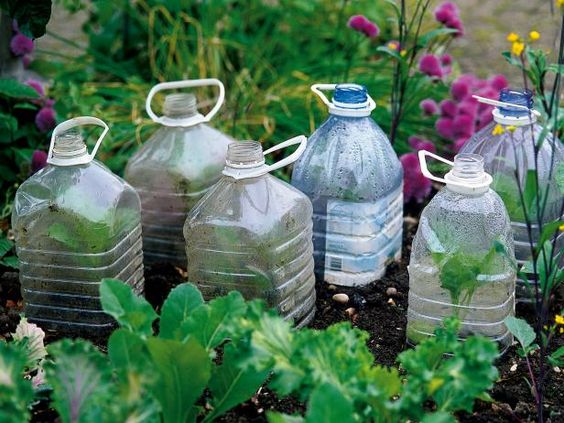
Milk container cloches: Cut the bottoms off of plastic containers or bottles and lay them over individual plants if you’re short on time or don’t have any DIY abilities. The jugs are held in place by mounded earth. Remember to remove the caps to allow for airflow on hot days.
Picking Up The Right Spot
You may maximize sunshine exposure, encourage drainage, guard against bad weather, and create an atmosphere that is good for plant growth and development by carefully choosing the ideal location for your DIY cold frame. To achieve maximum effectiveness and ease of use, numerous things must be taken into consideration while selecting the ideal location for your DIY cold frame.
- One adaptable solution is to build a basic bottomless wooden box that can be put in a variety of locations, offering location as well as flexibility.
- Opt for a southern or southeastern exposure to get to the most of your chilly frame. These angles get plenty of sunshine all day long. Also, you can consider a location with modest slopes that will help in effective sun absorption and encourages healthy drainage.
- You should place your cold frame in a protected spot, ideally with a wall or hedge to the north. This design protects your plants from winter winds, which improves the environment for your plants.
- You may partially immerse the frame in the ground to increase insulation by using the earth’s built-in insulating properties. This ensures a steady and favourable climate for your plants by regulating the temperature within the cold frame.
- Last but not least, make sure the space around your cold frame is open and accessible. It is easy to maintain and harvest the frame by leaving enough room around it.
Benefits of Cold Frames
- A Defense Against Bad Weather: Plants are protected from harsh winds, chilly temperatures, and frost. Through this defence, plants remain healthy and are allowed to develop even under adverse weather conditions.
- Seedlings Hardening: Cold frames are perfect for “hardening off” seedlings. Before being transplanted into the garden, young plants can develop larger and better accustomed to the environment by being gradually exposed to outside factors.
- Effective Space Utilisation: Cold frames are a great way to maximize space in your yard. They provide you with a focused space for growing particular crops, maximising the potential of your garden and enabling you to customize the quantity you produce.
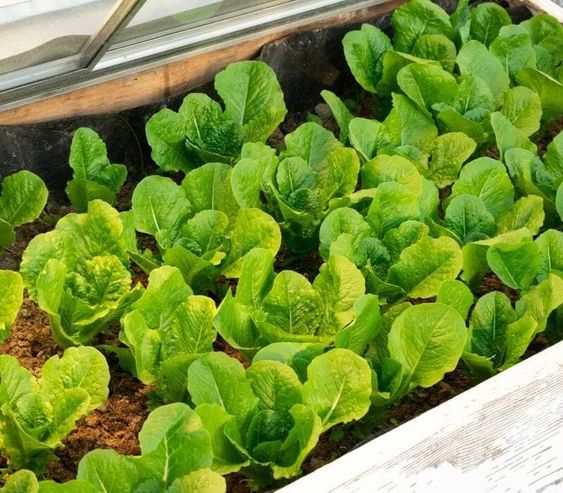
- Summer Crop Maintenance: Cold frames can also be used in the summer. You may grow crops like winter lettuces, spinach, kale, or other salad greens in the cold frame by removing the cover during mild weather, ensuring an ongoing supply of fresh vegetables.
- Seasonal Extension For Gardening: Gardeners can extend their period of growth in the spring. Cold frames offer a few more weeks of shelter in the autumn, allowing plants to flourish for an extended period of time.
- Cost-Effective Alternative: Constructing your own cold frames from inexpensive materials might be a more affordable option than buying prefabricated structures. DIY cold frames offer a cost-effective solution while still benefitting your plants in the same way.
- Early and Late Harvests: Seeds can be directly sown in the frame for crops like radish, lettuce, and onions. You may get an advantage on fresh vegetables before or beyond the regular growing season.
Maintaining Your DIY Cold Frame
It’s simple to keep your cold frame functioning at its best for a long time. You can maintain your cold frame in excellent condition and enjoy its benefits for many years to come by adhering to some basic maintenance procedures.
In order to preserve the wood from the weather, make sure it is sealed by a sealer. You can seal on a regular basis which protects the wood’s resilience against excess moisture. Also, you can change the plexiglass if it gets clouded. Cloudiness has no impact on how well the cold frameworks work.
Conclusion
As we have explored the wonderful world of cold frames and discovered how you could extend your growing season and safeguard your plants. Any gardener can undertake a simple and rewarding DIY cold frame project.
You can extend your growing season, preserve your plants, and enjoy fresh produce year-round by utilizing simple items and following the step-by-step instructions. Take advantage of the chance to nourish your garden with this useful addition.