How to Effectively Propagate Hydrangeas from Stem Cuttings
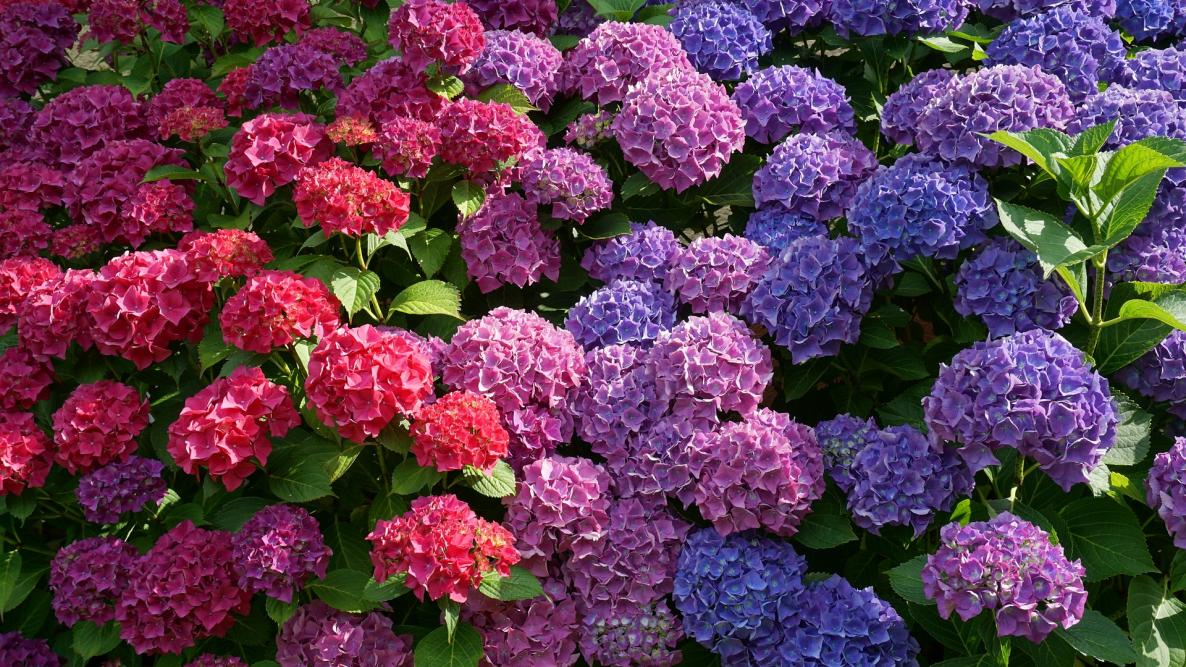
Table of Contents
If you are here, we believe you are into gardening or specifically looking for ways to propagate hydrangeas effectively. Don’t worry; let us start by telling you that you are not alone! Everyone who is into gardening must try growing hydrangeas at least once.
These plants were considered excellent showpieces during the Victorian era due to their attractive blooms. Hence, they are, without a doubt, the centre of attraction if grown in a garden. This naturally made them a high-demand cultivar, but it also became a headache for gardeners.
Growing hydrangeas from their seeds is a time-consuming and challenging task. Hence, the most adapted way of growing them is by propagating them from stem cuttings. If you are looking to have these amazing plants in your garden, then you must know about growing them with the help of hydrangea cuttings.
Scroll down and learn everything there is to know about how to propagate hydrangea cuttings.
About Hydrangeas
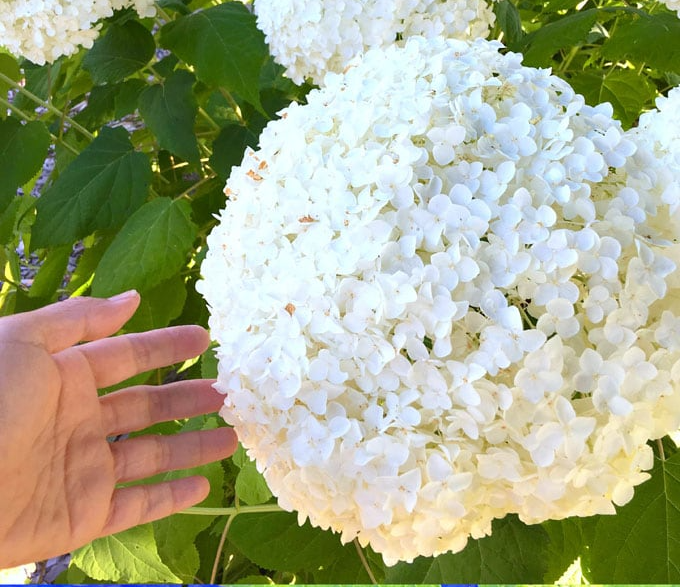
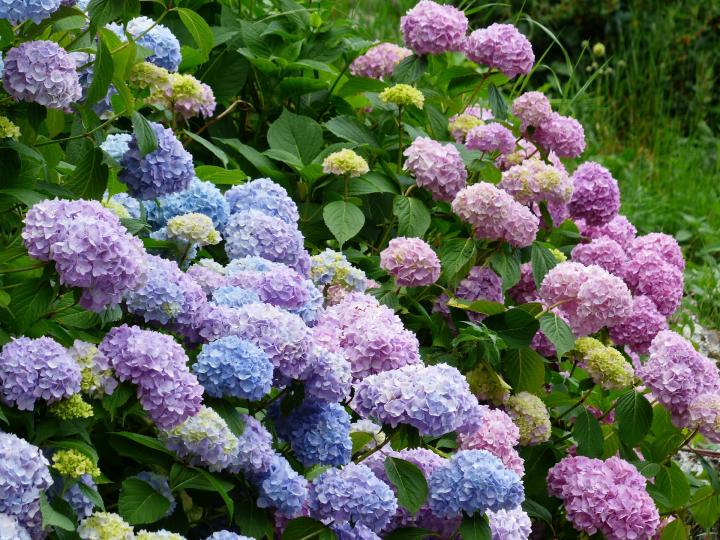
Name your favourite colour, and we bet you will find a hydrangea of that same colour for your garden. The variety of flowers offered by this amazing plant makes it a favourite of gardeners. Not only that, they are easy to maintain and can be grown in almost any type of soil. You can even get multiple colours of blooms on a single plant! Imagine the kind of beauty such a plant can provide for your garden! When it comes to growing hydrangeas, you can do as you like. There are no strict rules to follow. You can have your hydrangeas in garden sites, containers, or along the fences too. According to your requirements, you can choose a plant of any size and height. The range of varieties you can choose from is one of the biggest perks of going with hydrangeas for your garden.
Propagating Hydrangea Cuttings
Propagating hydrangea is an interesting process. These plants will readily root from their stem cuttings, so it is not a tedious task, as widely believed. Scroll down and follow the steps to propagate hydrangeas from stem cuttings effectively.
Step 1: Pick the Right Branch from a Mature Plant
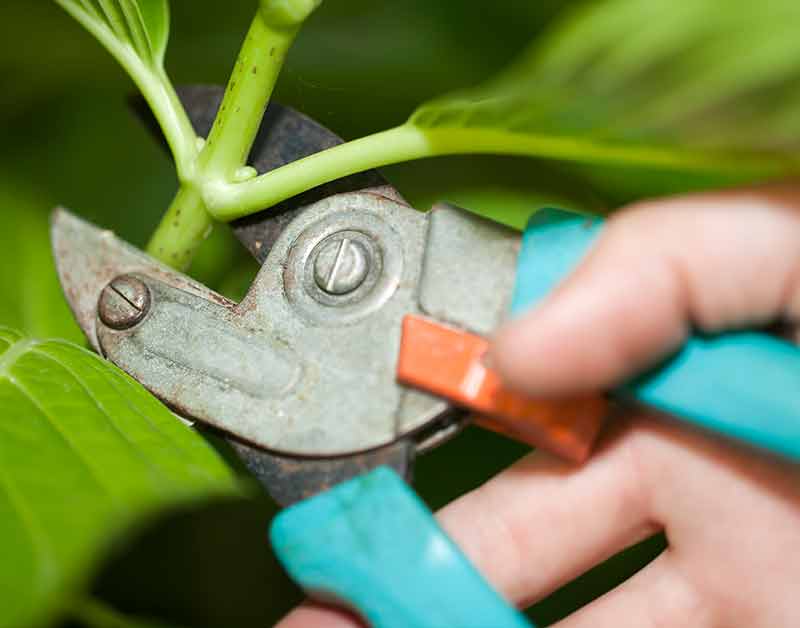
The first thing is to locate a well-established hydrangea. Scan the plant for a newly pruned stem. To locate the right stem easily, look for a light green stem. Always make sure that no blooms are on these stems. Make a cut using a clean, sharp pruning blade 4-5 inches away from the stem’s tip. Before cutting, make sure to position the knife in a horizontal manner and that there are at least a few pairs of new foliage on the selected stem. It is advised to cut the stems from a plant during the morning hours for better results.
Step 2: Prepare the Stem Cutting for Propagation
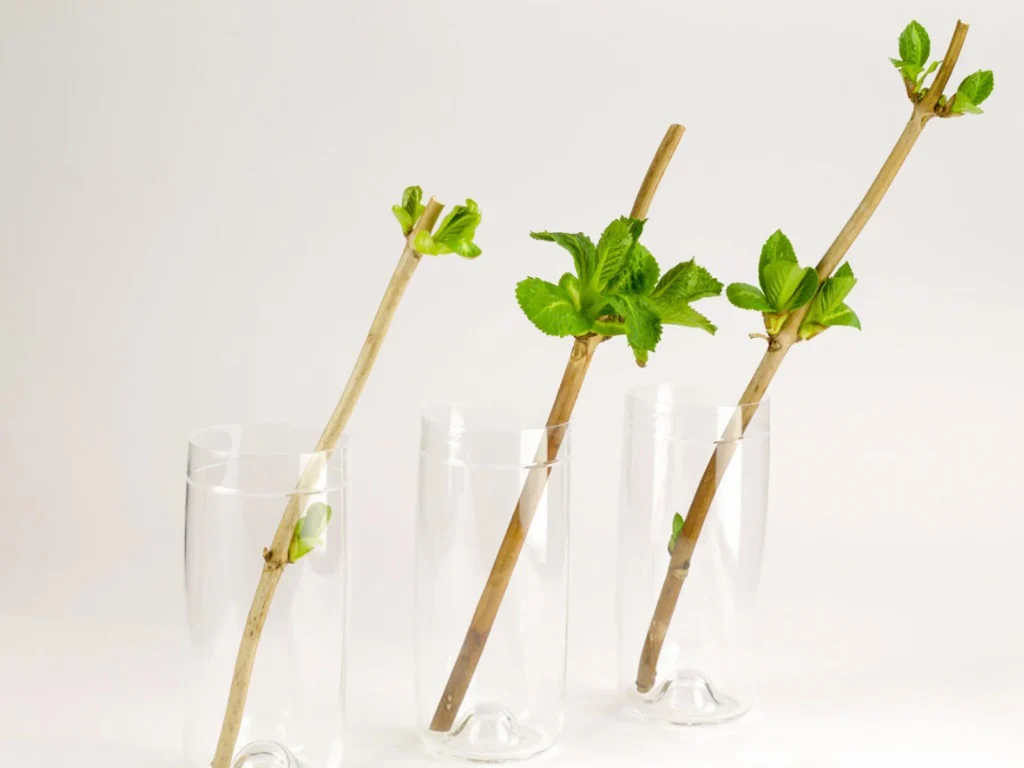
Chop the leaves at the tail end of the hydrangea stem. It is from these parts that new roots will grow. Make sure not to cut all the leaves off the stem. At least two pairs of leaves must still be present at the other end of the stem. It is suggested to apply rooting hormone to the leafless part of the stem. If possible, you can also apply an antifungal solution. All these will be available from your local plant or garden store. This will help the plant not to invite any diseases and grow effectively.
Step 3: Planting the stem cutting
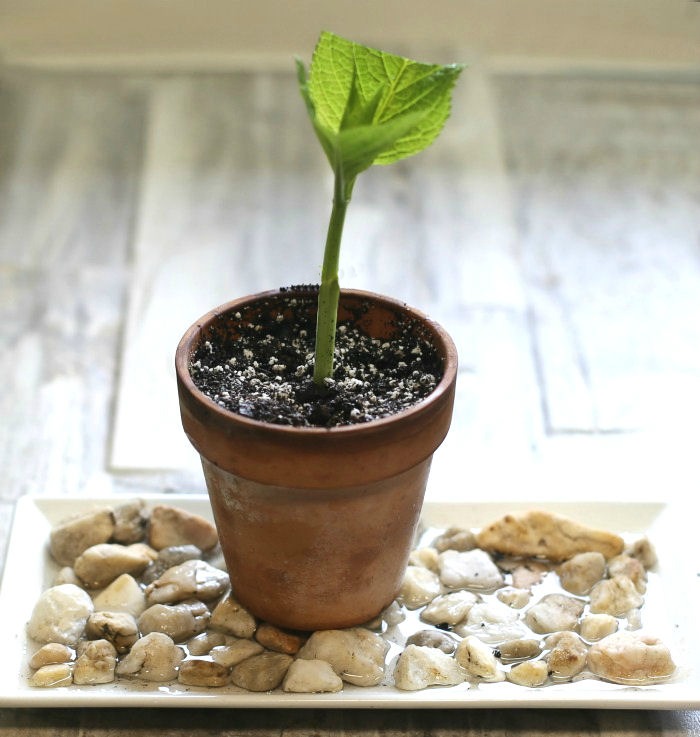
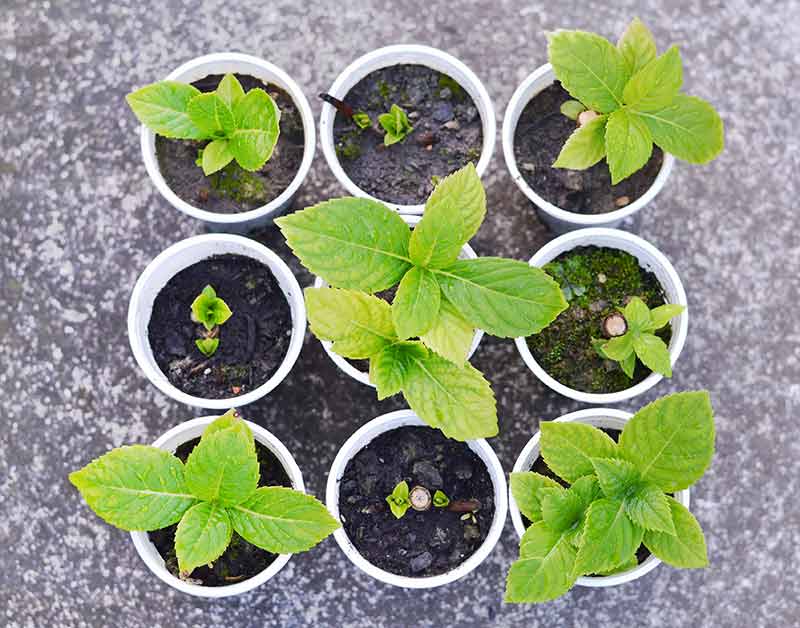
Take a small pot and fill it up with the potting mix. Take the stem cutting and plant it in the pot. Make sure to plant the cutting deep enough to reach the first pair of remaining leaves on the stem. It is recommended to slightly water the pot after planting the stem. This will help fill the gaps in the soil, if any.
Step 4: Enclosing the Stem Cutting
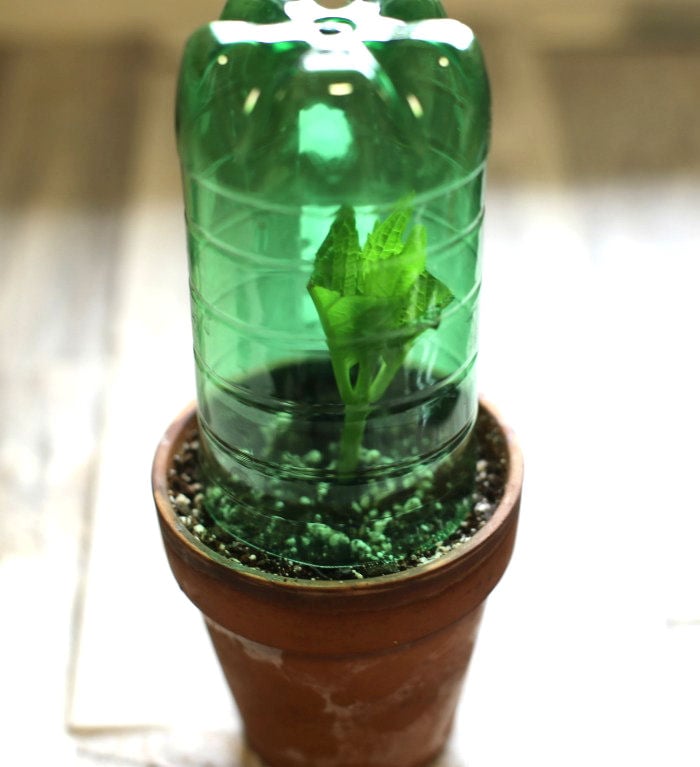
Take a small plastic bag and use it to cover the pot. This is an important step that should be taken carefully. Enclosing your pot inside a plastic bag will create a favourable environment for the stem to grow quickly, and this setup will maintain humidity for the plant. While covering the pot with the bag, make sure no leaves come into contact with the plastic. You can use tiny sticks or toothpicks to make the leaves stay away from the plastic bag to avoid rotting.
Step 5: Waiting
Now the waiting starts. After covering the pot properly, you can place it in a warm environment. Keep this pot away from direct sunlight or heat. Check your pot once in a while to make sure that the leaves are fine and are not rotting or in contact with the bag. You can slightly water the stem if you find the surface of the soil drying up. Keep the stem in this setup, and very soon, you can see the stem growing into a beautiful plant!
Caring for Hydrangeas
- Watering: Hydrangeas require an adequate amount of watering. During the first two years, it is recommended to deep-water the plant. Providing a good and continuous amount of water will trigger the pace of root growth. It is recommended to water at least 1 inch per week. For good leaf growth and flower production, the plant should get plenty of water. This can also prevent the early wilting of leaves due to dry soil. Make sure that the foliage and flowers aren’t moist.
- Fertilising: Fertilising the soil for the effective growth of hydrangeas requires a bit of knowledge about the soil they are planted in. You can do a soil test to see whether the soil is already rich. If the soil is fine, you don’t have to bother about adding additional fertilisers. If not, understand the variety of hydrangeas you have and fertilise accordingly. Unnecessary fertilisers will boost the growth of leaves, which in turn hinders the production of flowers.
- Winter Protection: Hydrangeas require extra care during the winter. It is best to cover the plants with mulch or grass to keep them warm. If your area gets too cold or snow, you can even entirely cover the plant until its tip with a cage or a similar enclosure and fill it up with mulch. But make sure you don’t use too much mulch so that the plant suffocates and dies due to a lack of airflow.
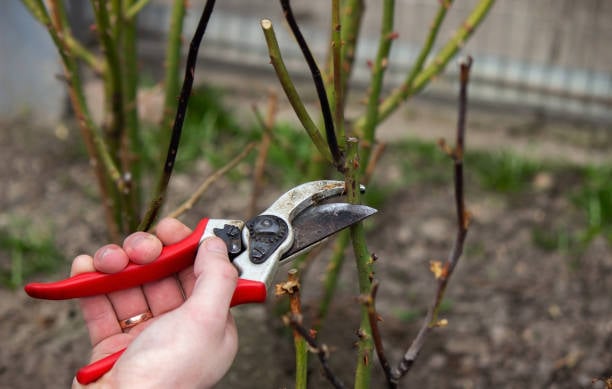
- Pruning: Like any other cultivar, hydrangeas also require pruning to stay in good shape. Generally, it is best to prune them in the early spring. You can cut off one-third of the branches to attain the desired shape. Make sure to use clean pruning tools to avoid infection. Always wash them after pruning each plant. There are a wide variety of hydrangeas that belong to different pruning types with different flowering seasons. Hence, it is advised to know your plant well before pruning.
Planting Hydrangeas
There are certain things to be taken care of when it comes to where and when to plant hydrangeas. If you are confused about what kind of soil will be befitting for your hydrangeas, the answer is that they can be grown well on fertile, well-drained soil. Hydrangeas appreciate soil that has a lot of moisture. If you think your soil is not really fit for growing plants, you can always use compost to make your soil ready for the same.
Different cultivars demand varying levels of sunlight. Hydrangeas can’t tolerate excess sunlight. It is fine to let them get direct sunlight during the morning hours when the intensity of the sun’s rays will be generally low. During noon, it is advised to place them in partial shade so that excess heat from the sun won’t affect the plants adversely. Even then, it is better to know about the plant variety you possess, as some kinds can tolerate direct sunlight.
It is advised to plant each hydrangea at least 3 to 10 feet apart from the others. Try to know how they will look when fully established; this will help you get a fair idea of what distance you can plant them from each other. When it comes to the time of planting, autumn will be perfect for hydrangeas. This is mainly because, by the time of summer, the plant can have a strong root system and well-established growth so that it won’t go weak due to sunlight.
Before planting, inspect the root portion of the plant or any dead parts and remove them. Measure the root ball of the plant and dig a hole exactly the same length. Place the plant in the hole, fill half the hole with soil, and water well. After watering, you can seal the rest of the hole with soil.
End Note
Hydrangea propagation requires the steadiness of an artist and the patience of a monk. Though these plants grow very quickly after proper propagation, sometimes it may take time. The health of a parent plant and the condition in which a hydrangea stem cutting is propagated are a few factors that affect the rooting process. Nevertheless, propagating hydrangeas from root cuttings is a fun process, and the results will make your efforts worth it. With the help of this guide, we believe you gained useful insights regarding hydrangea propagation.
Once you have successfully grown a plant from a stem cutting, it is time to make more of them to make your garden colourful!
Frequently Asked Questions
How Do I Grow Different Colours of Flowers on the Same Hydrangea Plant?
You can change the colours of hydrangea flowers, but this will take weeks or months. Firstly, let your plant be fully established after its first planting. You can slowly change the colours of flowers by varying the alkaline content of the soil. Also, note that not all hydrangeas can change colours.
How Do I Cut and Store Hydrangea Flowers?
Hydrangea produces very attractive blooms, and these flowers can be used for ornamental purposes. You can cut the flower heads after the flowers are fully grown. Make sure there is no foliage on the stem, and let them hang upside down in a room with less light and good airflow. Once these flowers are completely dry, you can store them in a dry place.
How Do I Protect Hydrangeas from Pests and Diseases?
It is rare for a hydrangea to get diseased easily. Though no cultivar is absolutely immune to pests or diseases, To avoid such a situation, start by choosing a well-immune plant, and if infected, use a medicinal solution to treat the plant and remove affected parts.

![When and How to Plant/Sow Marigold Seeds [UK]](https://www.thearches.co.uk/wp-content/uploads/Sowing-Tagetes-Marigolds.jpeg)