How to Level A Sloping Garden? – Guide to Preparing a Wonderful Garden
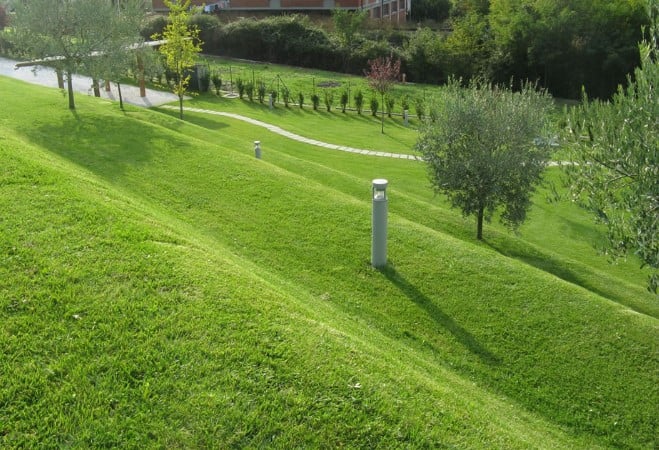
Table of Contents
A Garden is the one place in the house where a person is not angry or devoured by any negativities. It is the place of choice for people when they think they are surrounded by or exposed to a lot of negativity or toxicity.
It is the picnic spot inside the house. There are very few people that do not like gardening and the satisfaction that comes from it.
For many people living in urban and significant metropolitan areas, gardening is impossible as they do not have any yard, especially the apartment dwellers.
Many people have the space for gardening who love gardening but are unable to practice it because of the topography around their house.
Most of the time, the problem is that the land around the house is sloping, and hence it is not practical for something like gardening. While there are many ways out of this problem, the solution is subjective, including the land type, land size, etc.
But before talking about the solution to this problem, there is a bigger question that needs to be answered first: “Why is Sloping land not good for gardening?”.
Why Is Sloping Land Not Suited for Gardening?
Sloping land, which is significantly steep, is not suited for gardening purposes, and there are many reasons behind this.
Soil Erosion: Soil erosion is the phenomenon of the removal of the topsoil from the soil bed, leaving the land devoid of its most fertile layer. A sloped surface is infamous for accelerating soil erosion in an area. With the help of agents like wind and water, the soil can be eroded very easily.
Low Irrigation: If you are thinking of starting gardening on a sloped surface, you must think twice before doing this as you cannot irrigate the plants properly on a sloped surface. The water provided for plants in the upper part of the slope quickly flows down to the slope’s bottom. This will ruin the plant’s life.
Water Stagnation: If you have fenced your area, then there might be an accumulation of water at the bottom of the slope because water falling all over the slope gushes over there. This can lead to stagnation of water, which can become breeding grounds for mosquitoes and many deadly diseases.
So now that we are aware of the troubles of gardening on a sloped surface, let us learn how to convert a sloped surface into a flat one where you can grow your garden as per your desire.
Given here is a step-by-step guide that answers the query of “How to level garden” in the best possible manner and will help you create a garden surface out of a sloped surface.
How to Level Garden – Step by Step Approach?
Step 1: Know the Area You Are Working On
First things first, you need to be aware of the area you are working in. Make sure that all the pipelines and wirings that must have been underground having been identified. If you are not aware of any pipes or wirelines, inquire the local authorities about the same.
This is to be done beforehand so that the rest of the procedure goes smoothly and ensures you do not run into any trouble. This step must be the rule of them when thinking of restructuring any landform.
Step 2: Identify the Rise and Run of Your Garden
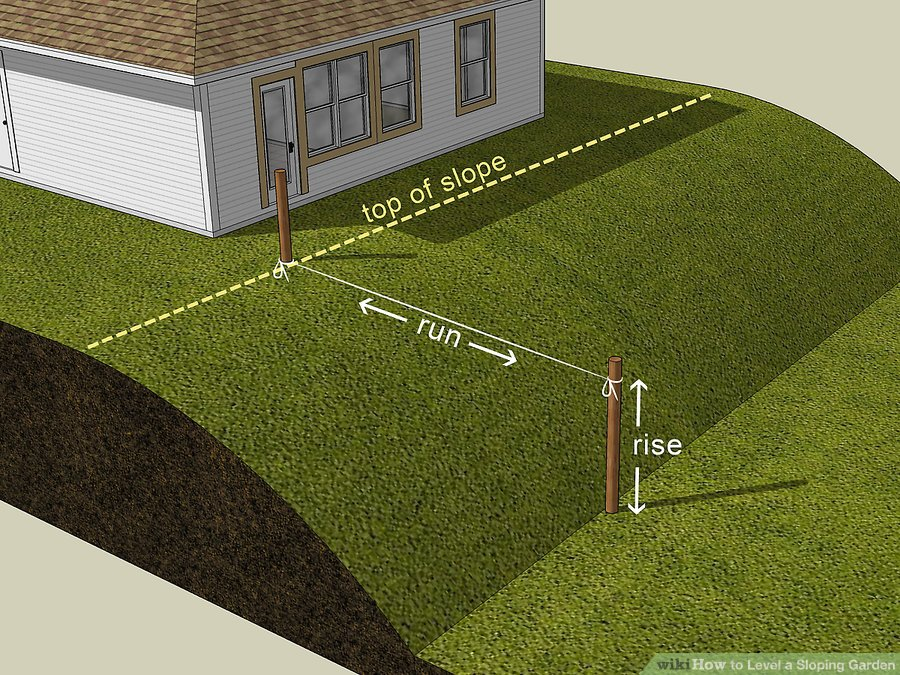
When dealing with a sloped land, there are two terms that you must be aware of. These are (a) rise and (b) run. The run refers to the slope’s length, and the rise refers to the height of the slope.
For measuring the rise and run of the slope, you are required two wooden or metal stakes. These stakes are required to be pounded in the ground, one at the top of the slope and one at the bottom.
After making sure that the stakes are standing upright, tie a string at the bottom of the first stake (at the top of the slope), and the other end should be tied to the other stake in correspondence.
This means that the string should form 90-degree angles with both the stakes. The length of the string hanging between the stakes is the run of the slope and the height from the bottom to the point where the string is tied on the second stake is the rise of the slope.
Rise and run of the slope are very important for implementing the next step that follows.
Step 3. Deciding the Number, Length, And Height of The Terrace
When converting a steep land into a flat one, the best option is to convert that part of the land into step-like terraces that are flat and easily cultivable.
The benefit of doing this lies in the fact that you will not have to work more rigorously and will not have to unearth the whole part of the land for converting the land into a flat one. This also prevents soil erosion very effectively.
While planning the number of steps, there are two decisions that you will be required to make. One being the height of each step from the previous step, and the second would be the length of each step.
These two decisions should be determined by the size of the rise and the run. Usually, you will want each step to be of greater length as it needs to be easily cultivable. A length of 5 ft is advised.
Do not go for a greater length as the step may break or collapse. The average height of the step should be 2 ft. When making all these decisions, try to map everything on a piece of paper for convenience sakes.
Step 4: Marking the Land Accordingly
After planning the number of steps, you are required to mark the land according to the planning. This will include marking the borders of each step so that you do not dig in a place where it is not required. Mark, in the form of parallel lines.
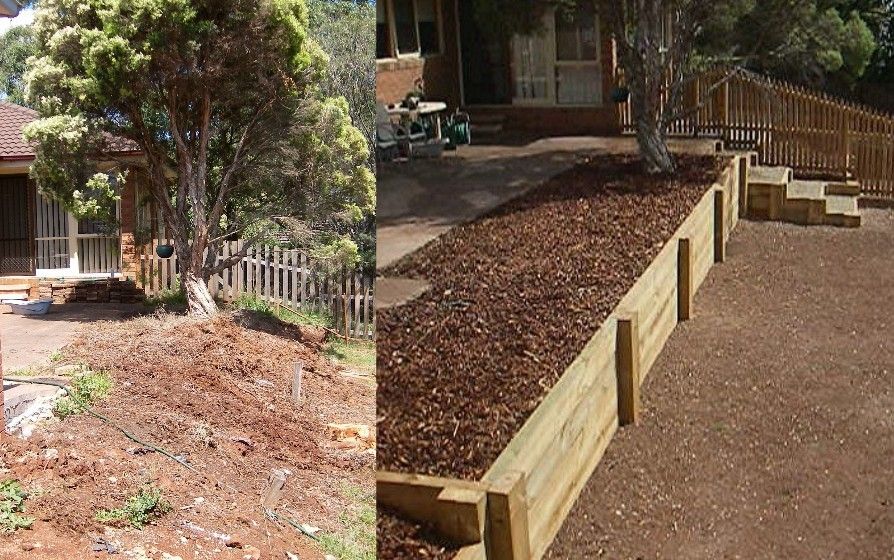
Step 5: Plan Your Boundary Walls
Now, you are required to plan the boundary walls for the steps. You can either choose from timber or stone boundaries. Step wall is essential so that each step’s rigidity is maintained and that the step does not collapse after planning the boundary.
Dig along the markings made in the land. The pit’s size should be at least 3 to 4 ft deep and there, and it should be wide enough to fit the walls and still have some space left. The wall should leave 1 to 2 inches of space on both sides of the wall.
Step 6: Water the Land A Day Before Work
The next step-in how-to level garden requires you to water the land a day before digging and stuff. Watering the land properly will make it moist, and it will be easier for you to work with it. Dryland is challenging to dig and can give you many problems. This way, your work can be delayed many a time. It is in your best interest to water the land before working on it. Do not over the drain, as an over drained soil is as challenging to work with as the dry one.
Step 7: Put the Wall Boundaries
Now it is time for you to put the wall boundaries in their designated positions. This is done before leveling because once the wall is installed, the steps become more comfortable to work with. If installing a timber wall, make sure to put holes in each plank and insert a pipe or a rod in them to bind all the planks together.
Step 8: Start the Leveling
Now, you are all set to level the ground. You will be required a shovel to dig the land and a grate or fork to level it properly. All of these are readily available online. You can carry out this process on your own or can hire professionals to do it for you.
This also depends on the size of the land you are dealing with. Make sure to dig as planned. When digging the slope, make sure to move the soil from the bottom of the next step to the other side. This will check on the soil erosion.
If you find that the steps are two lengthy, you can insert another step between the two steps. The process to be carried out is the same.
Step 9: Use A Soil Compactor If the Soil Is Too Moist or Airy
If you feel that the soil is too moist or airy and that it will be unable to withstand the test of time, then you can use a powerful tool called the soil compactor.
These machines can help you suck all the unwanted air and water present in the soil, making it compact and durable.
These machines are readily available on amazon. You can also rent these machines, but you may require this a lot more times than you know and hence it is best for you to buy one than rent it.
Conclusion
These are steps on how to level a garden. Leveling a garden may be a cumbersome task for you if you have a big plot of land to take care of. You can call in professionals who possess the right expertise and machinery to execute these kinds of tasks.
Skipping any of these steps may prove to be dangerous for your future garden. Also, keep the steps and the wall on a regular check to make sure no cracks or problems of that sort arises. You can plant the seeds plants on the steps or place pots on the steps with plants growing on them.
Make sure to take regular care of it. Water the plants properly but do not over irrigate them as it may lead to other kinds of problems like cracks in a step.
It is always an excellent option to map and calculate everything on a piece of paper and then execute everything precisely. This way, the chances of irregularities are substantially reduced.