How to Successfully Grow Canna Lily from Seed
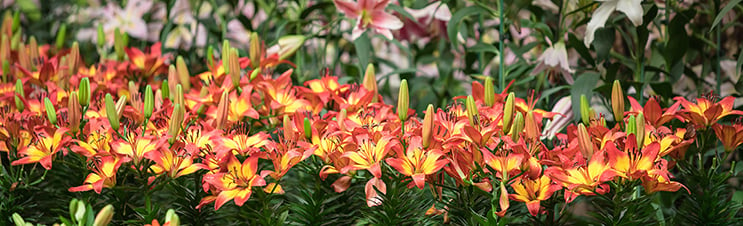
Table of Contents
Flowers are often a major part of decorating your house, office spaces, or any other area. We widely use them for gifting, to show our affection and emotions to any friend, partner, or family member. For all these activities, we usually buy flowers from the market and give them to important people. But you know what will make these flowers more special for your loved ones? Growing them on your own and plucking them freshly to gift them.
Working in our garden and watching the plants grow like babies is a pleasure in itself. Then they give the fruits or flowers, which is the best feeling ever. If you are someone looking to take up gardening as your hobby, this is where you start. In this way, you do not just save money on buying flowers but also invest your time in one of the most beautiful activities of gardening. In this article, you can learn about how to grow canna from seed.
Let us learn more about canna lilies.
What are Canna Lilies?
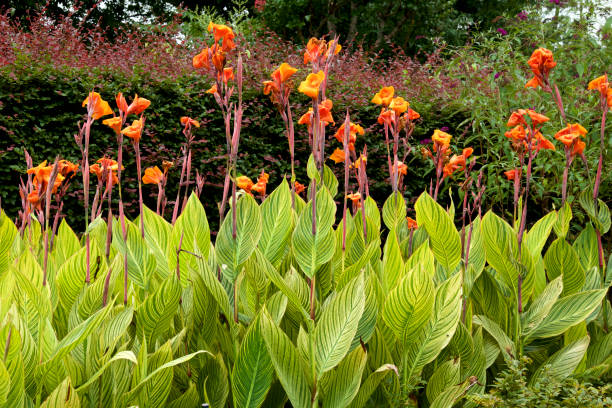
Canna lilies, also called cannas, are plants from tropical regions that have outstanding green foliage. They are rich in their look and are available in plenty. If you love to have rich green foliage, this would be your favourite flower. They usually have curved petals that curl at the end. They usually come in two colours, mostly in vibrant warm shades from the colour palette.
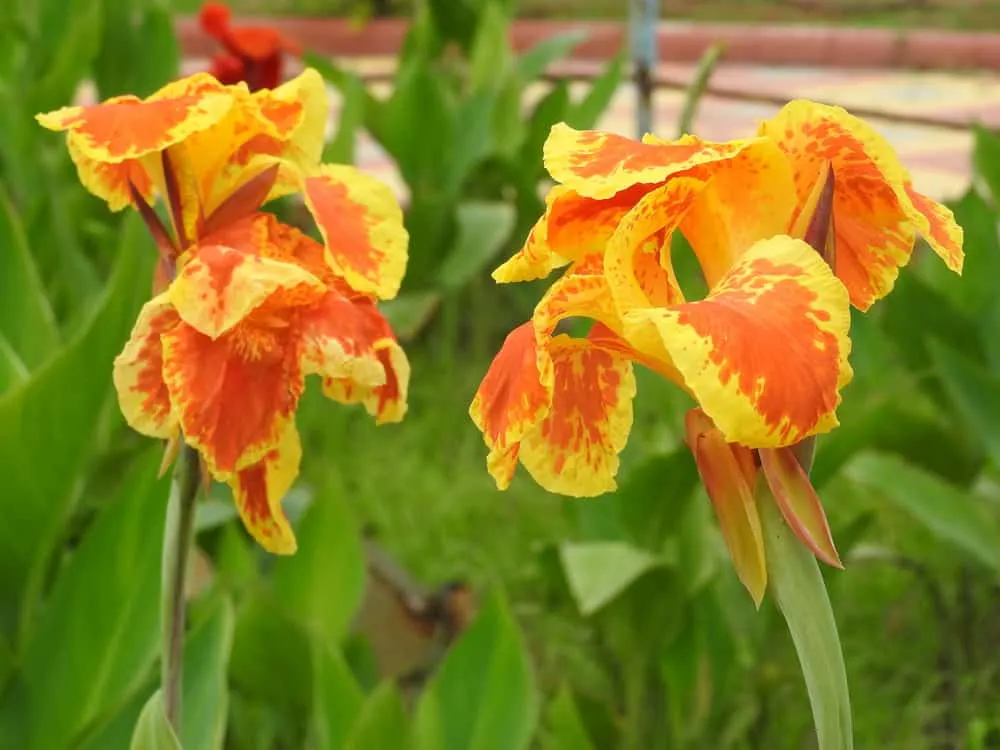
These plants can be easily grown from their seeds if you follow the correct process and be patient with the results. It will give you a bulk of vibrant, shining flowers, adding all aesthetics to your garden as well as your house. Now let’s see how to grow canna from seed. Witness how beautiful canna lilies look in your backyard. If you want to watch your canna lilies grow in your garden, follow this 5 step procedure to get started with it.
First, let’s prepare ourselves and gather all requirements for planting cannas lilies.
Preparation for Growing Canna Lily from Seed
Required Materials
Time to Sow the Seeds
Almost seven weeks before the last expected frost. This is mid-February in mid-UK
When to plant
When the soil has become warm after the first frost. Mostly April in the UK
How to Find the Canna Seeds?
If you do not have canna seeds around you, it is not a difficult task to find them. You just need to find a healthy and well-grown canna lily that has been planted or plucked recently and then gather seeds from them. They can be gathered if you have your canna plant already, or you can take them from your friends, family, or neighbours and check for seeds in them.
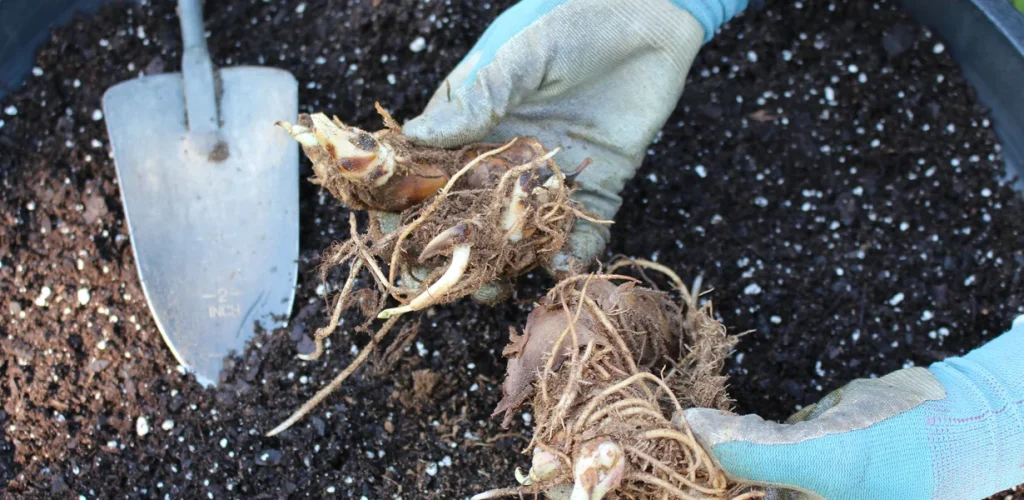
If none of this is possible and you cannot find any canna lily plants near you, you can find them online and buy them on various sites like Amazon, garden centres, companies, nurseries, etc. Further, they can also be found in mail-order catalogues, even though they are rhizomes instead of seeds.
How to Grow Canna from Seed?
The process of growing canna lilies from seeds requires preparation from 1 to 2 months before planting the seeds. This time is required for the scarification of the seeds before they can germinate. Further, all instructions related to harvesting, planting, scarification, etc., must be followed properly to get the best possible harvest of canna lilies in your outdoors.
See for yourself how beautiful canna lilies will look in your backyard. If you want to watch your canna lilies grow in your garden, follow this 5 step procedure to get started with it.
Here’s a detailed description of how to grow canna from seed.
Step 1: Harvest the Seeds
After finding the seeds, here’s the step-by-step process of ‘how to grow canna from seeds’ you can follow.
The easiest step in the entire process of growing canna from seed is harvesting. If you cannot find the seed pods, look for a fruit-like structure that is slightly spherical and has small spikes or bumps on it.
- After collecting the flowers, you must get the seeds out. But before that, let the pods convert to brown colour.
- Let the pods dry well, and you will see them open with a crack.
- As they begin to crack, cut these pods finely from the plant.
- Now you can follow one of the two ways- either store the pods and wait to remove the seeds from the pod till the time you are ready, or you can immediately get to work and remove the seeds from the pod.
- Now you need to sort the seeds that can be used from the non-viable ones. It is not a difficult process to identify which ones are which.
- The best way to do the sorting is to notice its colour. Healthy canna seeds that can be used will look brownish-black or black and will have an oval or completely round shape.
- All the seeds, other than those that are cracked, broken, or not of the right colour, must be thrown out from the gathering immediately.
Step 2: Scarify the Seeds
This is the most important step in the process of ‘how to grow canna from seed’. This process is conducted to enable the embryo to erupt from the seed when planted. Hence, the hard shell in canna lilies seeds must be penetrated. This process is easy and can be conducted in various ways. But to conduct it most quickly, you can use a nail cutter in your house.
Here’s how you can use a nail cutter to scarify the seeds.
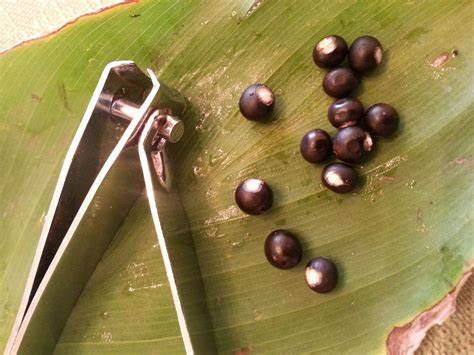
Hold the seed in one hand and the nail cutter in the other. Now use the corner of the nail cutter to prick in the Canna seed at any place on it. The interior of the seed has to be white. You must prick the seed such that a small part of the white interior is visible to you. The prick must not be very huge or deep, just enough for the embryo to come out of it.
By mistake, if you cut any deeper or larger than required, there is no need to worry about it. There is no harm in cutting a large part of the outer layer. This way, you can conduct the entire process of scarifying the seeds.
Step 3: Soak the Seeds
Once all of your seeds are scarified, you must go on to the next step of soaking the seeds. You must soak seeds in water for around 2 to 5 days. This process is not compulsory to follow but believe me, it speeds up your process as it softens the outer layer of the seed, which is not pricked, and gives early access to water to the embryo.
Here’s how you can conduct this process-
- Take a bag with a seal or container that has lead.
- Put water in the container or bag and place your canna seeds. Cover the container well.
- Let the seeds sit there for at least 1 to 2 days.
- By the end of the second day, you will see a change in the seed.
- There will be a nodule coming out through the end of the seed.
- The next day, you will be able to see the taproot that has formed.
- Also, the part of the seed where you have pricked will look a lot bigger than before.
Now you will see that the seeds have sprouted. Wait till the seeds to be of 3 to 5 millimetres before removing them from the container. You can store them for a few more days till you are ready to plant them.
You will notice that some taproots are unusually big. The size of taproots is dependent on the time of soaking them. If you put a few seeds in regularly, you will notice that the ones that were put in the first will have the biggest taproots.
Step 4: Sow the Seeds
After you complete the process of seed germination, now is the time to plant them in your garden.
You can plant the seeds with the help of a good potting mix. You must even out the soil in the place you want to pot and prepare the pots or flower beds.
- Ensure that you water them thoroughly and also allow the water to drain well for effective results.
- After you complete making the pots, the next step is to create holes in the soil that are just one inch deep.
- Now it’s time to plant each seed in one hole and ensure that its root is facing downwards in the soil.
- Cover the hole with soil and water it properly to help the seeds settle well.
- Ensure that your pots are placed in a location that receives direct sunlight, whether it is indoors or outdoors. However, you must protect them from extreme heat.
- Keep the pots away from freezing temperatures of excessive rains.
- Always keep the soil moist and do not allow it to dry out
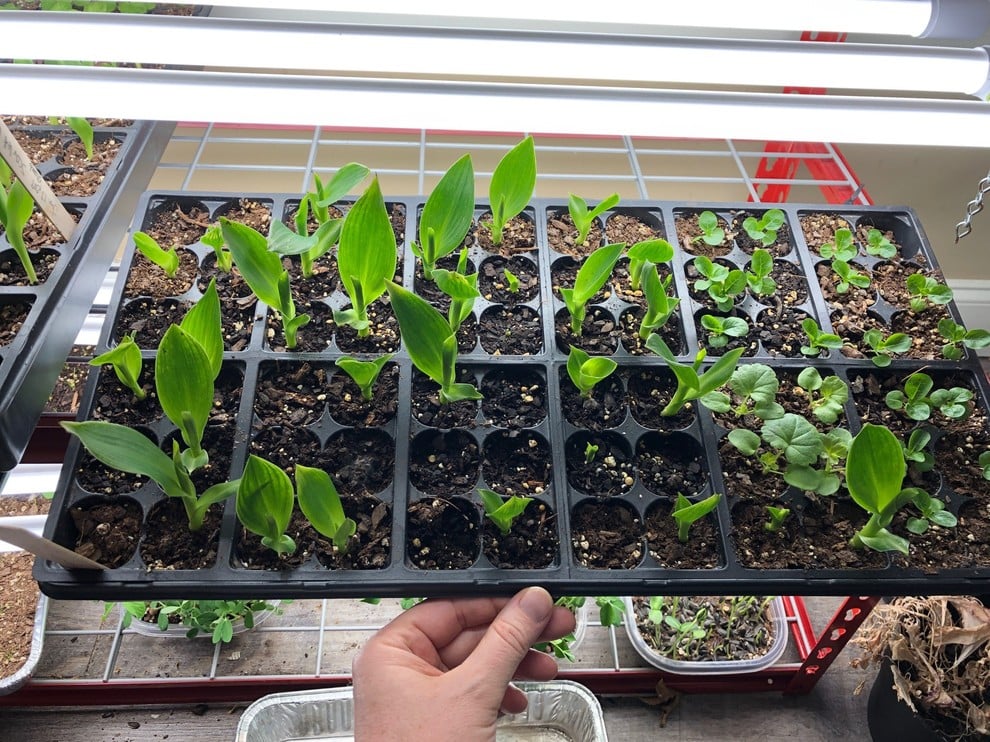
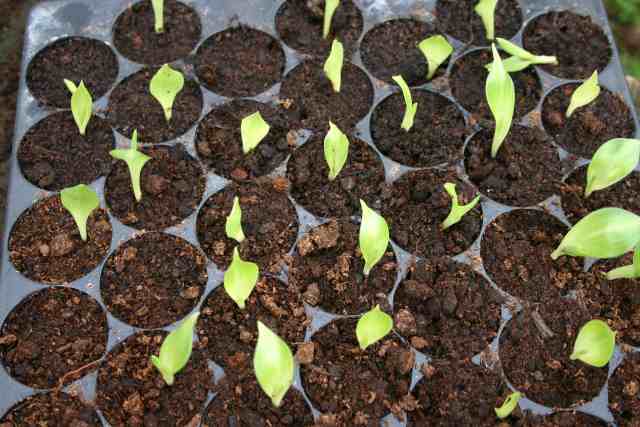
Now that your major work is done, you must wait for the seeds to sprout. It usually takes 5 to 7 days for the sprouting to begin. Small green shoots will come out of the soil when the seeds break out. They will get bigger and bigger with time. As they grow, they will unfold, and you will begin to witness the emergence of new leaves on your plant.
Step 5: Plant the Seedlings
You can say that your seedlings are now well established when they have two-three leaves coming out of the seed. You can take them and re-pot them in another container or elsewhere. You can also gift them to your loved ones so that they can grow their canna lilies.
- Canna lilies look great on flower beds. If you have a garden, you can plant them on its edges as a border because of its height. Also, they grow fairly well in a pot as single plants. But before planting the seedlings, ensure that there is no risk of frosting.
- You must plant them 8 to 12 inches apart to give them the space to grow and become huge.
- Ensure to water the plant in plenty, but also don’t make it soggy.
- You can take someone’s help to choose the fertilizer for canna lilies, or you can just use the general-purpose fertilizer.
For the trees to grow large and canna lilies to bloom, it will take almost two to three years. However, if you take proper care of the seeds, seedlings, and plants with the right sunlight, temperature, and water, they may show some early blooms as well.
About Hybrid Canna Lilies
If you want outstanding and vibrant flowers from the canna lilies, such results can be achieved by using hybrids. However, some of the hybrid flowers might not produce the seeds required to plant. If you plant seeds from a hybrid flower plant, the seeds might not be the same as the parent plant. Hence, in such cases, the flowers that you will get after two or three years may be of different colours than the parent flowers. It is caused due to the cross-breeding of the parent plant.
Conclusion
Growing canna lilies from seeds is a mid-level difficulty process. You must follow all the steps sincerely and give the plant your time and patience to witness the beautiful, elegant, and vibrant flowers. The process requires you to do fine work in terms of pricking the seeds and planting the seedlings for accurate and expected results.
Moreover, it requires constant care to place the plant in the right amount of sunlight and consistently give the right amount of water. What are your thoughts about planting canna lilies at your home?
Tell us more about them in the comment section below.