
Top 15 DIY Advent Calendars to Make this Christmas
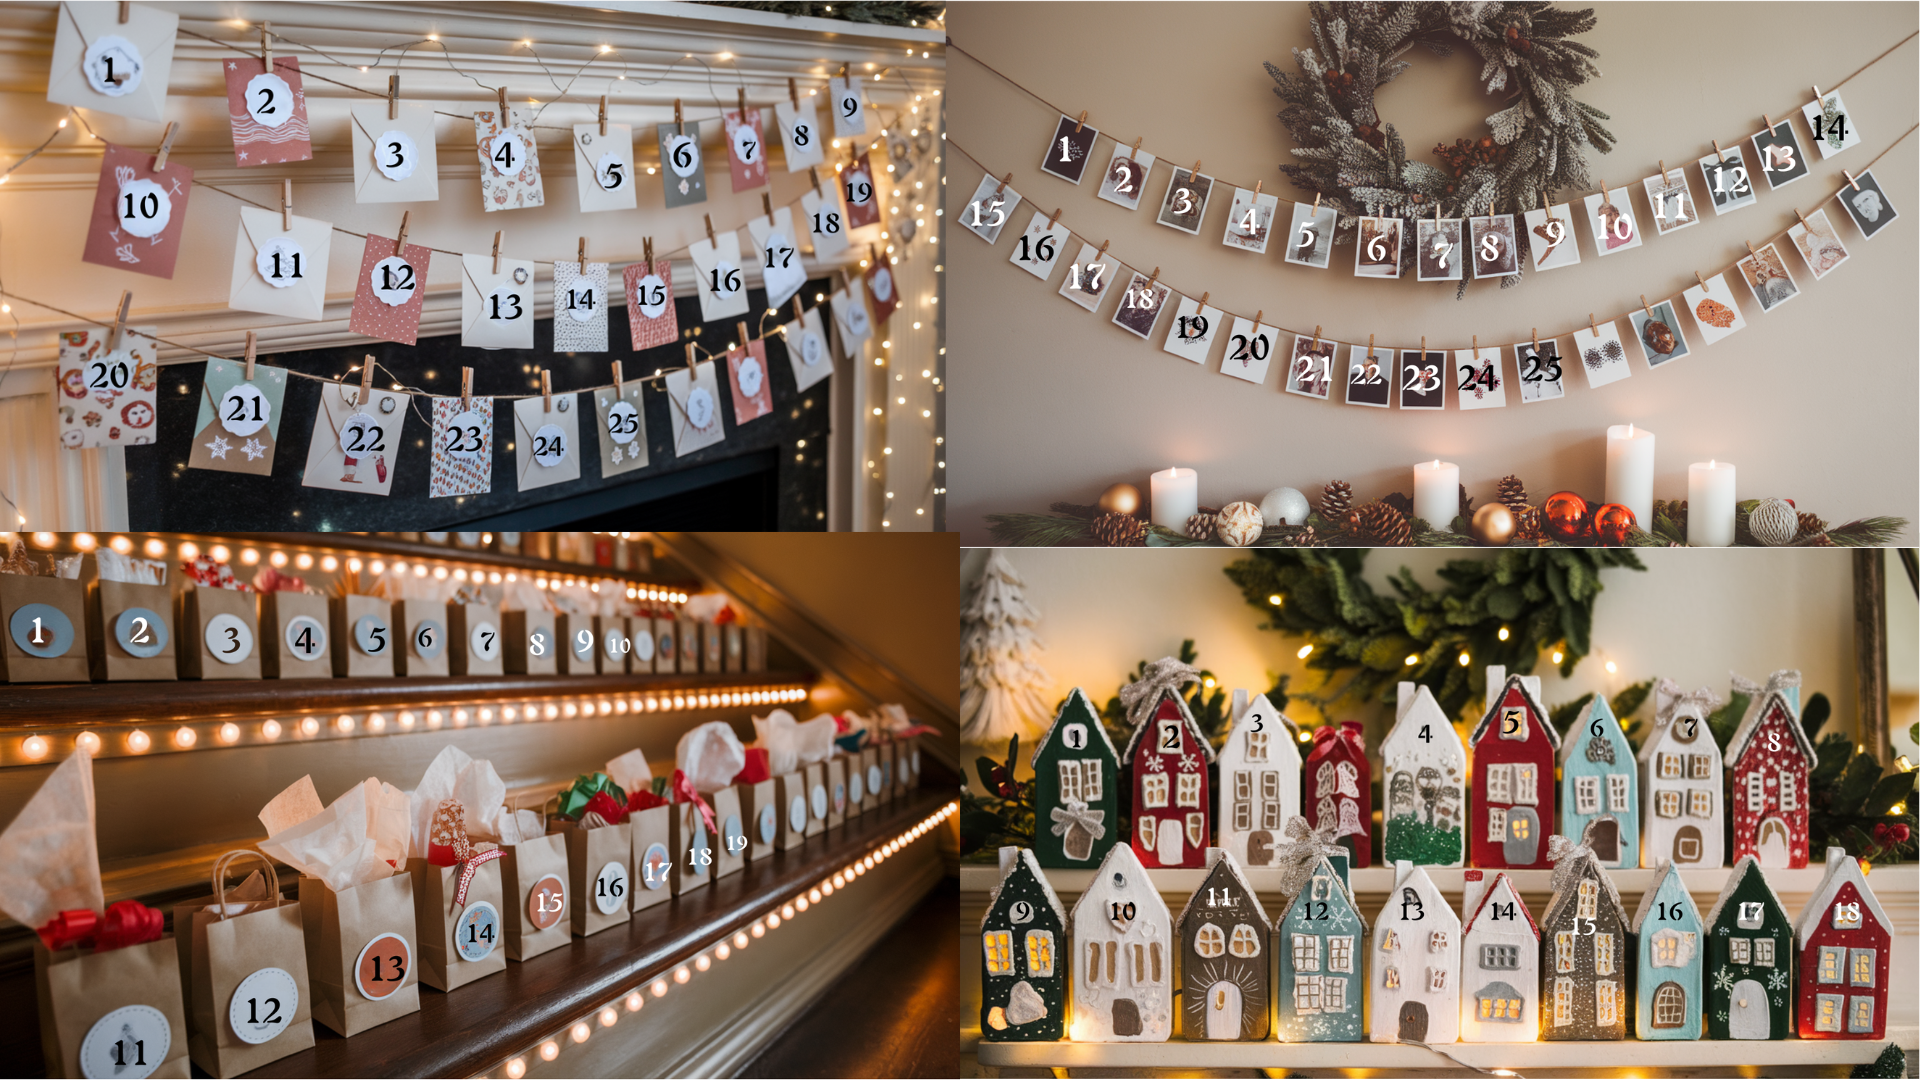
Table of Contents
Counting down to Christmas is one of the season’s most joyful traditions, and creating your own advent calendar makes the experience even more special.
Whether you love crafting, want to add a personalized touch to your holiday décor, or hope to surprise someone with a heartfelt handmade gift, DIY advent calendars offer a creative and meaningful way to celebrate the days leading up to December 25th.
From simple paper designs to pretty keepsake creations, there are ideas for every skill level, style, and budget.
In this guide, I’ve gathered twelve inspiring DIY advent calendar projects that are fun to make, easy to customize, and perfect for kids, couples, families, or friends.
Get inspired, gather your favorite supplies, and start crafting a festive countdown that feels uniquely yours this Christmas.
How to Turn Your Advent Calendar Into a Gift?
Turning your Advent calendar into a personalized gift is a thoughtful way to surprise someone special.
Start by choosing a style that fits their personality, whether it’s rustic, minimalist, or whimsical.
Fill each compartment with small, meaningful items such as chocolates, beauty samples, trinkets, handwritten notes, or favorite tea bags.
You can also add shared memories, inside jokes, or little challenges like “write a letter to Santa” or “sing a Christmas carol.”
Tailor the calendar to their interests, such as self-care, hobbies, or festive activities.
To make it extra special, add a heartfelt note or message for the first day. Finish by wrapping the calendar beautifully or placing it in a decorative box.
This personalized advent calendar gift offers 24 days of surprises and creates lasting holiday memories.
Creative Ideas for Unique Advent Calendars
Looking for fun, festive, and original countdown ideas? These unique DIY Advent calendars add personality and creativity to your holiday season.
1. Mini Christmas Village Advent Calendar
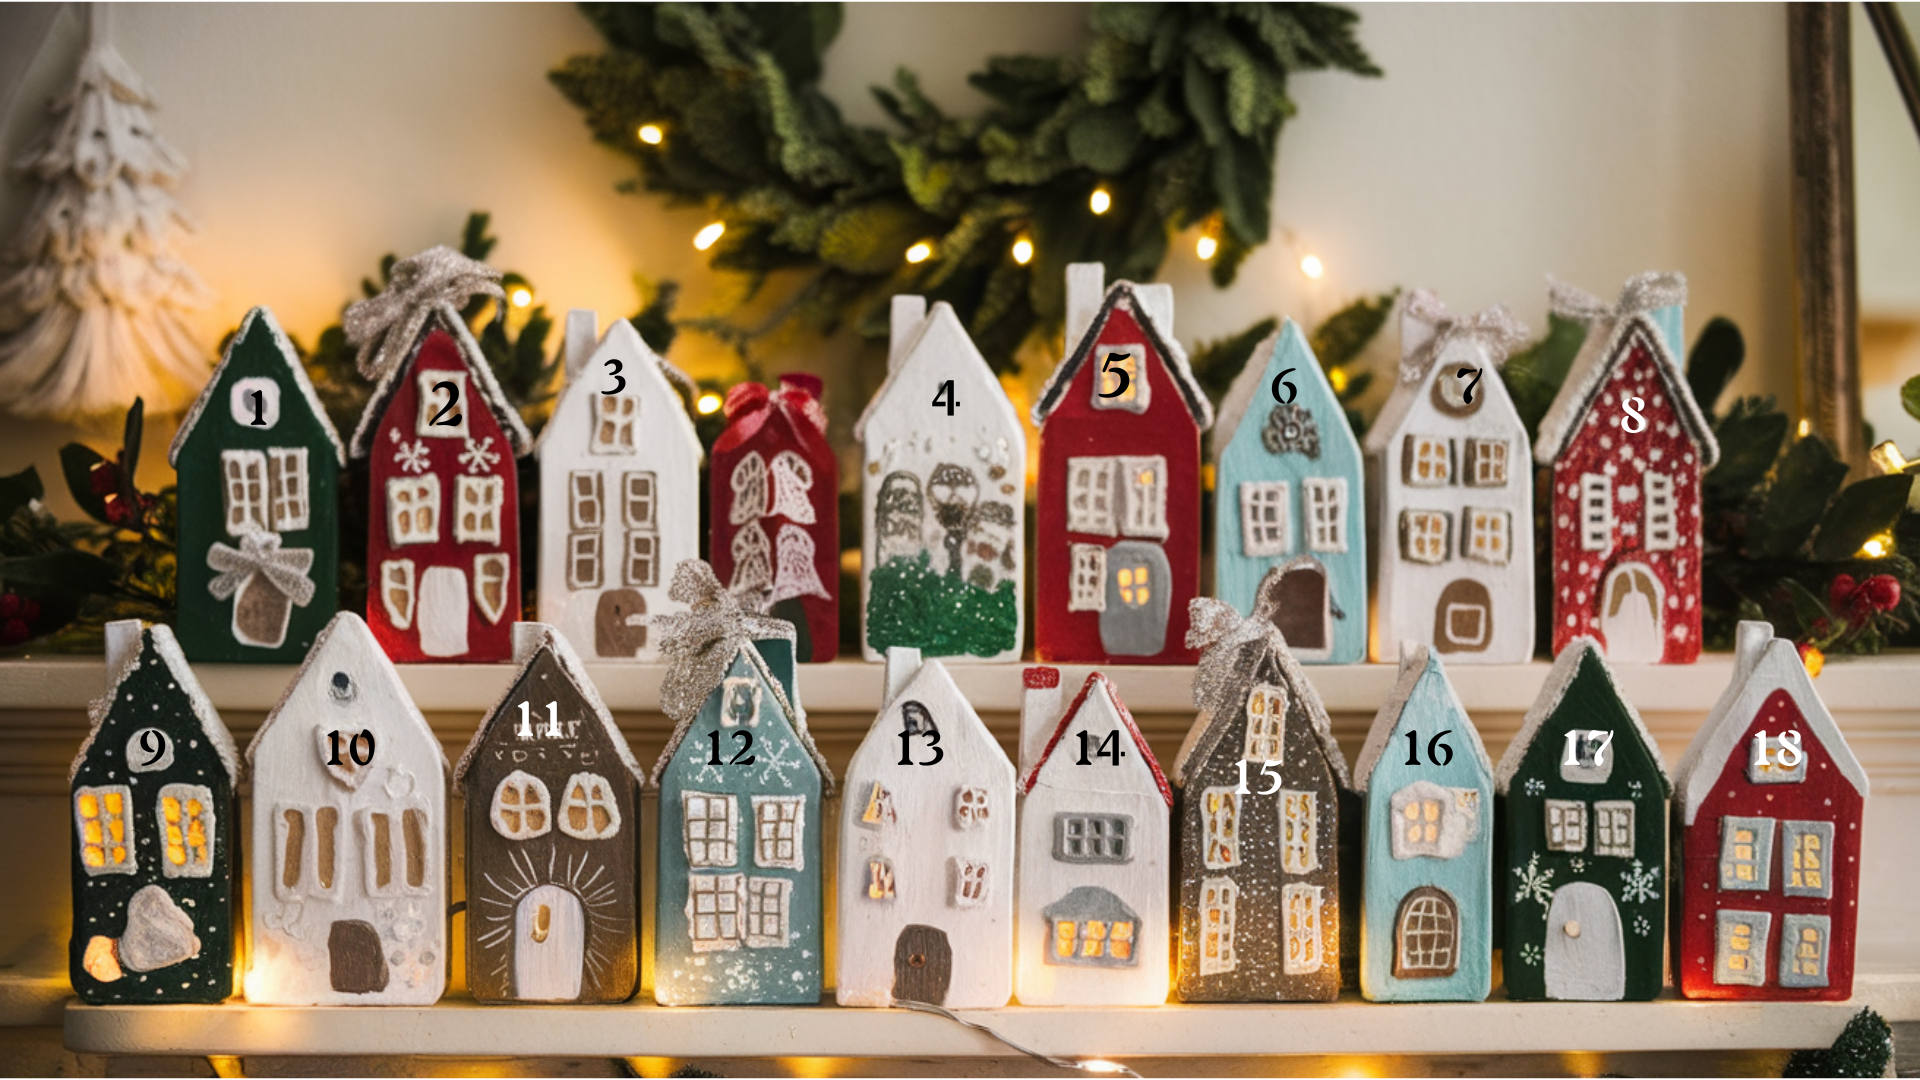
Create a charming winter village using 24 small cardboard or wooden houses filled with treats. Decorate each with paint, ribbon, or glitter, then display them on a shelf or mantel for a magical countdown.
This craft takes 2–3 hours and uses mini boxes, paint, glue, glitter, markers, and décor.
It’s perfect for adding a cozy Christmas touch and becomes a reusable décor piece each year.
Steps:
- Paint and decorate each mini house.
- Number the houses 1–24 and fill with treats.
- Arrange into a village display.
2. Hanging Envelope Garland Calendar
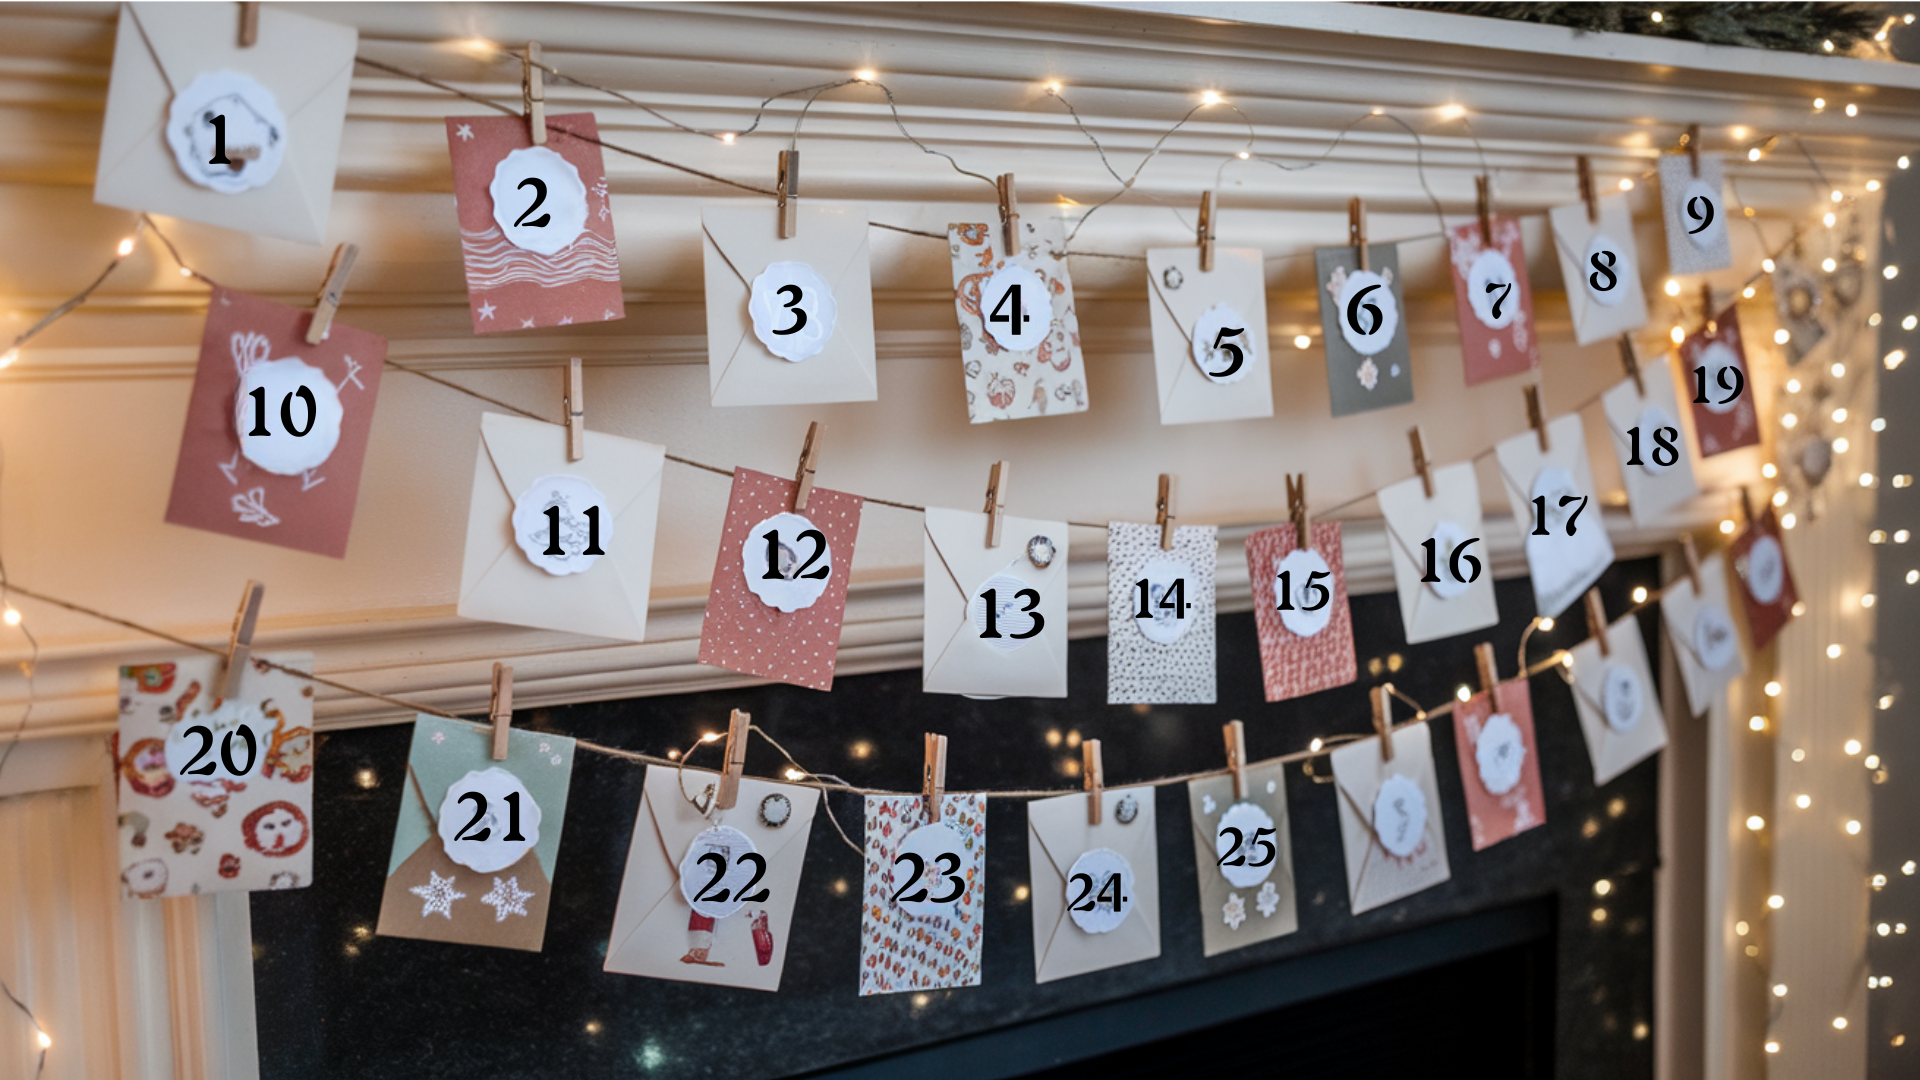
Create a simple, elegant Advent garland using 24 decorated envelopes. Each envelope holds a treat or activity and hangs from twine using mini clothespins.
This project takes 45–60 minutes and requires envelopes, twine, pins, stickers, and markers.
It’s an easy, beginner-friendly craft that beautifully decorates mantels, walls, or doorways while giving a festive countdown effect.
Steps:
- Decorate and number each envelope.
- Fill with treats or notes. Hang envelopes on twine using clothespins
3. Mason Jar Advent Countdown
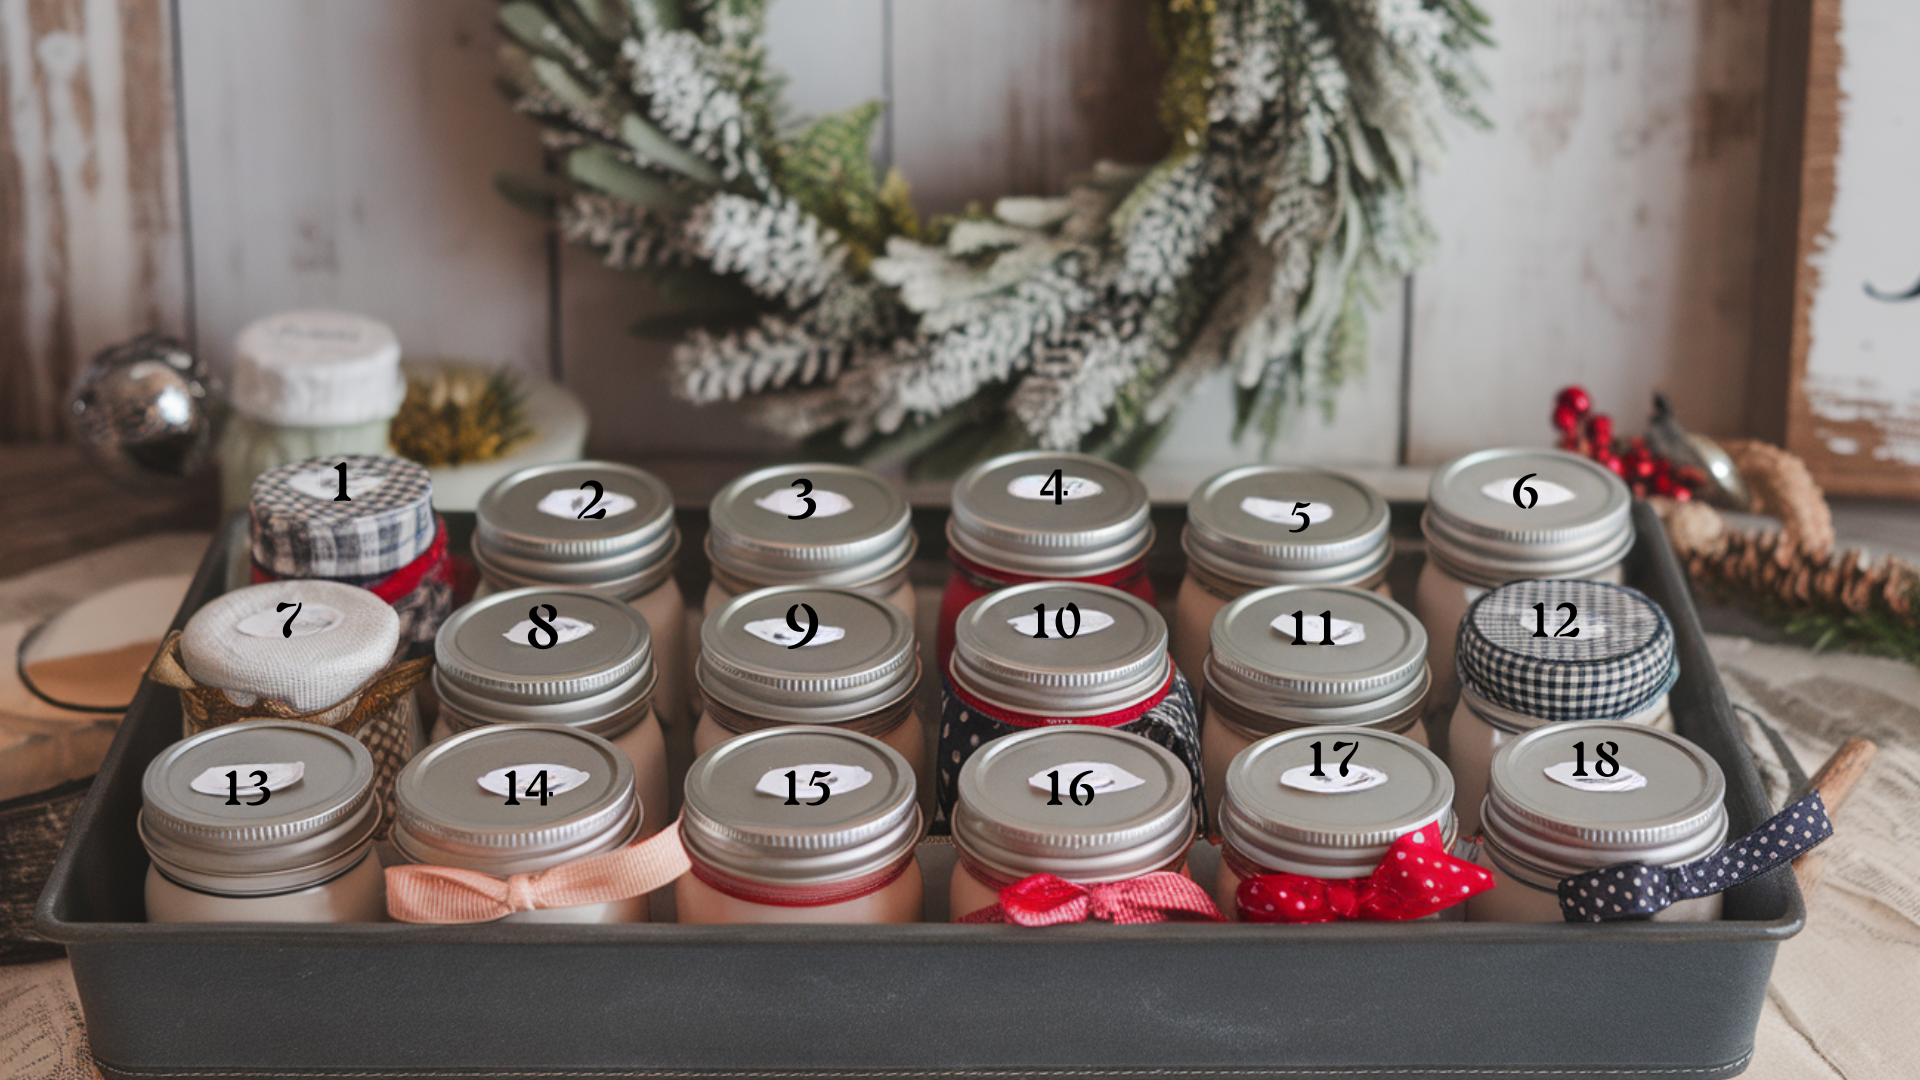
You can create a rustic-style countdown by using 24 mini mason jars or one large jar filled with small numbered capsules.
Each jar can hold candies, notes, or tiny surprises, and decorating the lids with ribbons or fabric adds a warm farmhouse look.
This project takes about 60–90 minutes and uses easy supplies like mason jars, labels, and ribbons.
It works as both a cute holiday display and a fun daily countdown, making it a nice choice if you want something that looks charming and feels handmade without much work.
Steps:
- Decorate jar lids and add numbered labels.
- Fill jars or capsules with small treats.
- Arrange jars in a tray or basket.
4. Matchbox Tower Advent Calendar
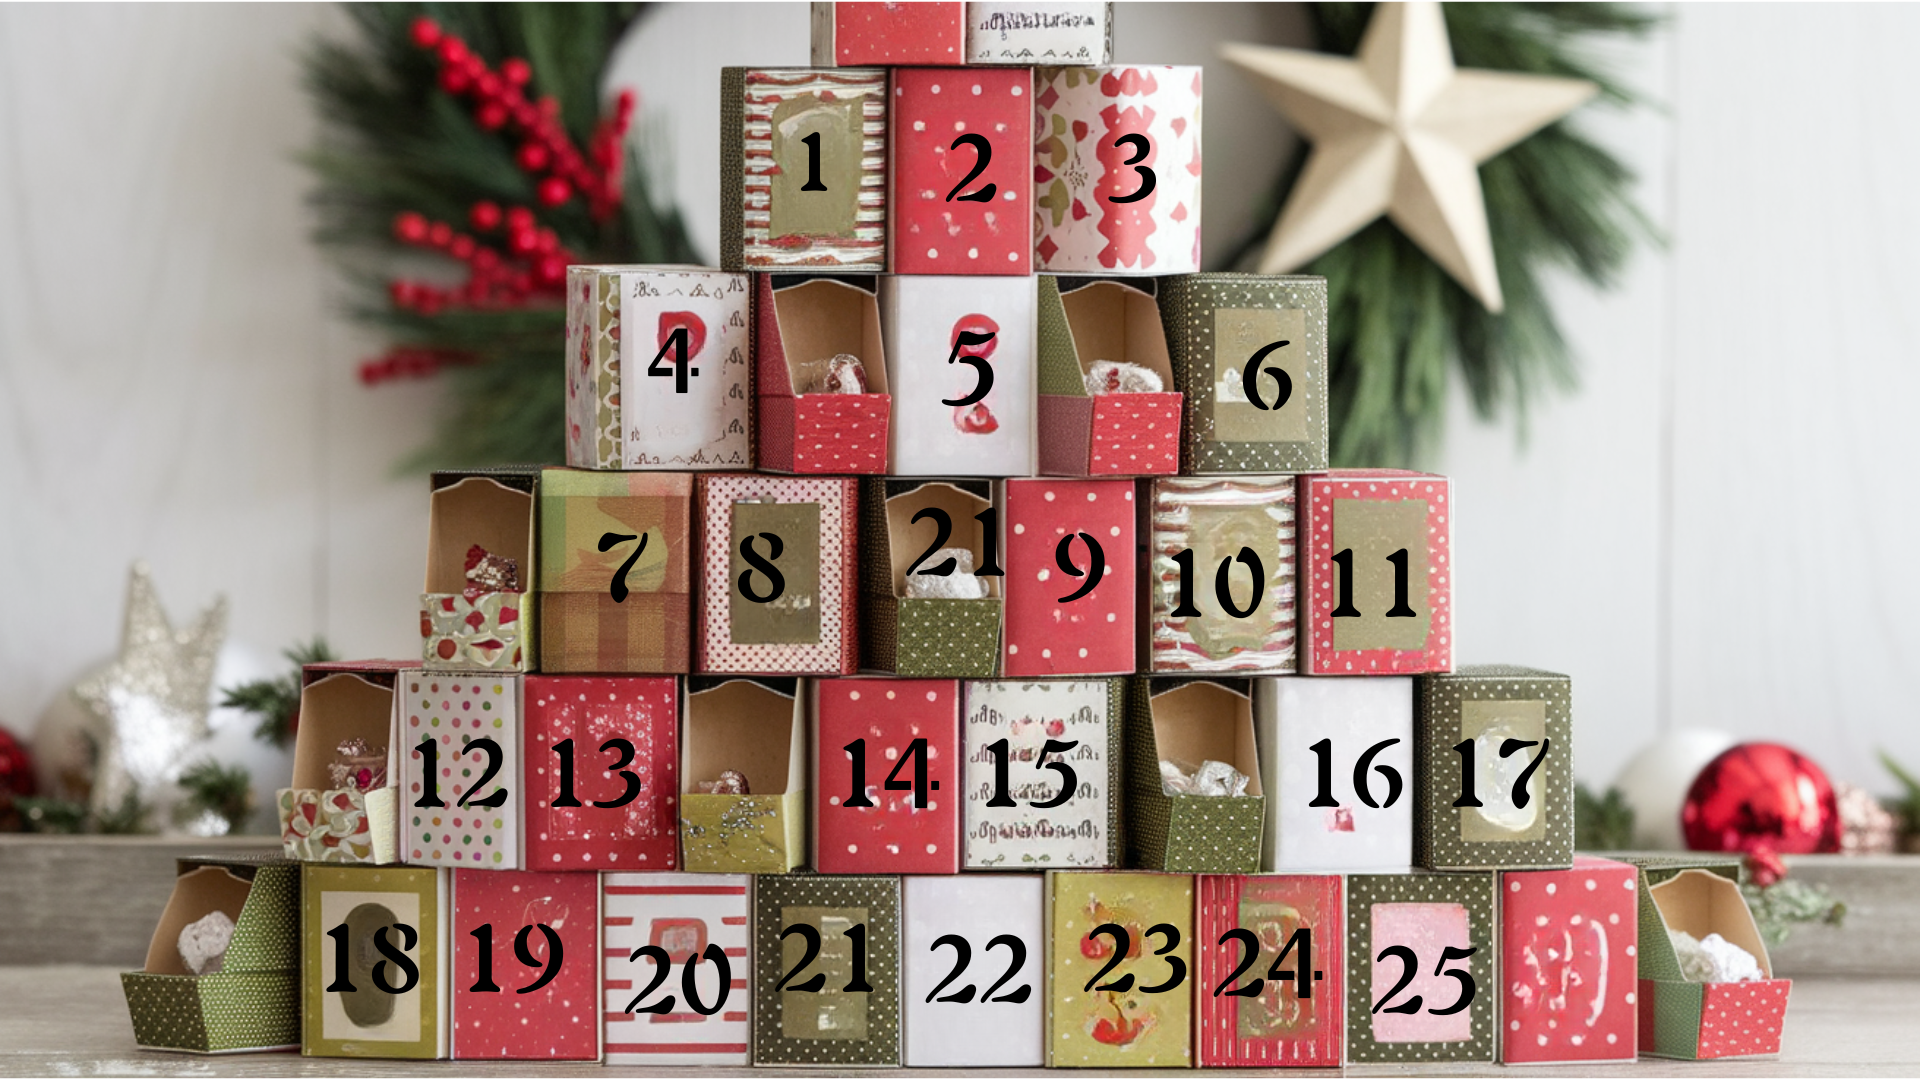
You can make a cute and compact countdown by turning 24 matchboxes into tiny drawers and wrapping each one in patterned holiday paper.
The little drawers are just the right size for sweets, notes, or tiny surprises, and decorating them feels fun and easy.
This project takes about 1–1.5 hours and uses simple supplies like matchboxes, glue, wrapping paper, and markers.
When you stack the finished boxes into a tower or a small tree shape, it becomes a playful display that fits perfectly in small spaces and brings a cheerful touch to any room.
Steps:
- Wrap matchboxes and add numbers.
- Fill drawers with treats.
- Stack into a tower or tree shape.
5. Paper Cone Christmas Tree Advent Calendar
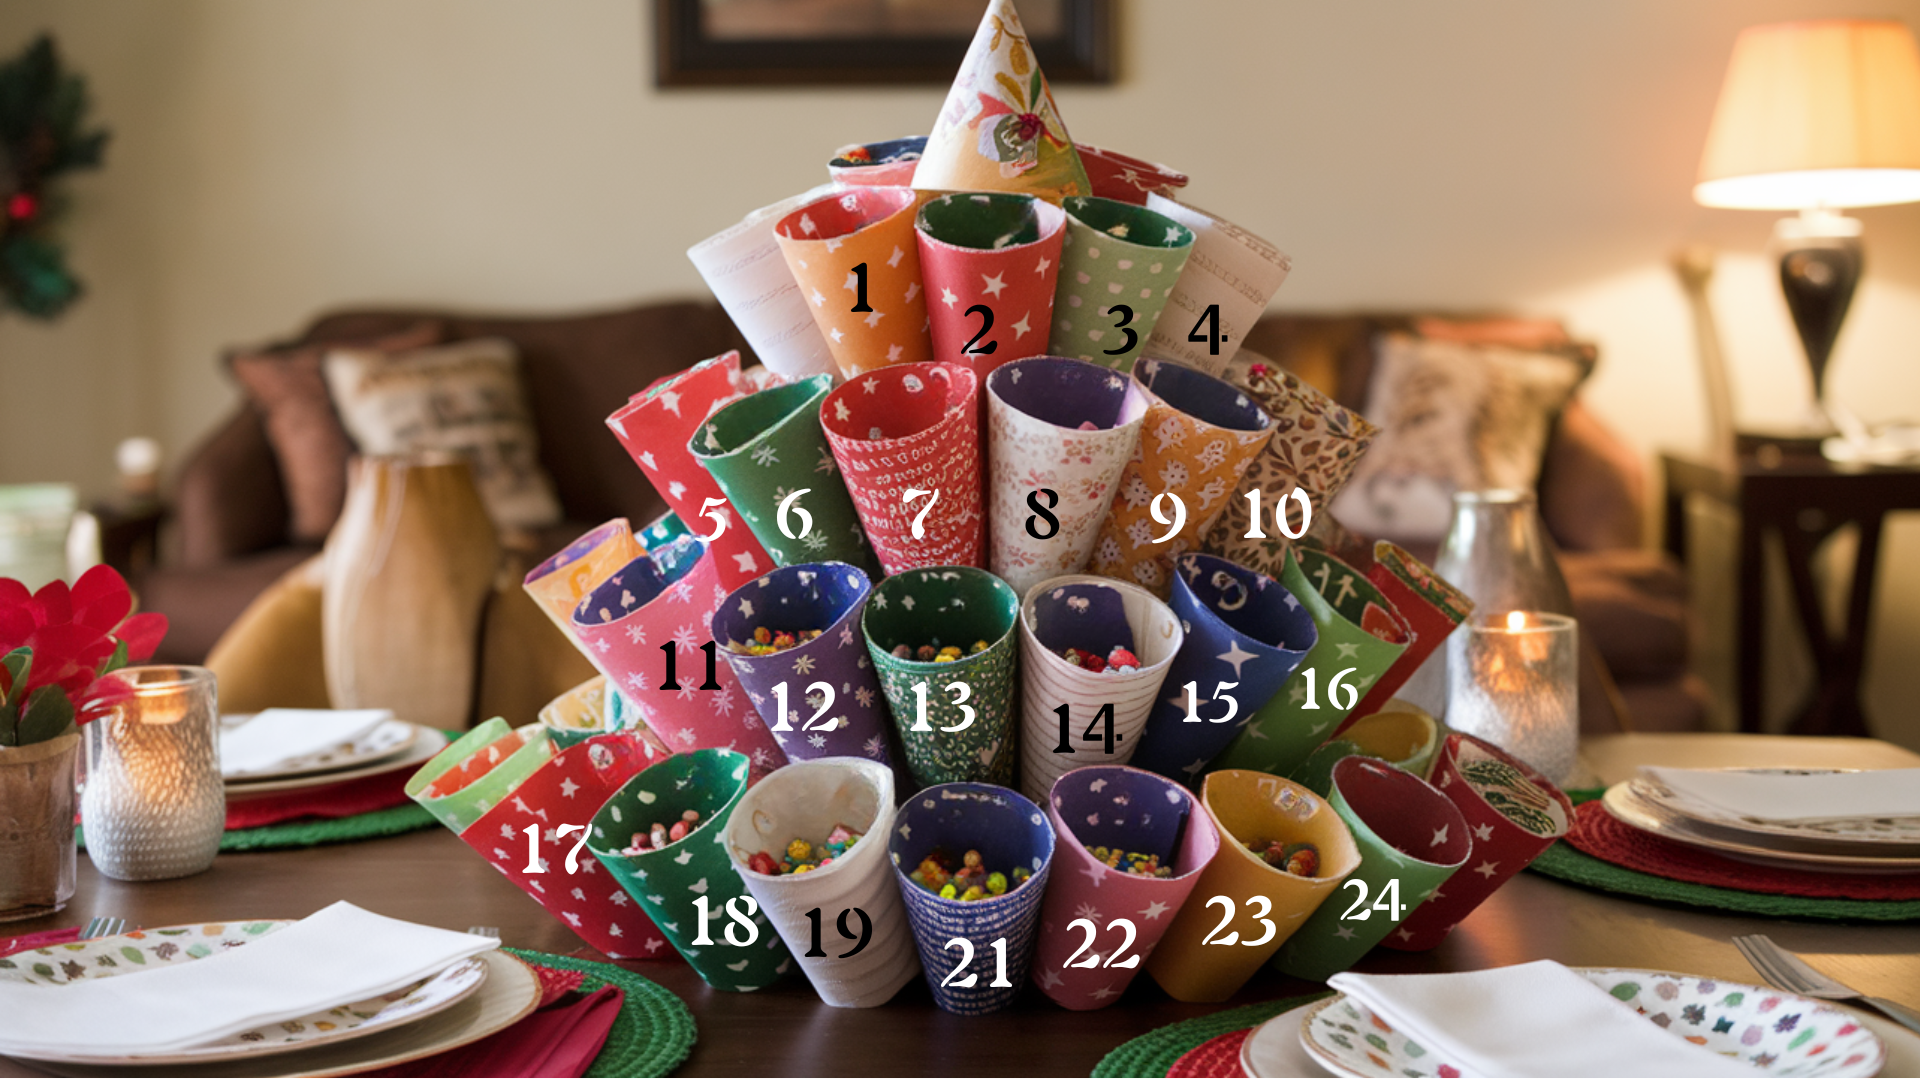
You can make a playful holiday centerpiece by rolling decorative papers into 24 cones and arranging them into a Christmas tree shape.
Each cone can hold candies, tiny toys, or simple notes, so kids get a small surprise each day.
This project uses basic items like craft paper, tape, scissors, and stickers, and usually takes about 1–2 hours to finish.
The final display looks bright and cheerful on a table, and the cone shapes make it feel fun and creative without needing special tools.
Steps:
- Cut and roll paper into cones.
- Number and fill each cone.
- Arrange cones into a tree shape.
6. Fabric Pocket Wall Hanging Calendar
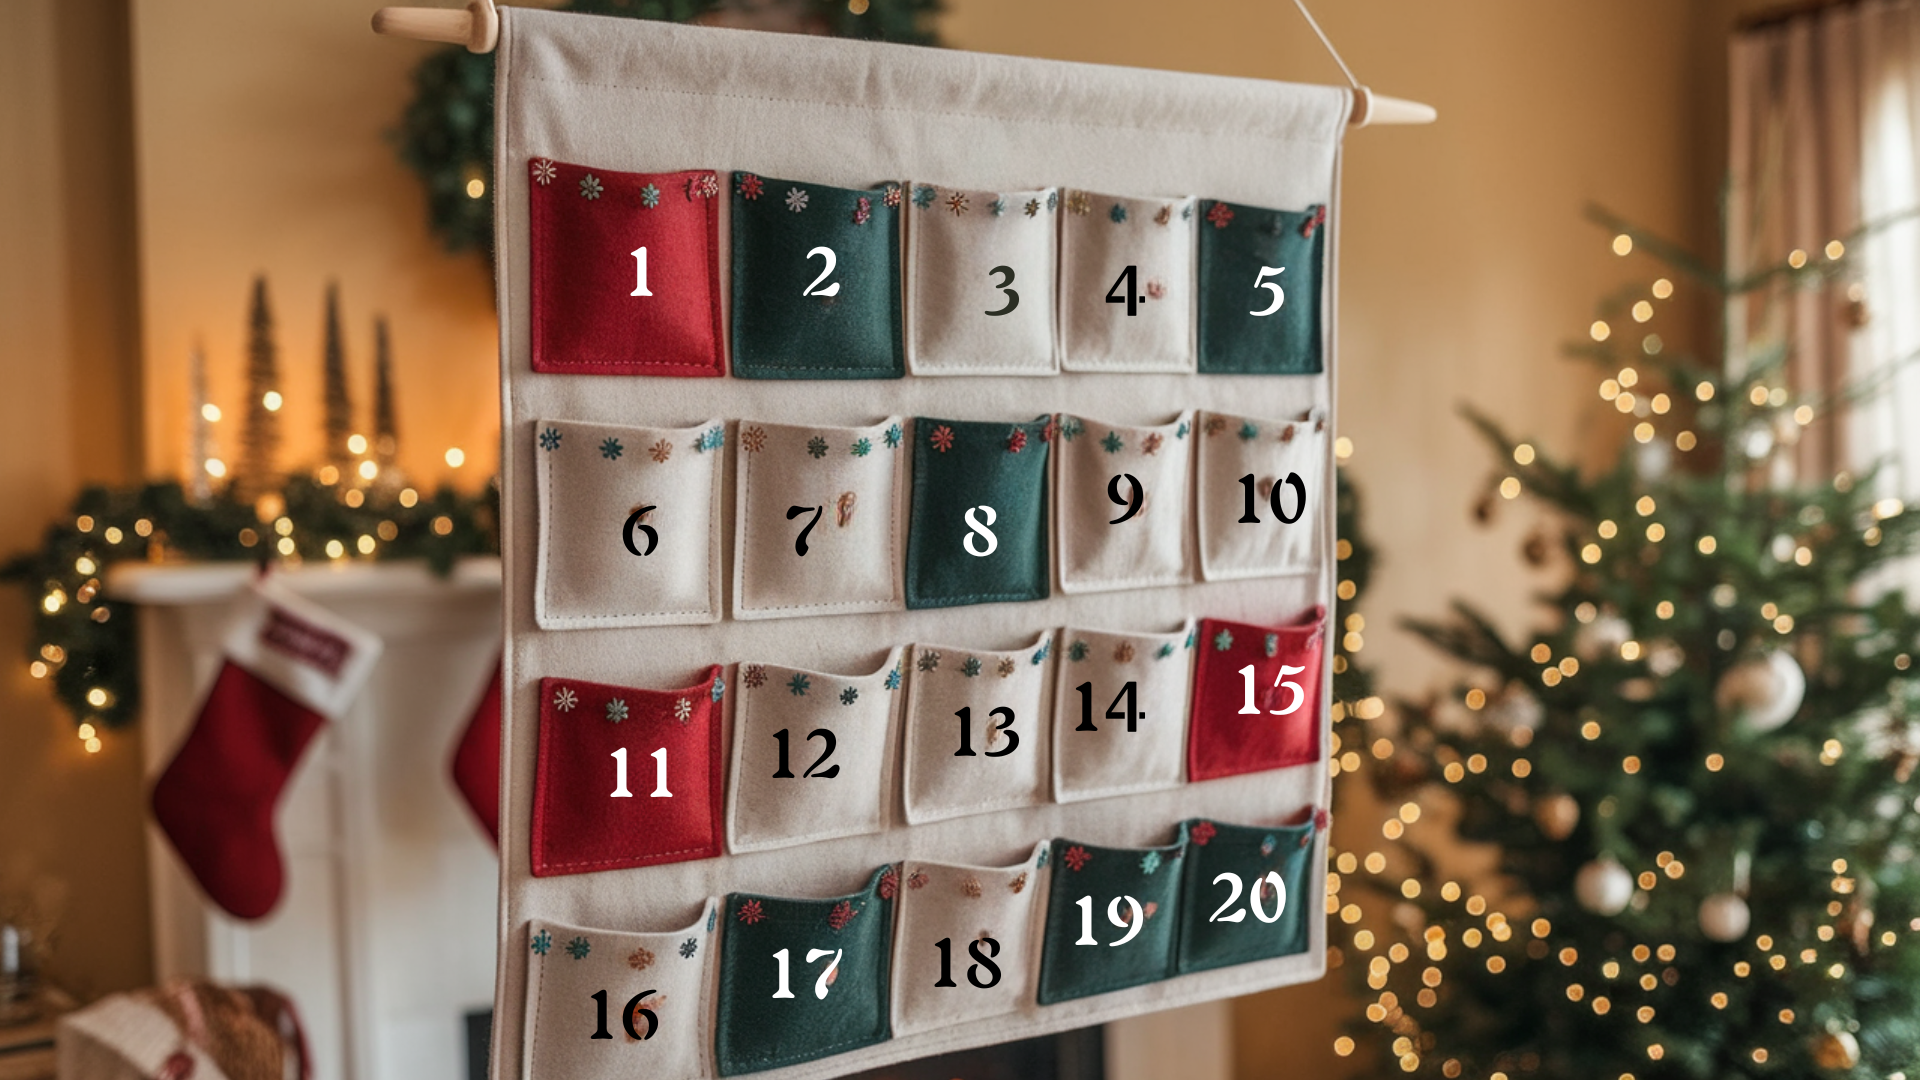
You can make a long-lasting, handmade calendar by creating 24 pockets from fabric or felt and attaching them to a sturdy fabric backing.
Each pocket can hold a tiny treat or note, making it a daily surprise that kids look forward to.
This project takes about 2–3 hours and uses simple supplies like fabric, felt, glue or sewing tools, and a wooden dowel for hanging.
It brings a warm, cozy feel to any wall and becomes a keepsake you can use year after year.
Steps:
- Cut and decorate pockets.
- Attach them to the backing fabric.
- Add numbers, fill pockets, and hang.
7. Magnetic Cookie Sheet Advent Calendar
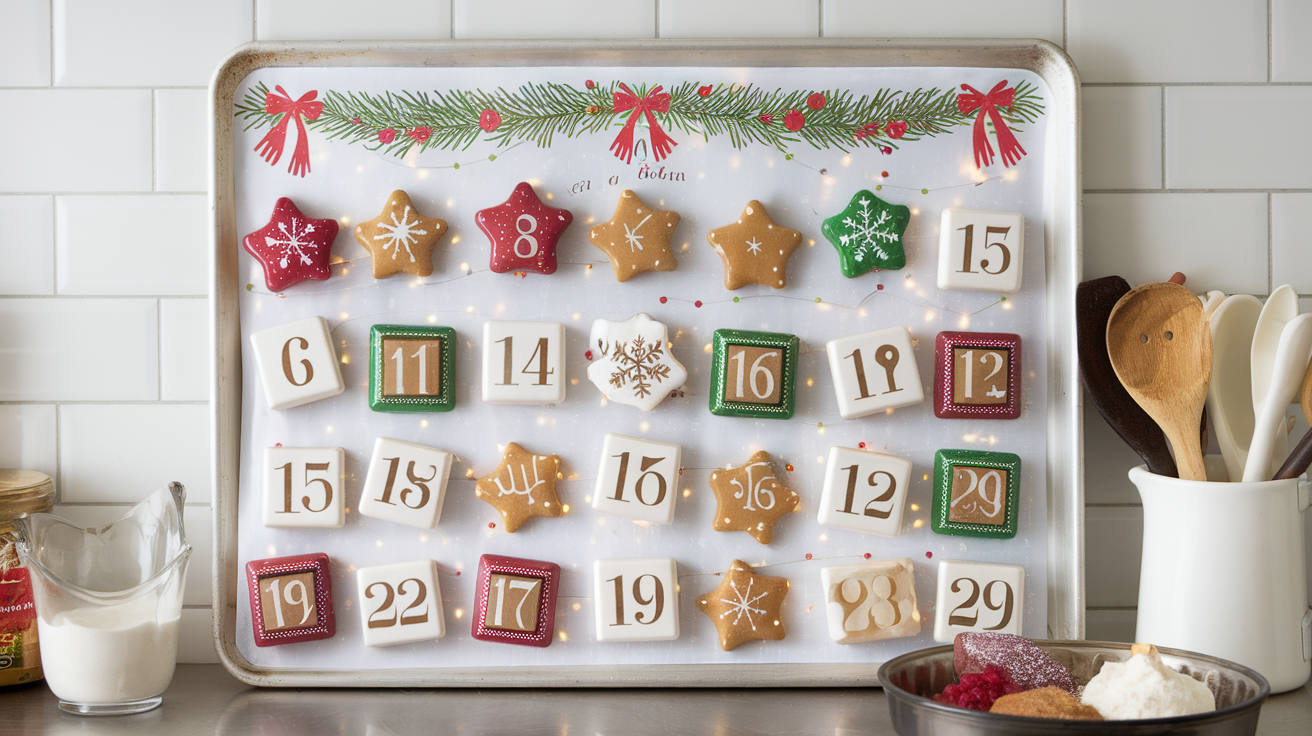
You can turn a simple baking sheet into a fun magnetic calendar by adding decorated magnetic boxes or shapes.
Each piece can hold a small treat or note, and kids enjoy moving the magnets around as they open them each day.
This project takes about an hour and uses easy supplies like a cookie sheet, magnets, paper, and glue.
It’s interactive, lightweight, and fits perfectly in the kitchen, making it a playful way to count down through the holiday season.
Steps:
- Decorate the cookie sheet background.
- Add magnets to boxes and number them.
- Fill in the boxes and attach them to the sheet.
8. Upcycled Toilet Roll Advent Calendar
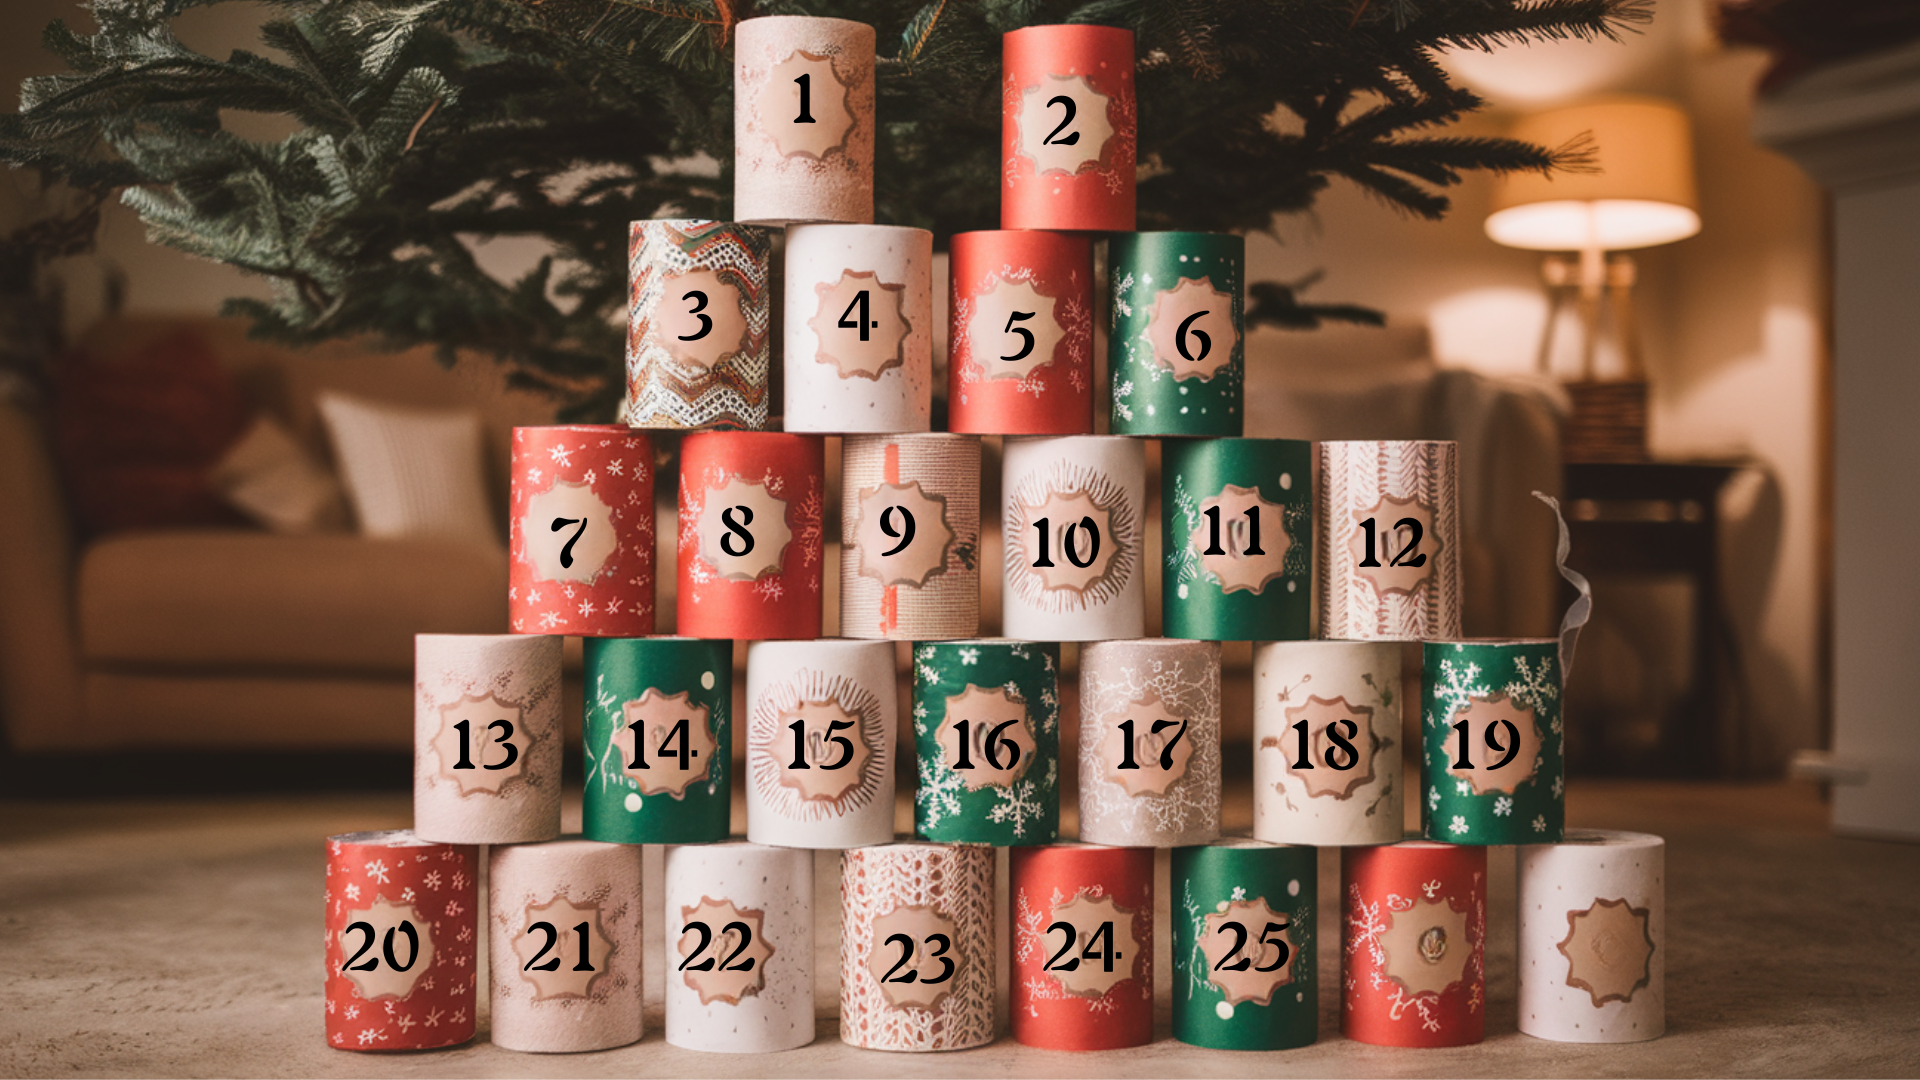
You can make a fun, eco-friendly calendar by saving 24 toilet rolls and wrapping each one in bright holiday paper.
The rolls can be arranged into a tree or pyramid, making the display look playful and full of color.
This project takes about 45–60 minutes and uses basic supplies like wrapping paper, glue, and markers.
It’s a budget-friendly craft that kids enjoy helping with, and the finished piece feels cheerful and handmade without needing any special tools.
Steps:
- Wrap and number each toilet roll.
- Fill rolls with treats.
- Glue rolls into a tree or a pyramid.
9. Gift Bag Staircase Advent Display
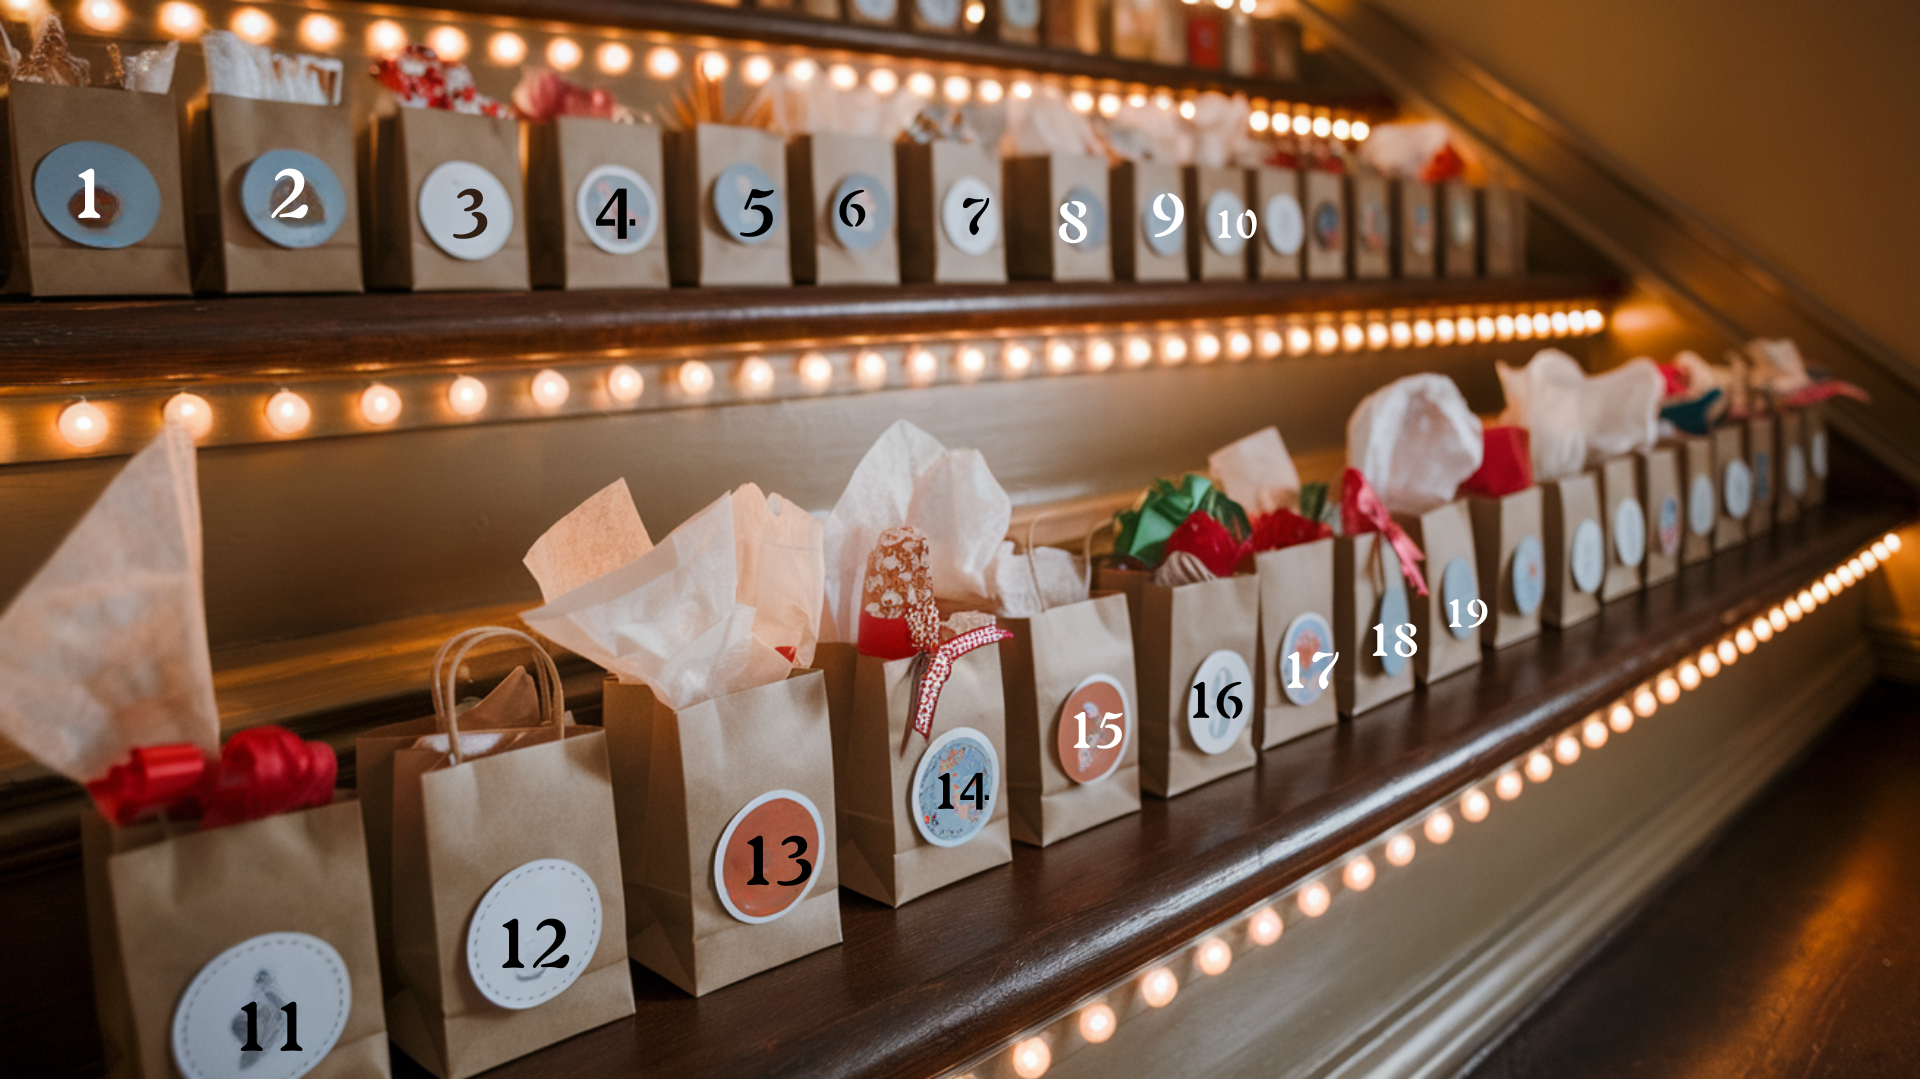
You can create a bright and festive display by lining up 24 mini gift bags along a staircase or shelf.
Each bag can hold small treats, notes, or toys, making it fun for kids to grab their surprise each day.
This project takes about 30–45 minutes and uses simple supplies like mini bags, ribbons, and stickers.
It adds a lively holiday look to any space and works well if you want something easy to set up that still feels cheerful and playful.
Steps:
- Decorate and number each gift bag.
- Add tissue paper and fill with goodies.
- Arrange along stairs or shelves.
10. Photo Memory Advent Calendar
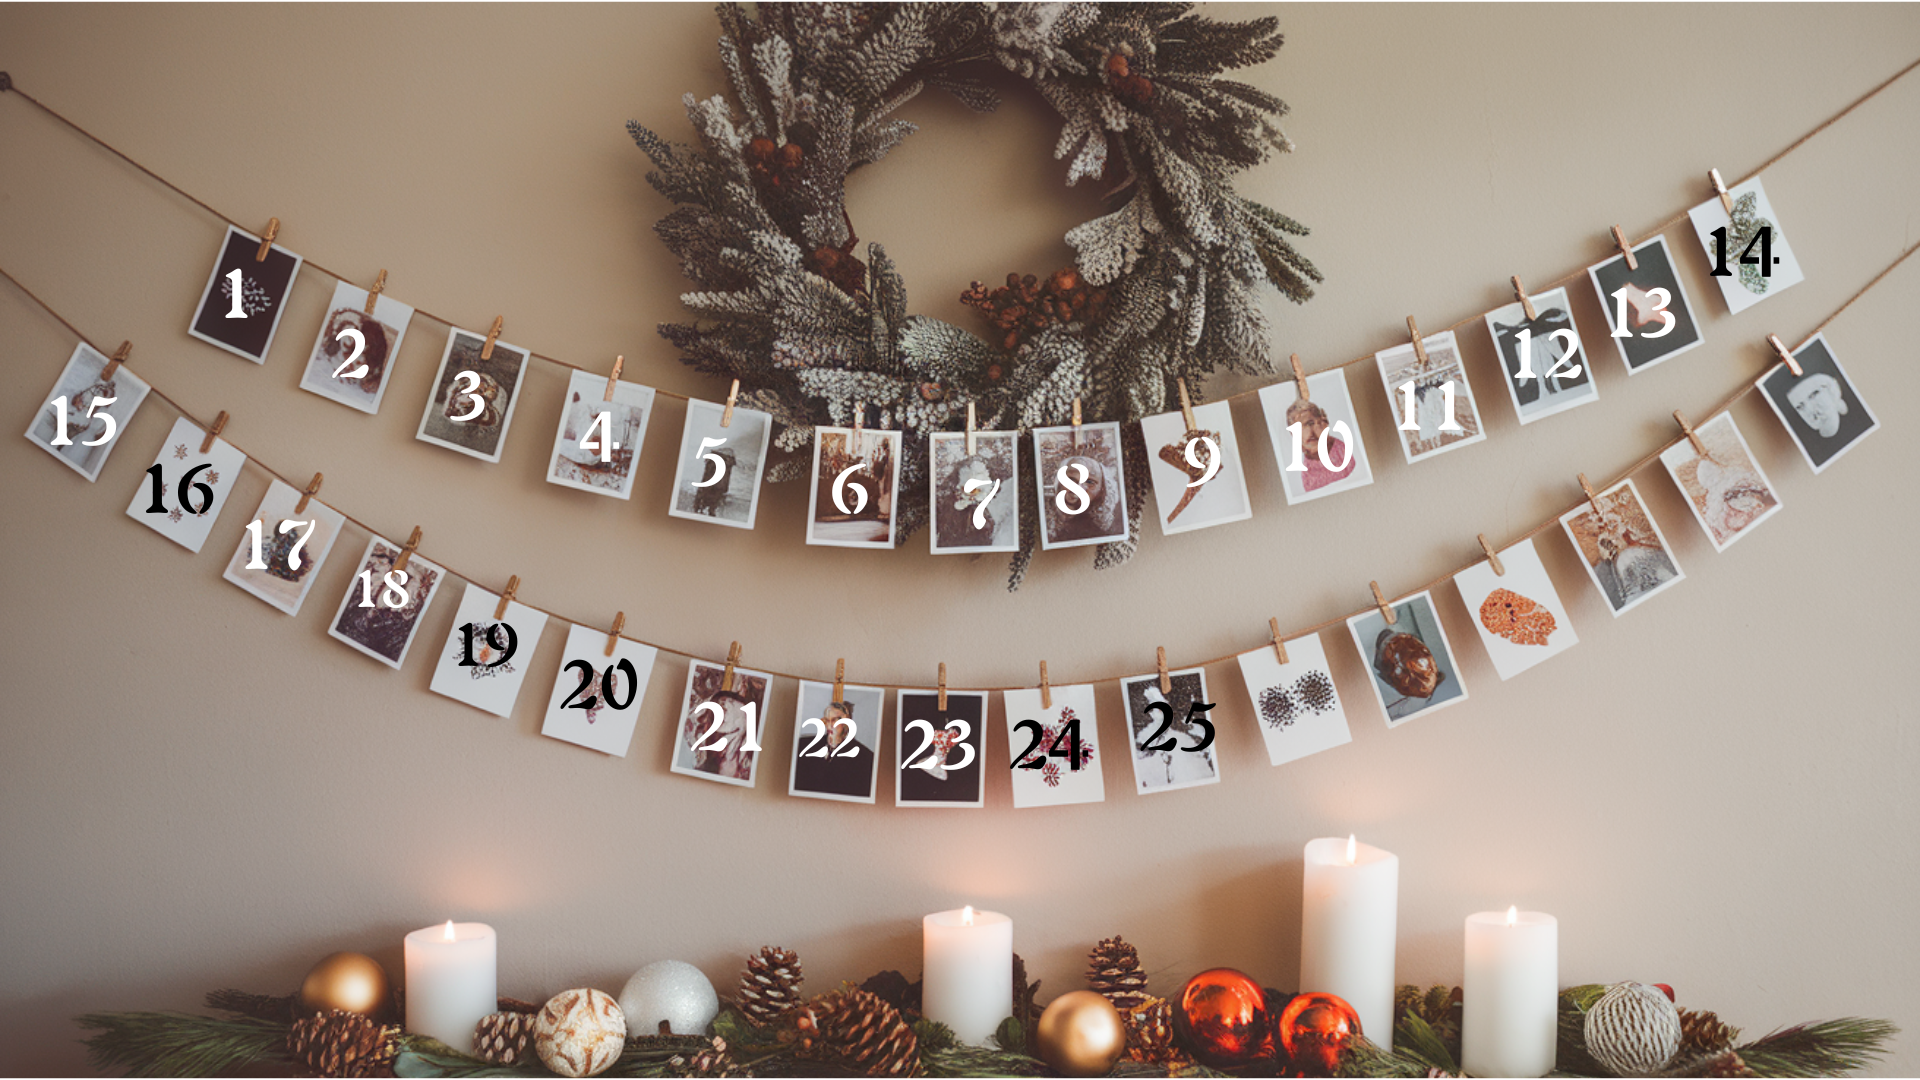
You can make a heartfelt countdown by clipping 24 special photos or memory cards onto a long piece of string.
Each day brings a new moment to look back on, which makes this idea meaningful for couples, families, or anyone you want to surprise with something personal.
It only takes about 30 minutes to put together and uses simple items like photos, string, and small clips. The finished display feels warm and personal and looks lovely on a wall, mantel, or doorway.
Steps:
- Print or gather 24 photos.
- Number and clip them to a string.
- Hang the garland on a wall or mantel.
11. Activity-Based Advent Calendar
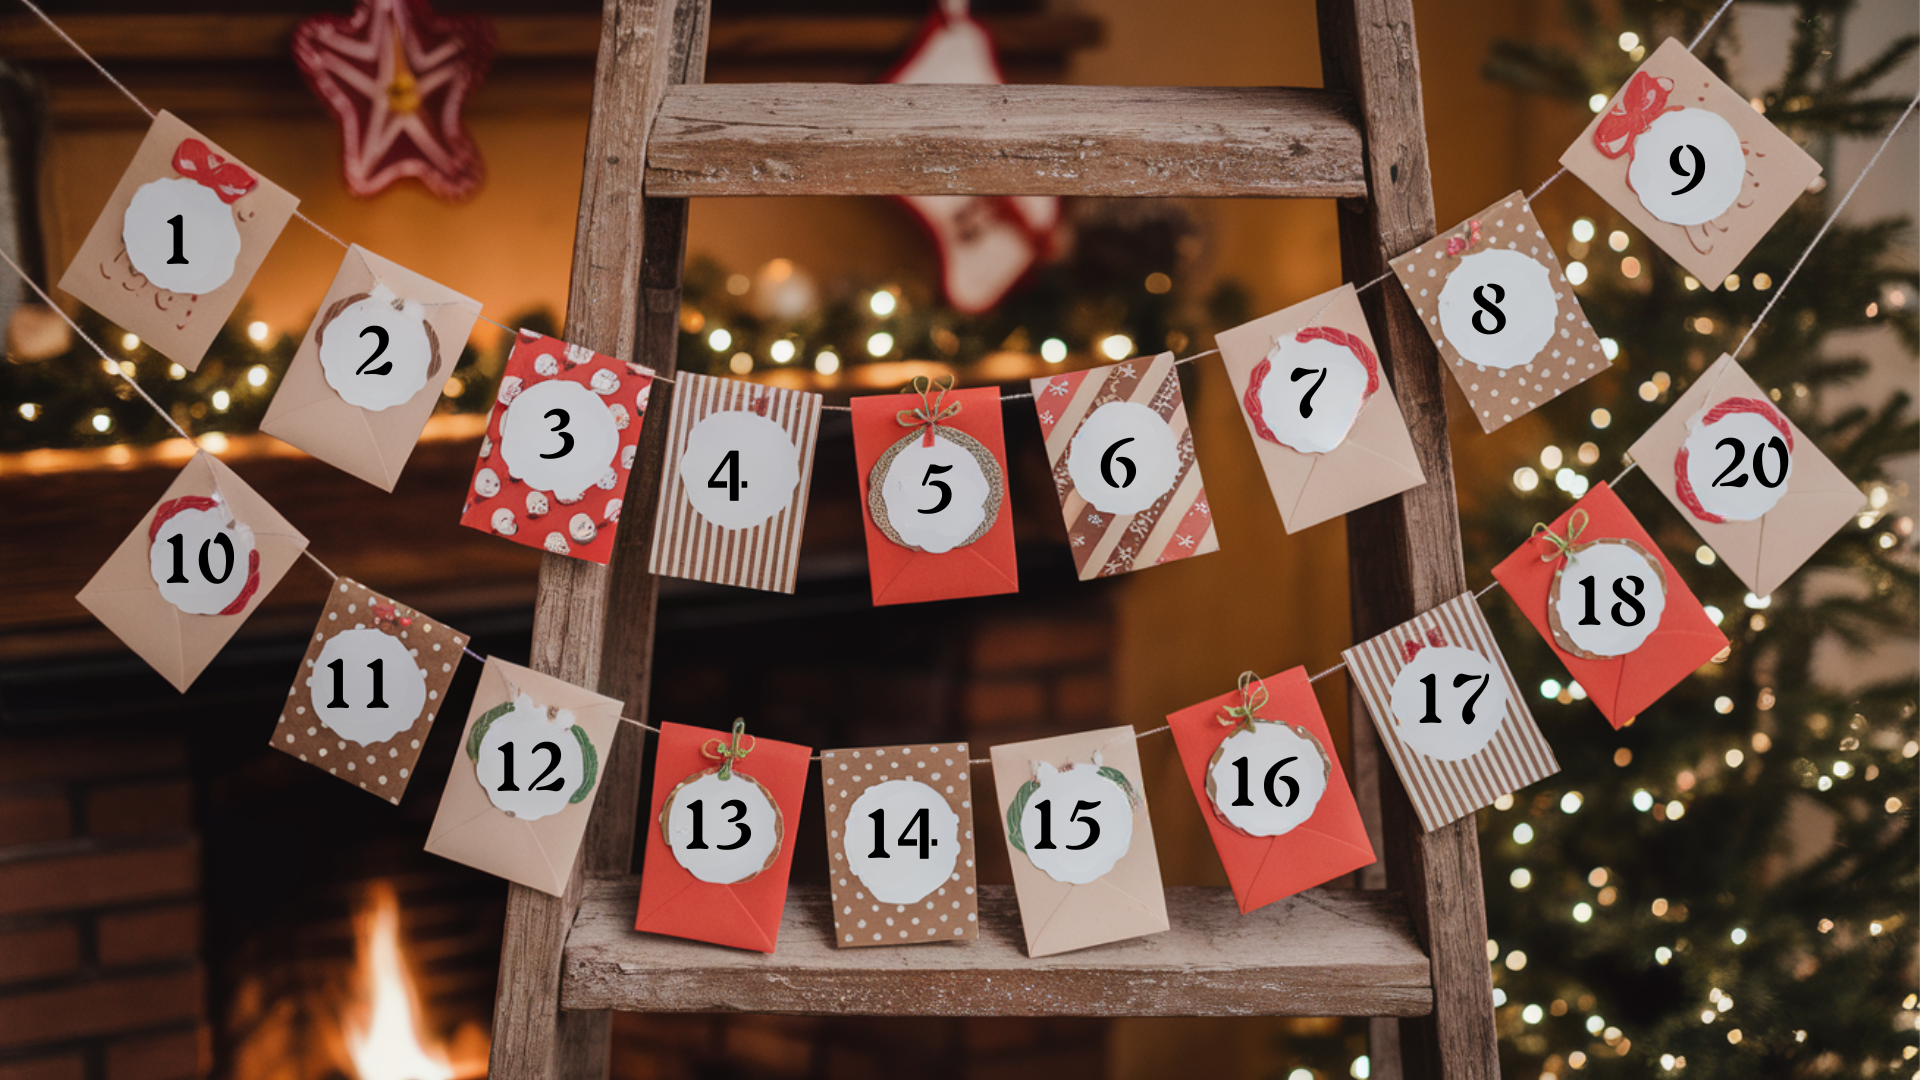
You can make a meaningful countdown by filling 24 envelopes with simple activities instead of treats.
Each envelope can hold ideas for games, crafts, baking, or small outings, so every day brings something fun to do together.
This project takes about 30–45 minutes and only needs paper, pens, and envelopes. It’s a nice way to slow down during December, and the daily activities create small moments that feel special.
Kids look forward to opening each envelope because they never know what fun plan is waiting inside.
Steps:
- Write 24 holiday activities.
- Place each in an envelope and number them.
- Display envelopes in a box or garland.
12. Puzzle Piece Advent Countdown
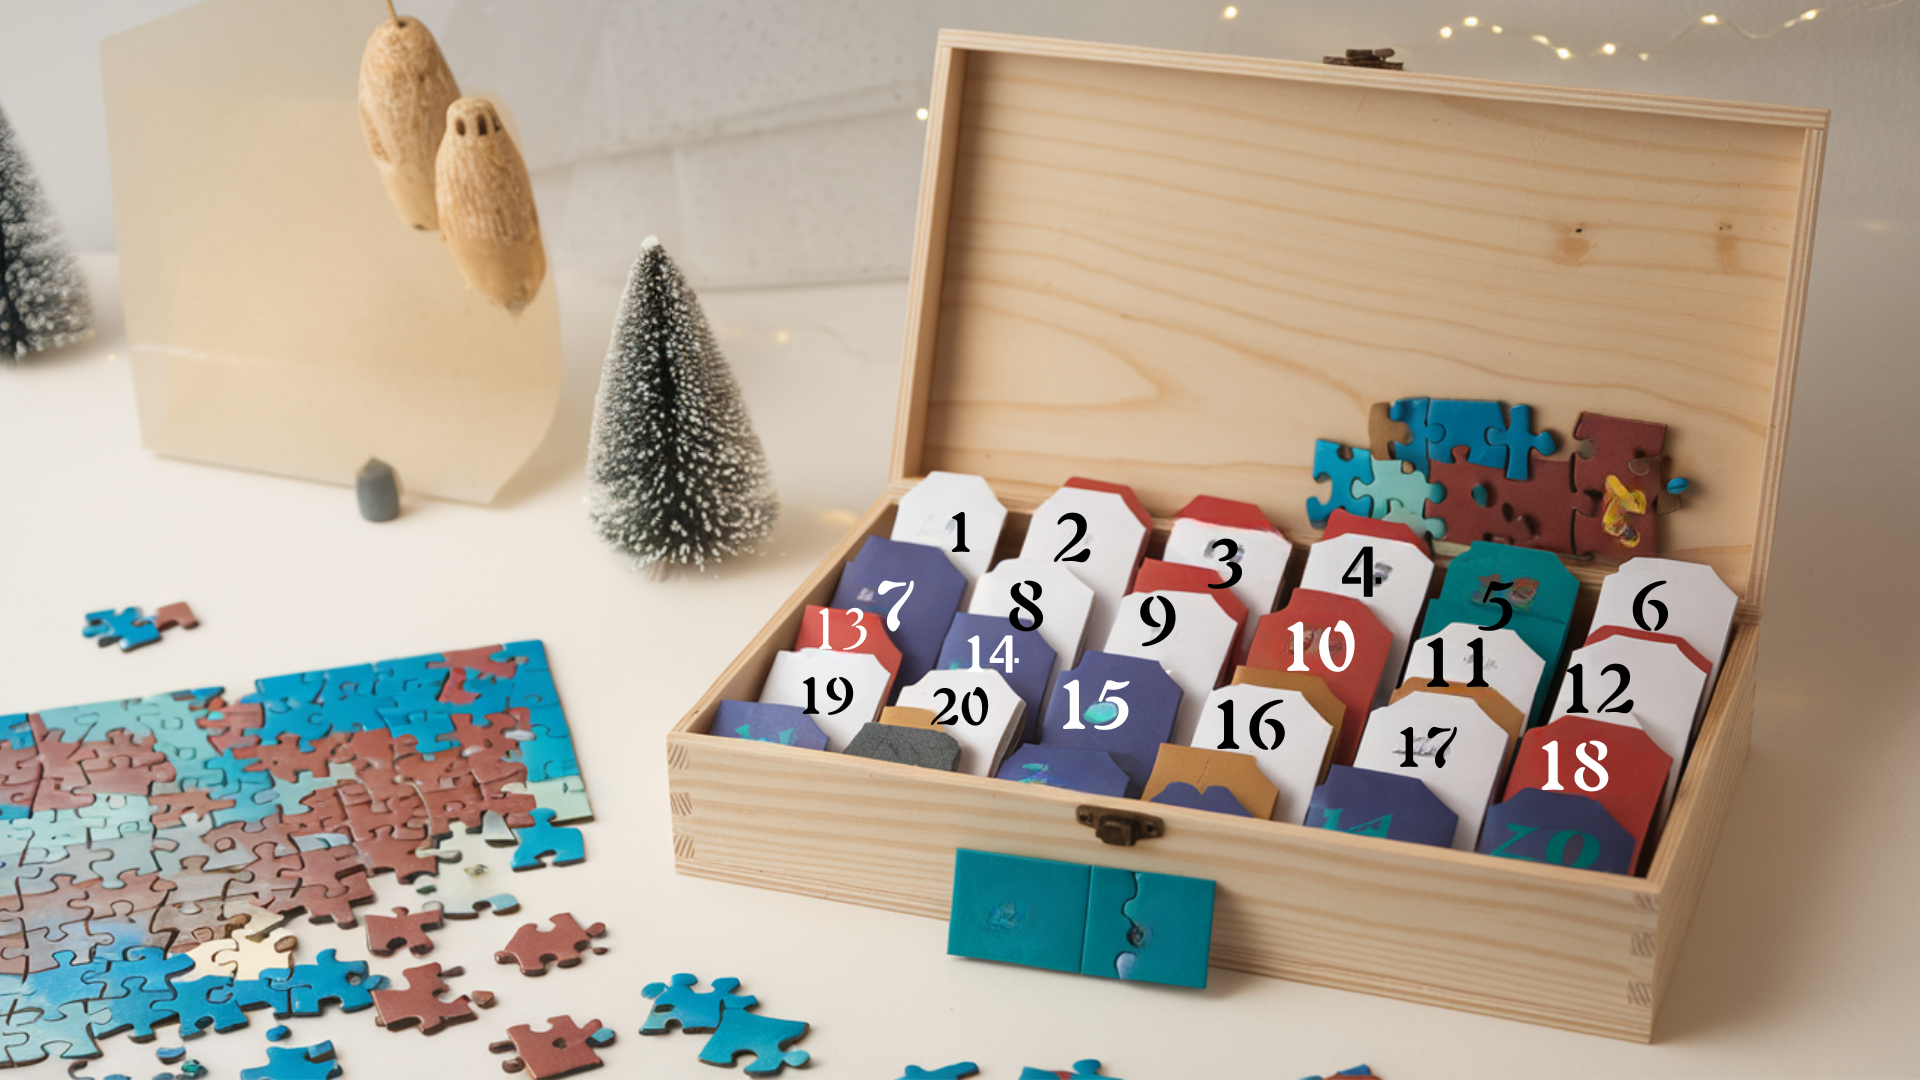
You can create a simple and surprising countdown by dividing a festive puzzle into 24 small groups and placing each set into a numbered envelope.
Kids open one envelope a day and slowly build the picture as the month goes on, which keeps the excitement steady.
This idea takes about 20 minutes to set up and only needs a puzzle, envelopes, and labels. It’s an easy way to add a quiet daily activity that feels relaxing and fun, especially for kids who enjoy hands-on projects.
Steps:
- Divide puzzle pieces into 24 groups.
- Place pieces in numbered envelopes.
- Display envelopes in a box or string.
13. DIY Tea Bag Advent Calendar
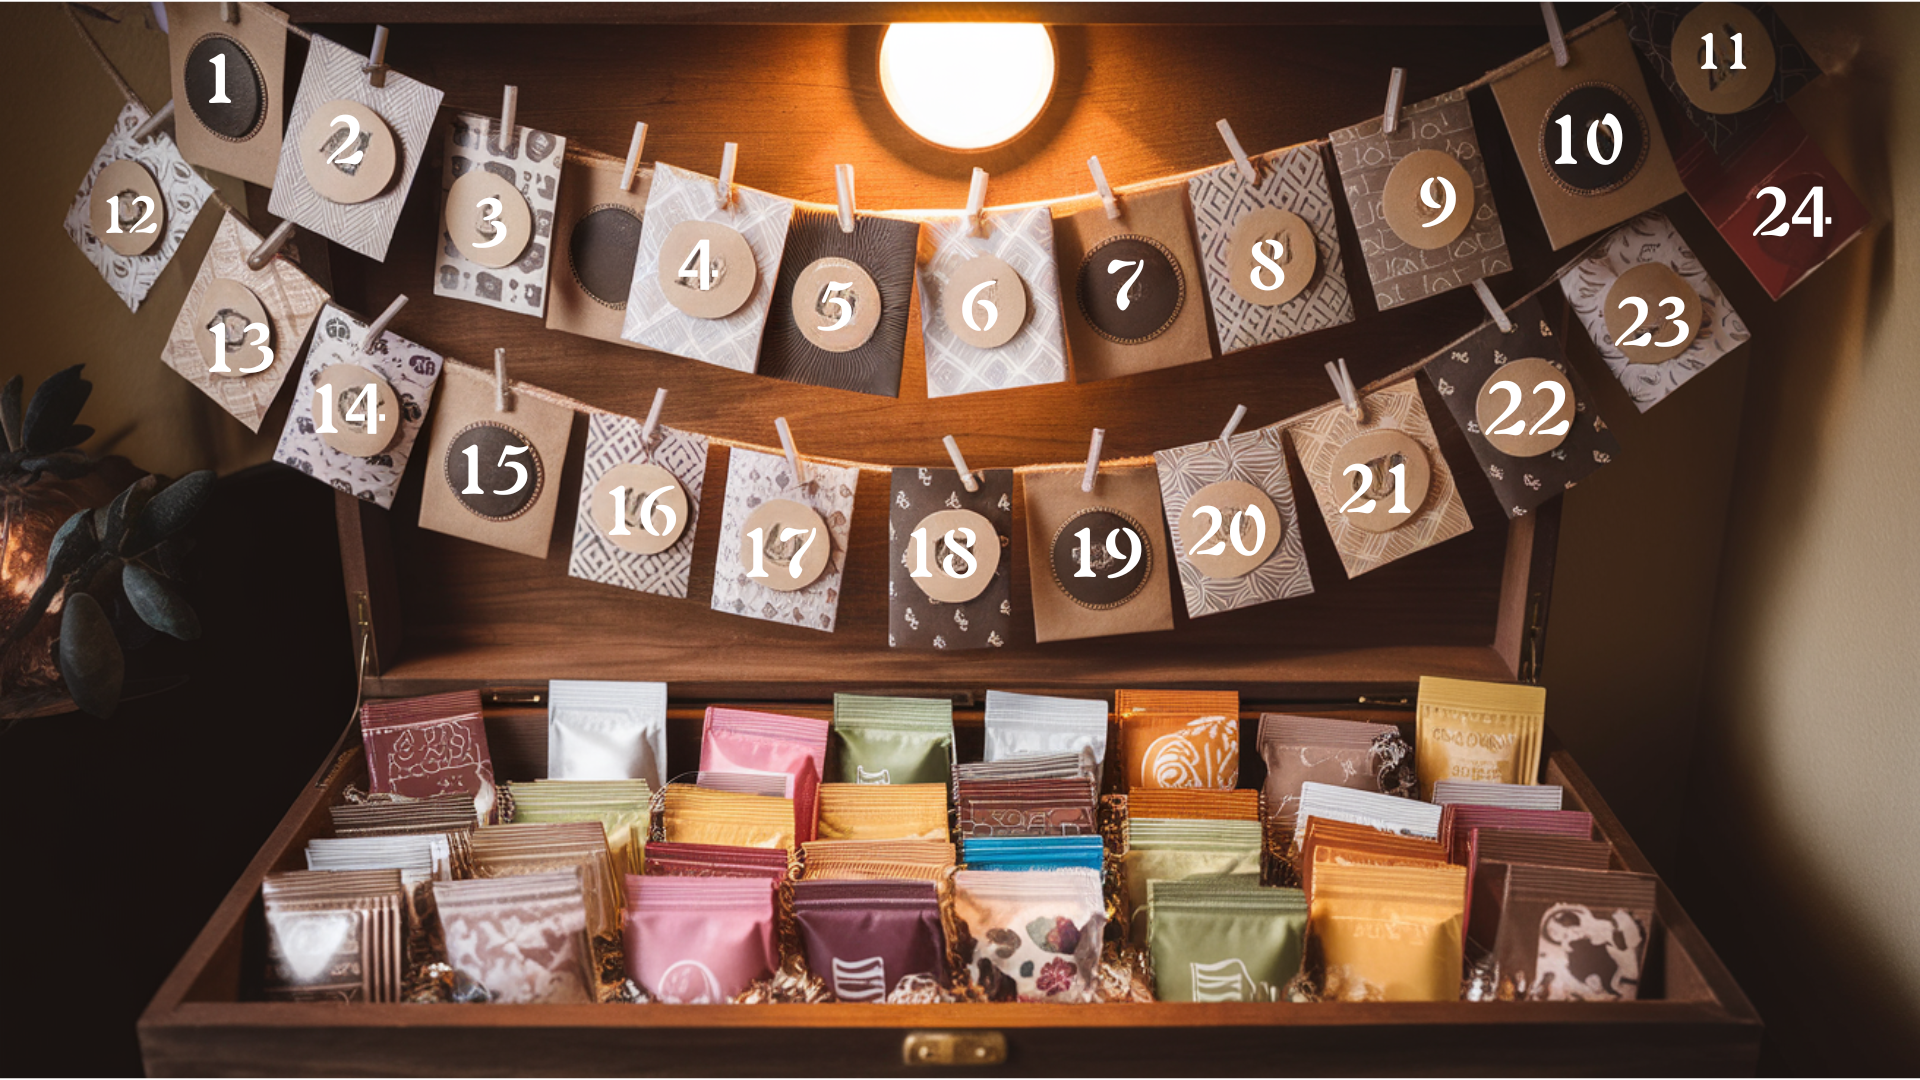
You can make a warm and thoughtful countdown by choosing 24 tea bags and packaging each one in a decorated envelope or fabric pocket.
It’s a simple idea that tea lovers enjoy because every day brings a new flavor to try.
This project takes about 20–30 minutes and uses easy supplies like tea bags, envelopes, and labels.
It works well as a handmade gift or a cozy treat for yourself, and the finished set looks cute displayed in a box or hung like a small garland.
Steps:
- Choose 24 tea varieties.
- Place each tea bag in a numbered envelope.
- Hang or arrange envelopes in a box.
14. Mini Stocking Garland Advent Calendar
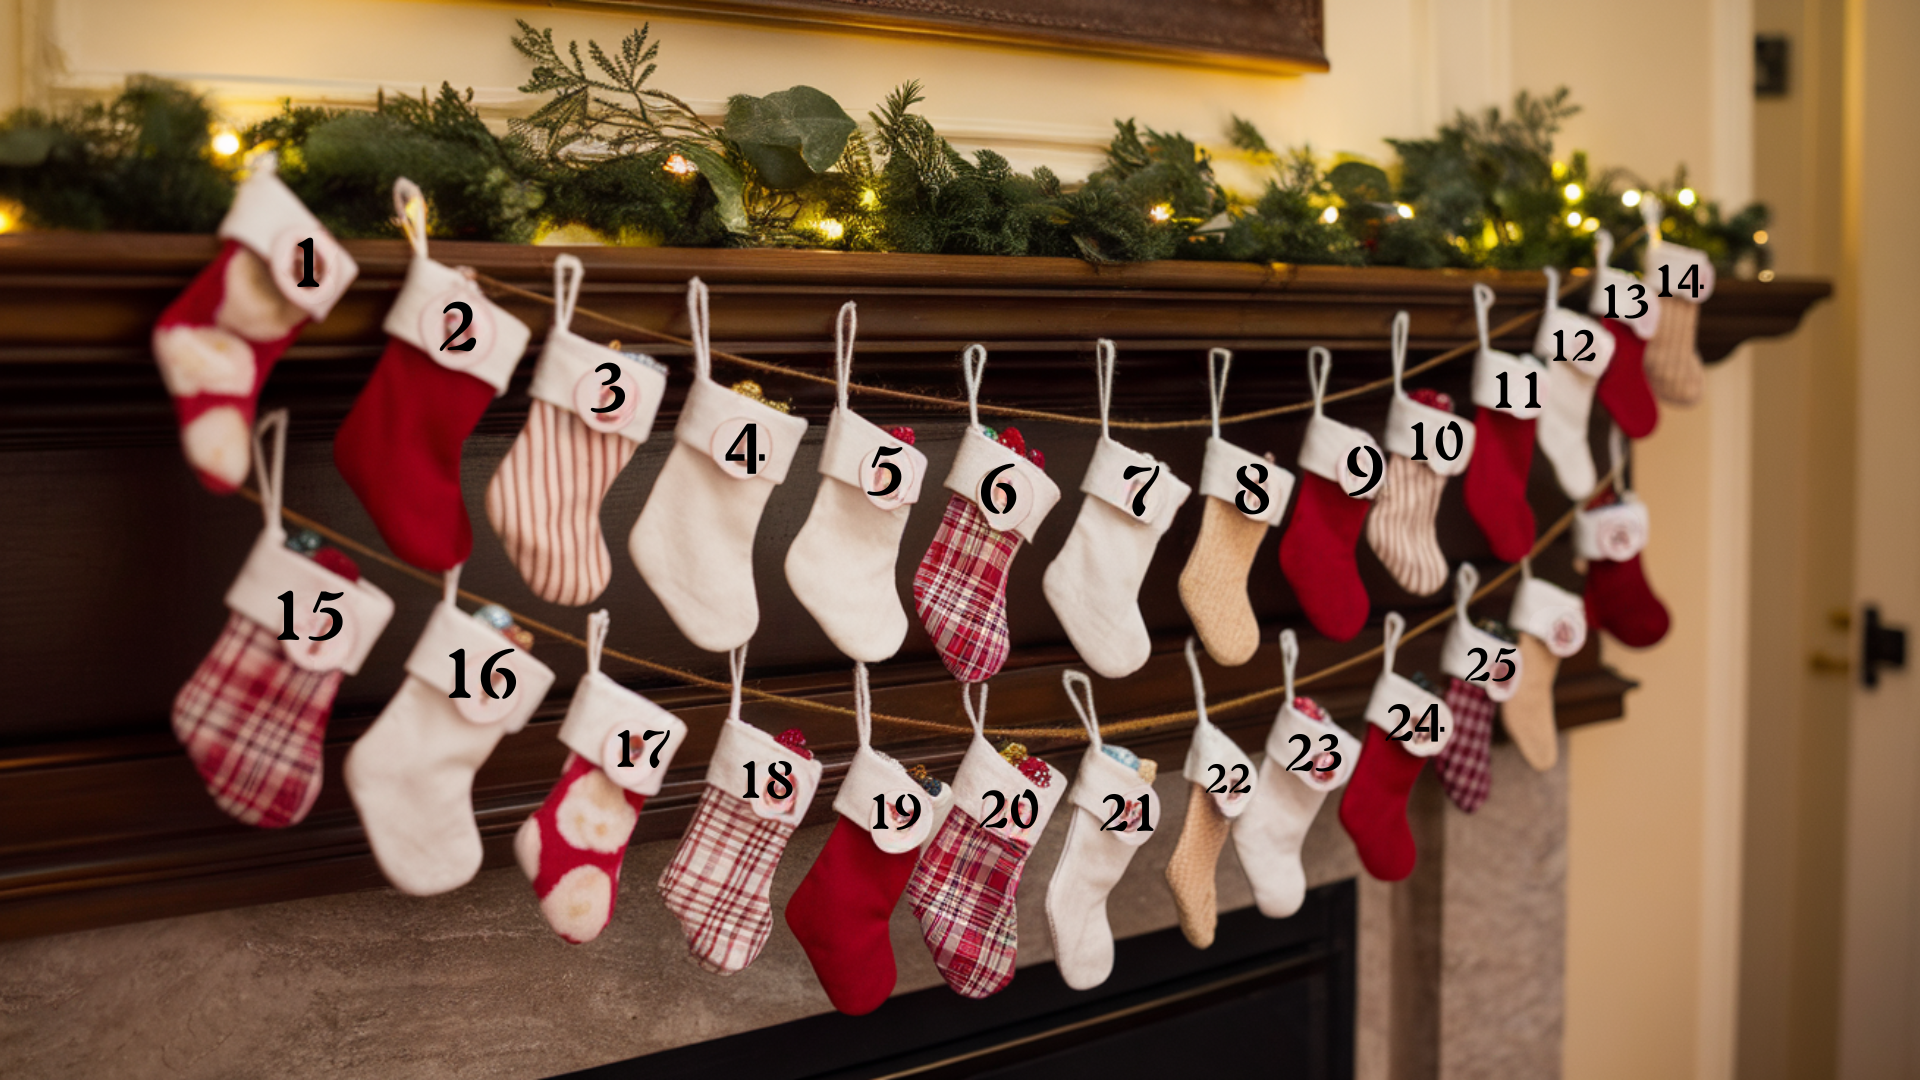
You can make a bright and festive countdown by hanging 24 mini stockings along a long piece of twine.
Each stocking can hold small treats, toys, or notes, so kids get a new surprise every day. This project takes about 45–60 minutes and uses simple supplies like mini stockings, twine, and number tags.
The garland looks cheerful on a mantel or wall, and the stockings can be reused year after year. It’s a fun option for families who want something playful and easy to set up.
Steps:
- Attach number tags to each stocking.
- Fill stockings with treats.
- Hang along a wall or mantel.
15. Lego Build-Your-Own Advent Calendar
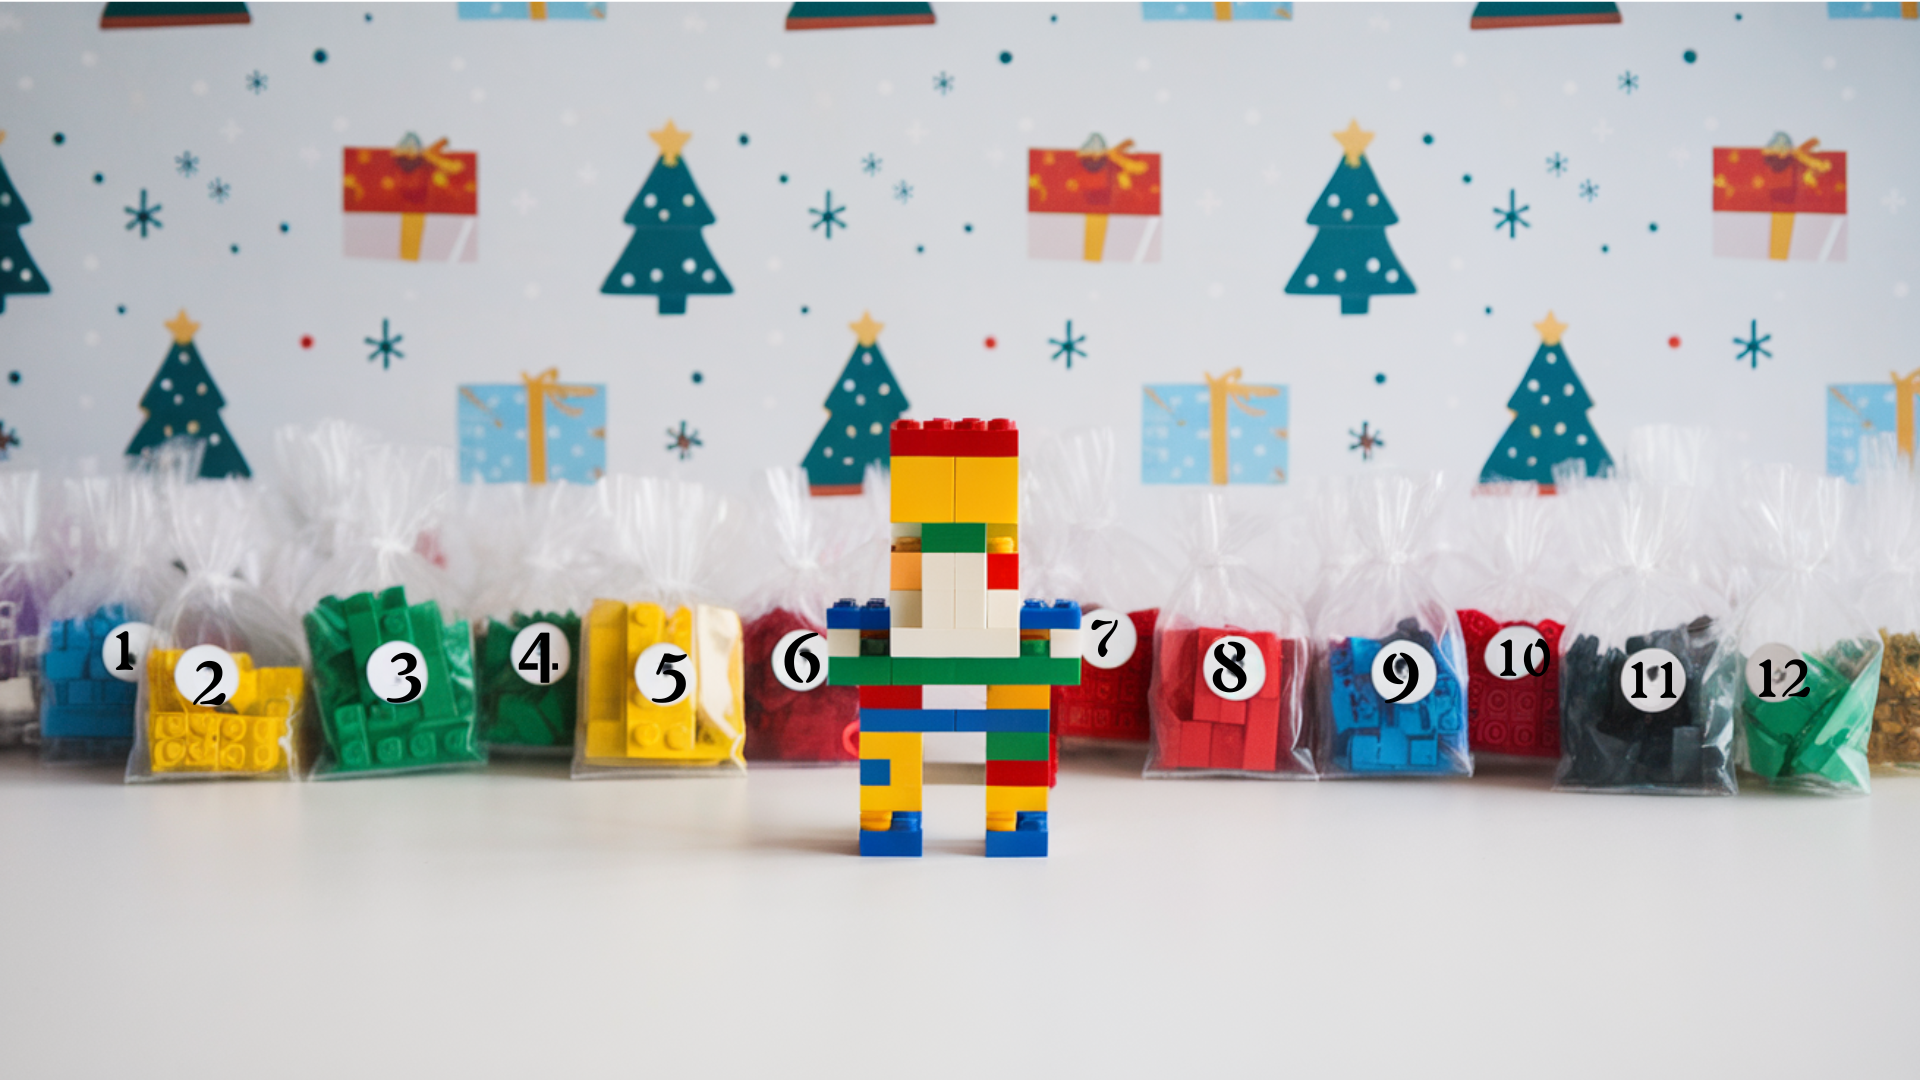
You can make an exciting countdown by breaking a Lego set into 24 small builds and placing each group of pieces into its own numbered bag.
Kids enjoy opening a new bag each day because they get to build something right away, and the full set slowly comes together as December goes on.
This project takes about 30–40 minutes and uses just Lego pieces, small bags, and labels.
It’s a fun, hands-on idea that works well for both kids and Lego fans who like a daily creative moment.
Steps:
- Separate Lego pieces into 24 groups.
- Package each group in a numbered bag.
- Arrange bags in a box or hanging display.
Common Mistakes to Avoid when Crafting
When making DIY advent calendars, a few small oversights can lead to frustration later.
One common mistake is choosing materials that aren’t sturdy enough, causing pockets or boxes to tear before Christmas arrives.
Another is underestimating the amount of time needed—detailed designs often take longer than expected.
Avoid filling containers with items that are too heavy or bulky, as they may not stay in place.
Finally, always double-check your numbering to ensure the countdown flows correctly.
Taking these simple precautions guarantees a smoother crafting experience and a beautiful final result.
Conclusion
Creating your own advent calendar brings warmth, creativity, and joy to the holiday season.
Each idea offers a chance to add something personal, whether you prefer handmade details, fun activities, or small surprises that make each day feel special.
I like how these projects let you shape the countdown in a way that fits your style, budget, and traditions.
They also make meaningful gifts, turning simple materials into something thoughtful and memorable.
As you gather supplies and pick your favorite designs, remember that the goal is to enjoy the process and the small moments it creates.
Start with one idea, keep it simple, and have fun crafting a Christmas countdown that brings excitement and happiness all month long.